

![]() Hey y’all! So, I know that some of you don’t like to read introductions, so let’s just make this short and sweet: I’m gonna teach you how to make some pretty dope models!
Hey y’all! So, I know that some of you don’t like to read introductions, so let’s just make this short and sweet: I’m gonna teach you how to make some pretty dope models!
Modeling Life Hacks
PMXEditor Quickly Edits MMD Model using Downloaded Parts!
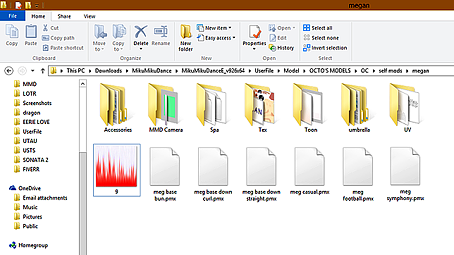
Textures
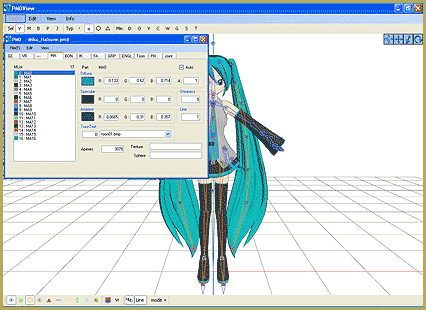
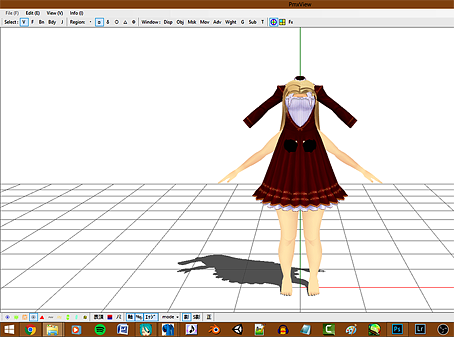
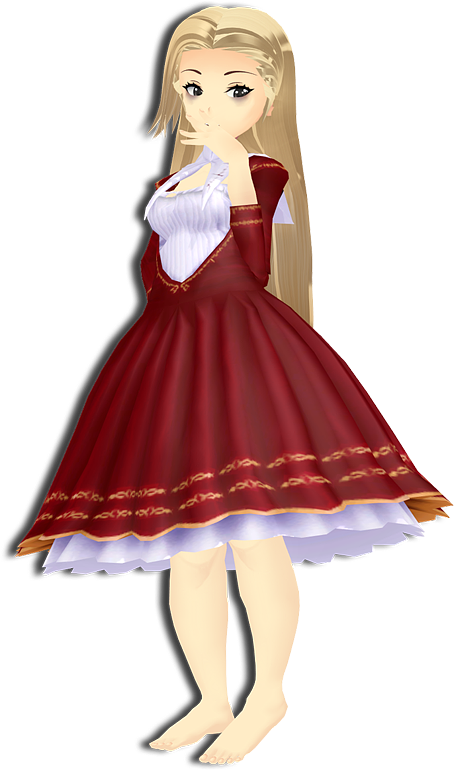
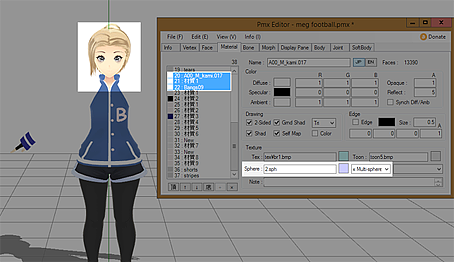
Now, here’s a question: what’s a texture? Basically a texture (sometimes referred to as a UV map) is a picture placed on a mesh (a bunch of vertices that make a shape) to give it life and color. Now, a lot of people (including myself) make their own textures. Take my self model for example, where I’ll point a few things out:

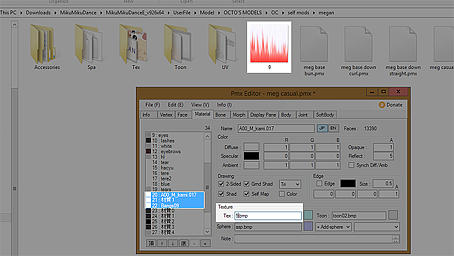
See how my letterman jacket is blue, but it still has a B on it? This is as well as the eye texture that she has, and this includes her skin texture. So, I have blonde hair. BUT what if I wanted people to think that I had funky hair? The first thing that I would do is load up the model in PMXEditor.

Well first thing’s first; go find a hair texture! There’s SO MANY on deviantART that I can’t even begin to describe how amazing it is.

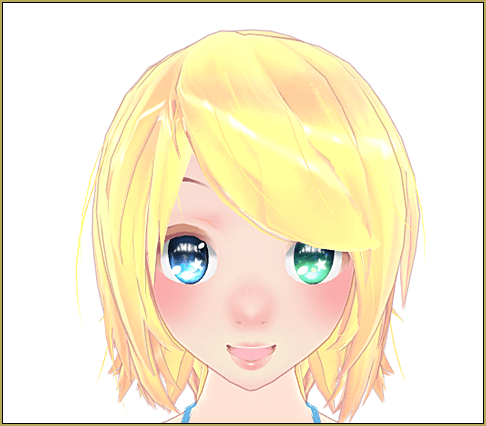
I’m going to use the red Frost texture that’s in the preview image above. You want to drag the texture into the folder with the model inside of it, and we won’t worry about subfolders at the moment.
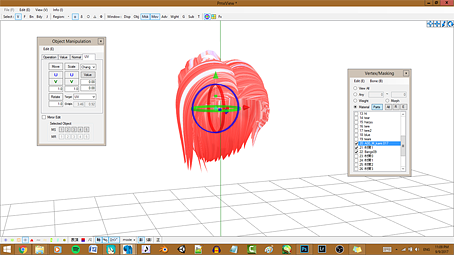
So now you want to find the mesh for the hair. Go to the Material tab in the little box and then in the big box where you see the model, find the Msk tab.
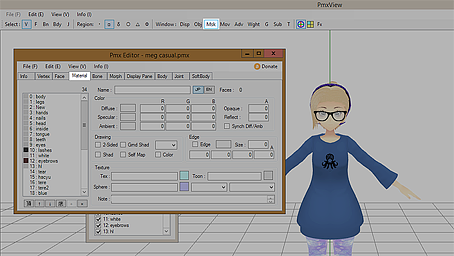
Now, in the Msk box, you want to find the tab that makes the hair disappear from the model. That means that you have selected the mesh for the hair.
Find the mesh in the Material tab.
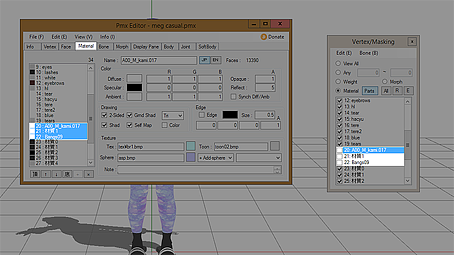
Notice where it has the texture in the bottom right corner? I’m going to change that to the exact file name.
Now I’ve got some crazy hair…
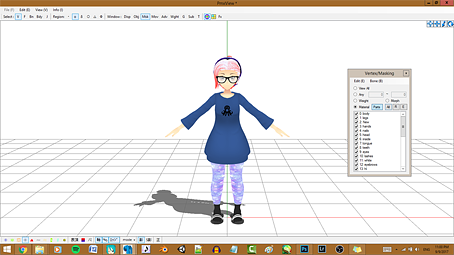
…but it doesn’t look right. It’s all stringy! Well, there’s one thing that you can do without getting too complex and don’t worry, it’s easy!
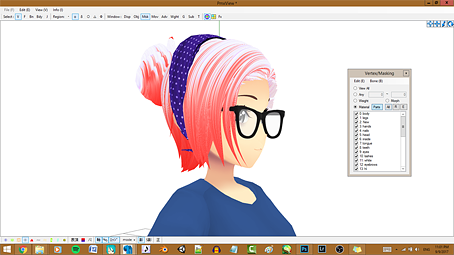
Select the mesh and open the Mov tab.
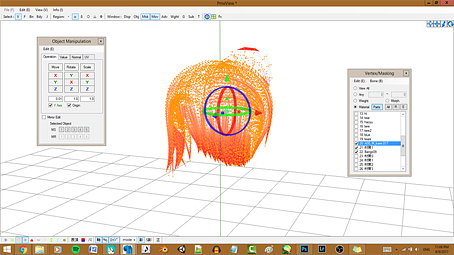
Then click on the UV tab inside of the Mov window and just drag the Scale option!
Resizing in PMX Editor
Now, let’s be honest; I made my self model as close to myself in real life, whereas I’m short and chunky. This was harder for me to model since I had to do a TON of resizing.

One of my pet peeves, though, is going on a part that’s on deviantART and someone asking “does this fit TDA?” It’s extremely easy to resize if you know what you’re doing. I’m working on making a hobbit self model, so I’m going to load up the base that I’ve made for her.

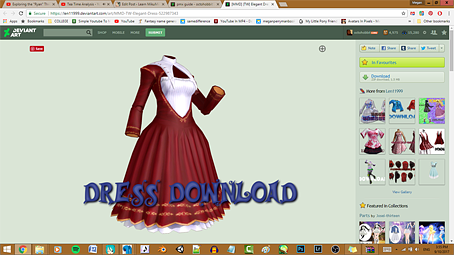
Now what I’m going to do is find a hobbit-like dress.
Download it and open the file with WINRAR, or open it by extracting it.
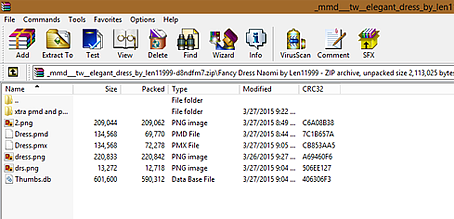
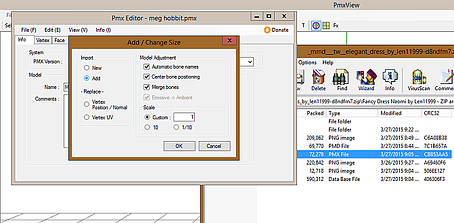
Drag the .pmx or .pmd file into the PMXEditor window. When the selection window opens, click Add (the bottom selection).
Now drag the textures into the folder so that the part isn’t completely white.
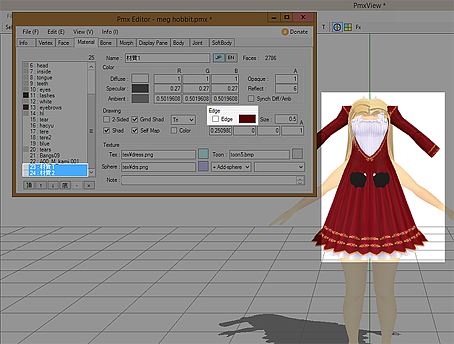
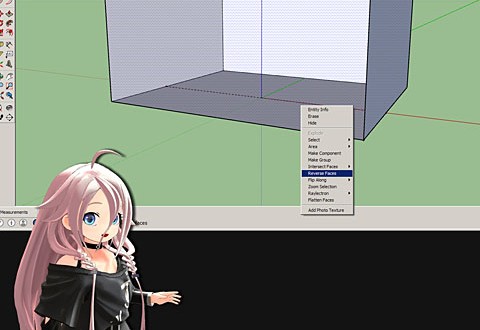
So I want to turn the edgeline off. Just select the mesh of the dress in the Material tab and uncheck that little box!
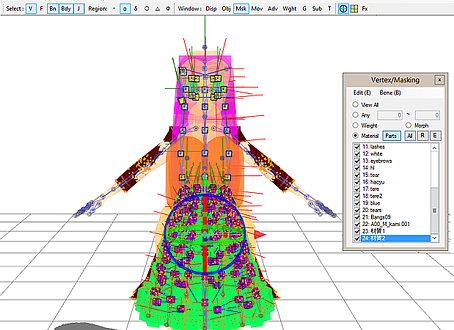
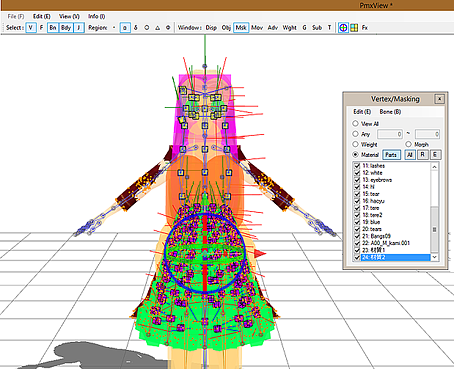
Now you need to select all of the bones, joints, physics and the mesh of the dress.
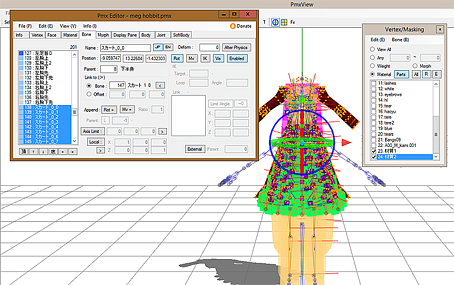
![]()
Now what I want to do is line the neck up where it should be with the arrows.
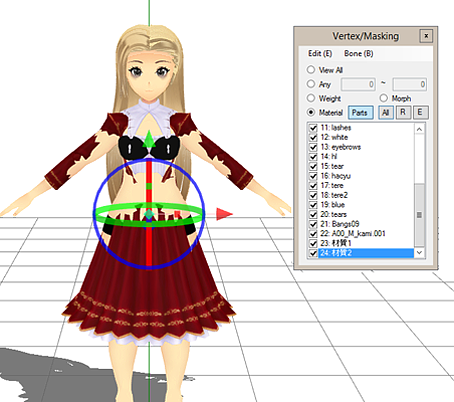
Now what you want is to deselect the parts that are perfectly lined up by holding down ctrl and dragging your selection over the part you don’t want to move anymore.
Since this is done, we can move the arms into place! If they need to be resized, use the Mov tab to scale them. In my case, I just need to move them, so I will make the arm as straight as I can.

Now do the same thing you did with the arms to her sides.
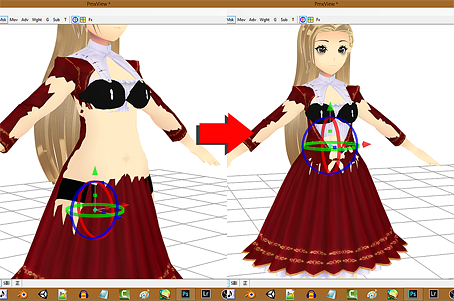
Load her into MMD and see if everything is working properly.
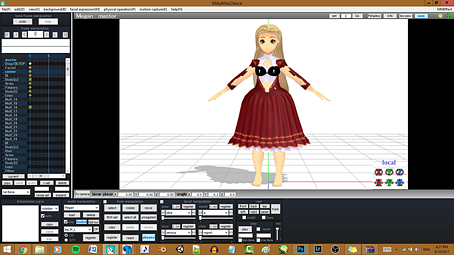
WHOA. Okay, so her physics are jiggly af. What now? Well, go to her Body tab and select all of the skirt physics. See those little check boxes? Select every single one of them.
Well, they aren’t jiggly anymore, but they’re going through her legs.

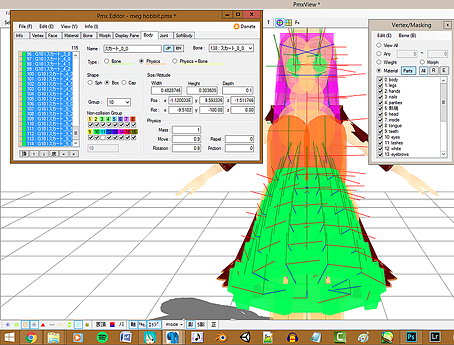
Go into PMX editor and find a physic color that you don’t have. I don’t have purple, so I’ll be making a 7 physic. You need to uncheck the 7 box and make a new physic.
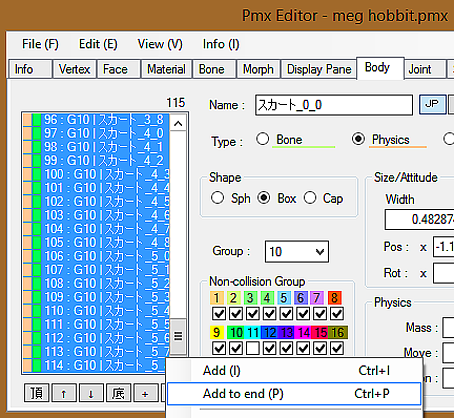
Change that new physic’s group into a 7 and check the 7 box.
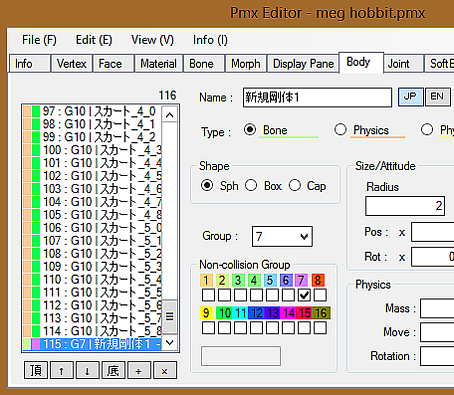
Take the sphere you made, change it to where you want the diameter of the skirt, and add it to the hip bone.
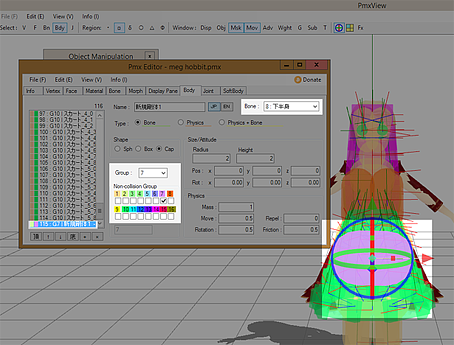
Now load it into MMD and change the diameter to what you need it to be!
The only thing left to do is delete the skin around the part and you’re finished!
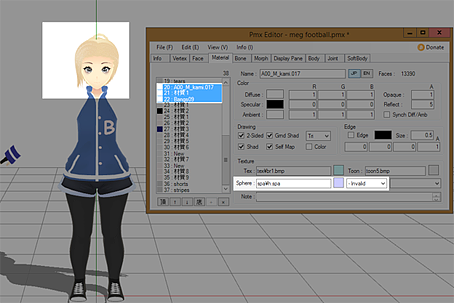
Spheres & Toons
If you know how to use toons and spheres, your life will be SO much better. First off, you want to change your toons (ALL of them) from toon1.bmp – toon12.bmp. Only choose one, because this will make the model look better when working with spheres.
A sphere is basically an overlay on a model. This can make them look glossy, shiny, mirrors, you name it and there’s probably a sphere for it. I want to put spheres on everything, so look up SPA/SPH files on deviantART to find what you’re looking for.
Drag the SPA/SPH into the same folder as the model and textures, then edit the SPA/SPH just like you did with the textures.
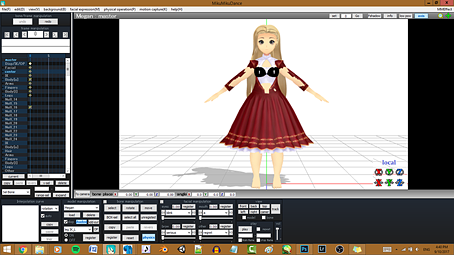
Have fun with PMXE and MikuMikuDance!
– SEE BELOW for MORE MMD TUTORIALS…
— — —
– _ — –
![]()


I wanted this so bad its amazing PLS tell me if you can download it
Sure, I can.
…Okay, you can too.
…Hint: Downloads page.
How can I put a face on a body base and make facial expressions still work? (Sorry for my bad english… I am brazilian ;-;)
Just do File->Import, all facials are supposed to be added.
I would like to ask of some help. I currently tried to use pmx, and even pmd editor to make a self model with parts. I would load up the base, and it worked well, and then I tried adding in the face, and it would turn white. I’m sure I had the textures and everything in it place, but I’m not sure that’s the problem. When I added the face (and I put add, not new) it would be white, but there wouldn’t be any information in the window for all the joints and materials and whatnot. It would still show the info for the body. And I tried loading in the face first, and then the body came out white! I had all the face information, and no body. I even tried to load the textured for both instances, they never showed up. Is it my laptop? It is super old but I thought that it would at least be able to make a model.
No, it’s not your laptop; yes, it is a texture issue.
When you import parts, you’re importing them into a model that’s in a new directory. Copy textures over and place them in subfolders appropriately. Save model, quit and restart PMXE to verify. (Whenever something seems weird, first thing to do is to backup, save, quit PMXE, restart PMXE.)
An imported face is unlikely to have any joints. Materials from imported models will be added at the very end of the list of materials. Since you imported the face onto the body, you still have all of the materials from your body, you just added the materials from the face onto them.
Keep playing with it. It can be frustrating at first but you’ll get the hang of it.
Thank you! I just want to be sure I understand. I have to copy all of my textures into pmx? How? I already have all of my textures and body parts in it’s own folder, then separated by part or base. Is that enough? Or is it wrong that way? Additionally, I’ve attempted to save both my face and my body and trying different things like adding in my body again or my face first. The same thing happens and I tried the whole “add the toon and spheres manually” thing, and it never showed. However, I understand why my faces materials never showed, but I dont recall being able to see the face materials and whatnot, but I have to go back and look. Now I’m wondering if adding the textures *then* will fix the problem. I’ll work on that.
The textures have to be where the model expects them to be– which is relative to the current path of the model, which depends on the model you’re importing into, not the model you’re importing. See https://learnmmd.com/http:/learnmmd.com/two-pmxe-common-problems/ for more info.
This is very useful! I’ll admit, I am one of the “does it fit TDA?” people. I don’t understand how to manipulate the bones and physics of one part of a model without messing with the rest. Once I know that, I’ll be set.
Glad that I could help!
I’ve run into a little problem. I’ve been trying to modify a Masisi Gumi dress ( https://2234083174.deviantart.com/art/MMD-Simple-Gown-DL-696537670 ) to fit TDA. Most of the body can fit with only a few size adjustments. The butt is both too low and too small to fit the model. The skirt has physics. What should I do?
If you have a dress with physics like this, then you need to use the Bone, Physics and Joint tabs in the little window to be able to resize everything.
Hi Senshi,
What you’re describing is a good case for fitting via the transform window. Check out https://learnmmd.com/http:/learnmmd.com/pmxe-transform-window/ .
Lets say the dress is too low in back, but fine in front; and skirt physics make it hard to do proportional editing to drag the back up. First, rename the bones in the file containing the dress, so they won’t get merged– just putting a letter on the end will do it– then import it in. Now, load up the transform window and disable physics. Try rotating the dress’s base– probably it’s lower body bone– in the X axis, to get the back up and the front down, and then move it in the Y axis to raise both to the appropriate level. Then, if the skirt needs adjusting around the legs, rotate the skirt bones as needed, and the mesh and physics will follow. You can also use the scale window if you need it, but be warned that if you do, previewing with physics enabled won’t be accurate, and that transform window scales in different axes depend on the rotation of the bone. When you’re happy, save the file. (Consider loading your new file to MMD or a new instance of your editor, to keep your old pose in case it’s not quite right, or save the pose from the editor, so you can reload it and try again.) Of course, afterwards, you’ll need to merge the dress bones back into the main file’s bones, or at least parent them appropriately to the main file’s bones.