Ray-MMD
Shading Mech Girls…
… A Petite Kawaii Mech Girl
Japanese anime have a lot of franchises to feature mech-girls; these are sort of like magical girls with some far out future tech types of gear and usually armed with super-sized, great big, state-of the-art weaponry such as swords and hand cannons. Some of these types of girls have made it over to MMD in model form… but in this article, we will focus on one in particular. However, the approach that we are taking will be applicable to other models of the type.
She is called White Glingko and was made by ACMMD back in 2011 and so the model is actually quite old. But back in the days, she was pretty popular as back then the default Animasa models were still the rage and Tda Miku Append wouldn’t make her debut until the following year. Despite her vintage, she is still one of the finest MMD models of this genre made specifically for MMD.
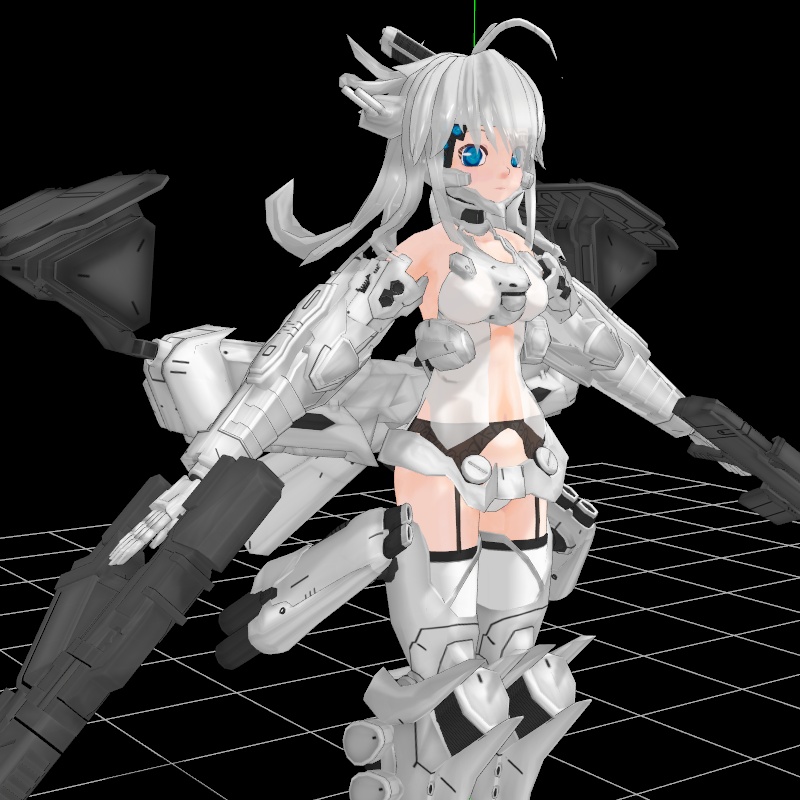
White Glingko is issued as a PMD format model but her modeling is very decent and she takes MME shaders well. But what we will want to do is to apply RayMMD assets to her, simply because RayMMD, in many ways is simply ideal for this type of model. Glingko uses a lot of texture mapped parts and lot of her parts are gear. This actually does make her a challenge to shade using RayMMD materials. But we worked out a good solution to this problem and this article will explain how to get her shaded.
You can download her here: [White Glingko Regu 1.0] ux.getuploader.com/acmmd/download/6/%e3%83%9b%e3%83%af%e3%82%a4%e3%83%88%e3%82%b0%e3%83%aa%e3%83%b3%e5%ad%90%e3%83%ac%e3%82%ae%e3%83%a51.0%e3%82%bb%e3%83%83%e3%83%88.zip
Shading Considerations
Glingko, like most mech girls features a variety of materials that need to be accounted for when shading her. Specifically:
- skin tones
- clothing
- armor or plastic parts
- glowing elements
As mentioned above, the Glingko model uses a lot of textured mapped parts. What this means is that we need to factor in these types of materials when choosing our material shaders, otherwise we could end up eliminating much of the fine details that were rendered using the texture maps.
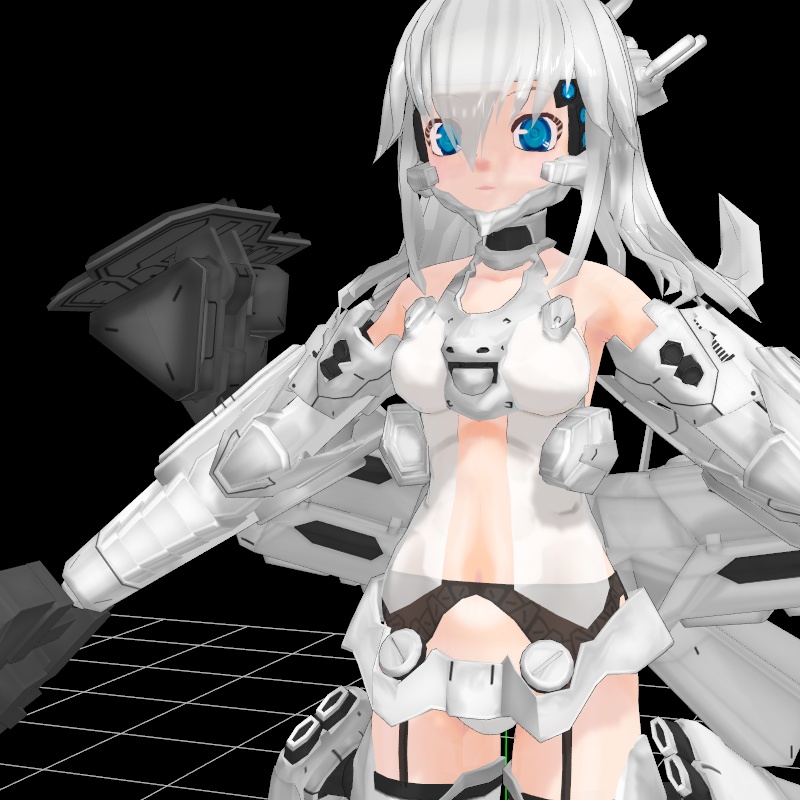
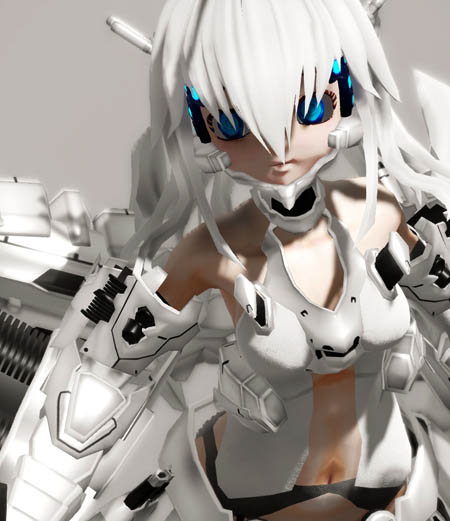
When you come across a model like this one good trick is to load up a basic shader on it and look at it carefully to workout a good shading strategy. In the image below, we have just applied ExcellentShadow2 to her. Due to the qualities of this effect, it is excellent for studying the basic texture as well as the play of light and shadow on the model’s surfaces.
Posing the model
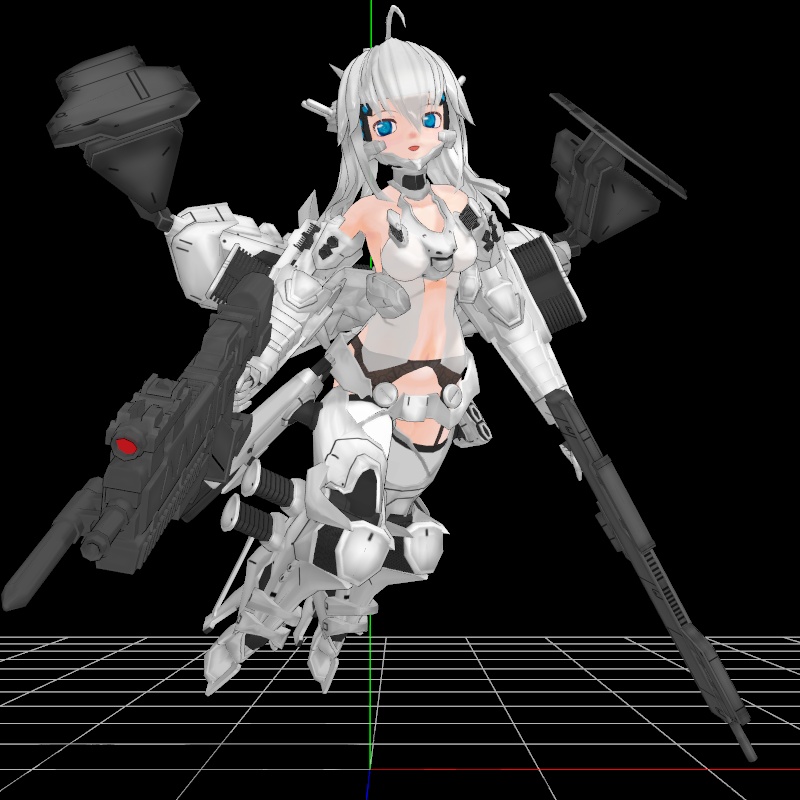
Being a mech girl and with some sort of flying gear on her back, we simply put her into a flying or if you prefer, hovering pose.
Shading the model
PMD models differ from PMX models in a number of ways but the main impact here for our project is that PMD models cannot have labeled materials names which means you need to identify each material manually. This can be a bit tedious but not really any obstacle to the overall process of shading the model using RayMMD materials. What will be an issue is the types of shading materials that we use as much of the Glingko model uses textured mapped parts.
Many RayMMD materials overwrite underlying texture map, often time replacing them with their own normal maps. This is desirable in many circumstances but not always. Fortunately, RayMMD comes with editable materials which can be modified using simple slider controls for very specific circumstances and so we make use of these. There are no tutorials on using these types of materials, so this will be done here in the sections below, so this is another reason why you should be reading articles in LearnMMD.com.
Laying the shading foundation
The basic set up is very simple:
- Sky Hemisphere sky box – use the Time of lighting.fx on this under the EnvLightMap tab
- Add main.fx to Glingko
- Make sure that the sky box is drawn before Glingko.
Base Shaders
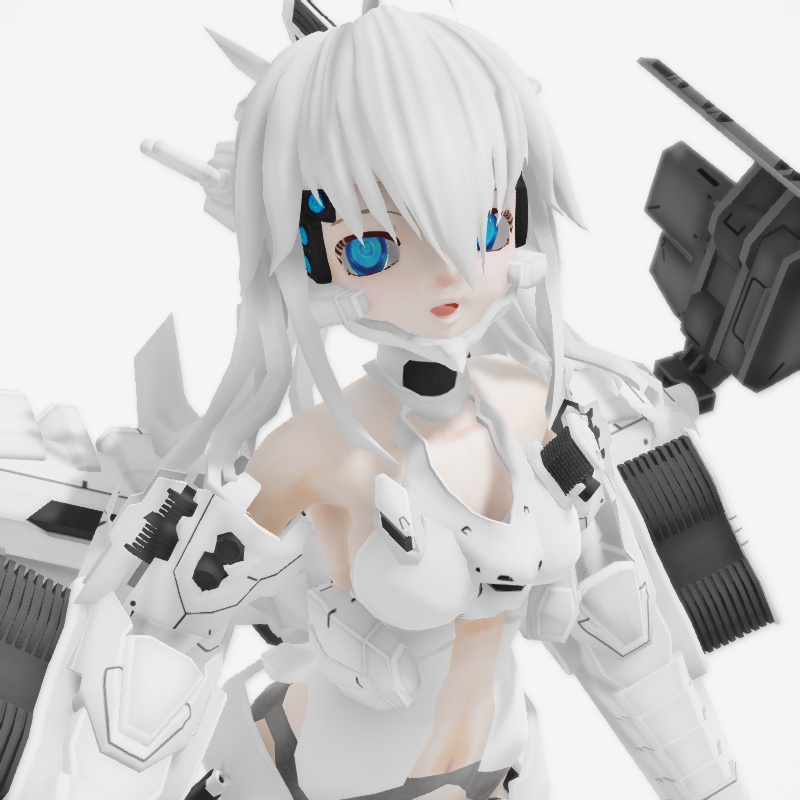
We can use stock shaders for the follow parts of the Glingko model:
- Basic skin tones for the head and torso. Use light tones on this model because on this model, the eye sockets are a part of the head material and using a rich skin tone will overwrite the whites of the eyes.
- Cloth.fx is used for her underlying garments. This gives these materials a matte look which will contrast nicely with her gear which will be shiny.
- A clear albedo overlay was added to her pupils to make them shiny, but we used her facial controls to remove the faux eye highlights as those just look bad.
- We used the plain hair.fx for her hair. This model has a lot of white so we will use shiny and matte materials to create contrast. RayMMD is ideal for this sort of approach.
Shading her gear – whites
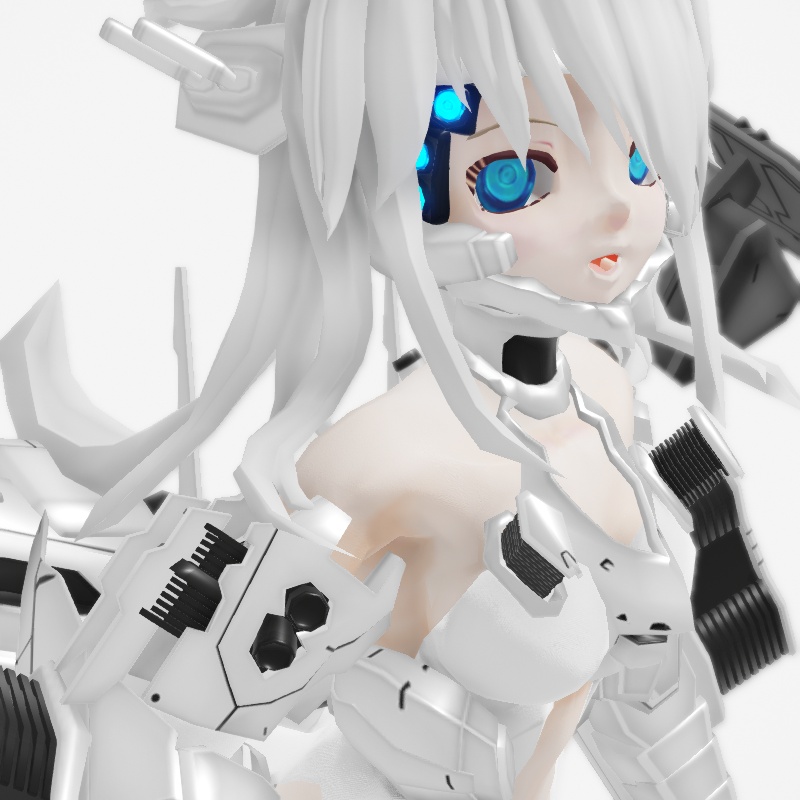
For her gear that is predominantly white, but has some black elements, we use a customizable shader. These shaders are found in the “Editor” subfolder in the materials folder directory. There is a lot to choose from, but don’t be confused. To use these materials, just assign one to the parts you want and then load the corresponding pmx controller for the selected material. You use the pmx controller to adjust the material to look the way you want. By default, these materials do not use normal maps, but they can be customized to use these by editing the fx file. We won’t get into this as it is not necessary for this project as the stock effects work just fine for our project.
We applied material_subsurface_1.fx to her white tone mech gear and added the subsurface_1.pmx controller to MMD. Sub-surface materials are exactly what the label says, they are texture materials that forms the underlying texture characteristics of a material. The short explaination is that they don’t overwrite the texture maps used on these parts. Also, they are ideal fro creating gloss painted or plastic looking materials.
To get the look shown above these values were used on the controller:
- smoothness 0.60
- metalness 0.85
- melanin 0.35
Very crudely what these values do are as follows:
- smoothness affects the play of shadow and highlights on the surface.
- metalness affects how shiny a material is.
- melanin makes materials dull; less reflective.
Shading her gear – weapons
Glingko’s guns uses standard editable materials: material_editor_1.fx with Editor_1.pmx. This was set up to the weapons a slightly military olive drab type of look.
Settings used were as follows:
- AlbedoV 0.15
- SpecularH 0.15
- SpecularS 0.25
- SpecularV+ 0.85
- Smoothness 0.50
- Metalness 0.65
- Melanin 0.75
Shading her Jet packs
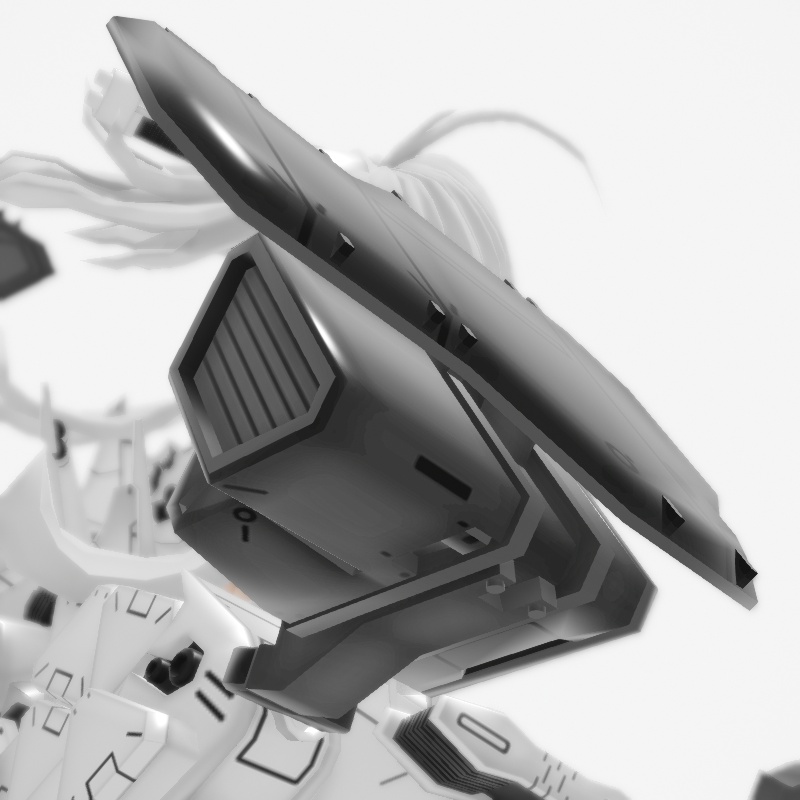
Her jet packs also uses a standard editable material. The settings, however, are different giving them a “blacker” look:
- SpecularV+ 0.45
- Smoothness 0.75
- Metalness 0.90
- Melanin 0.35
Everything together
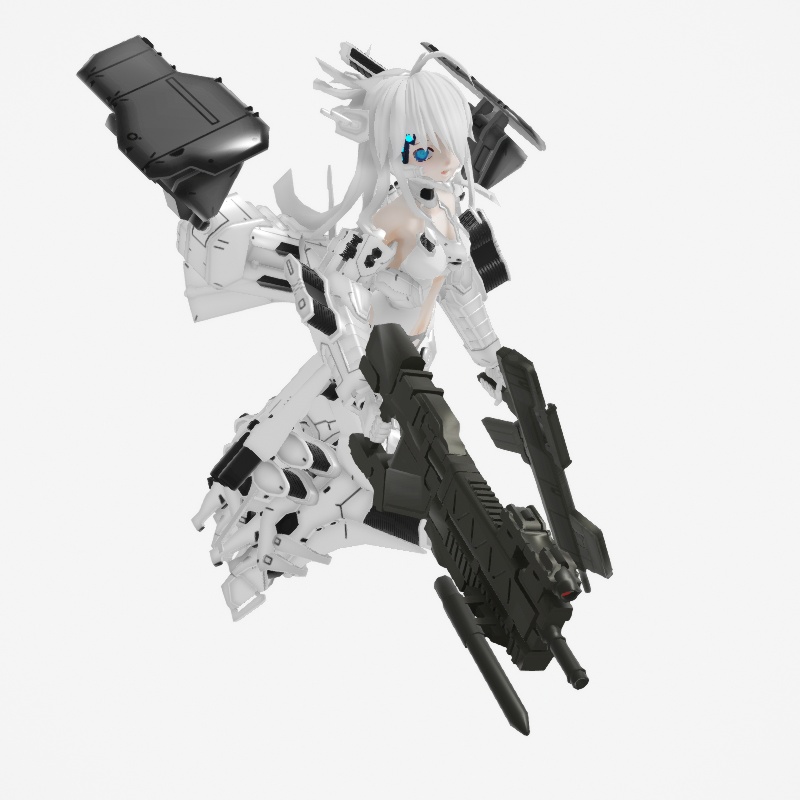
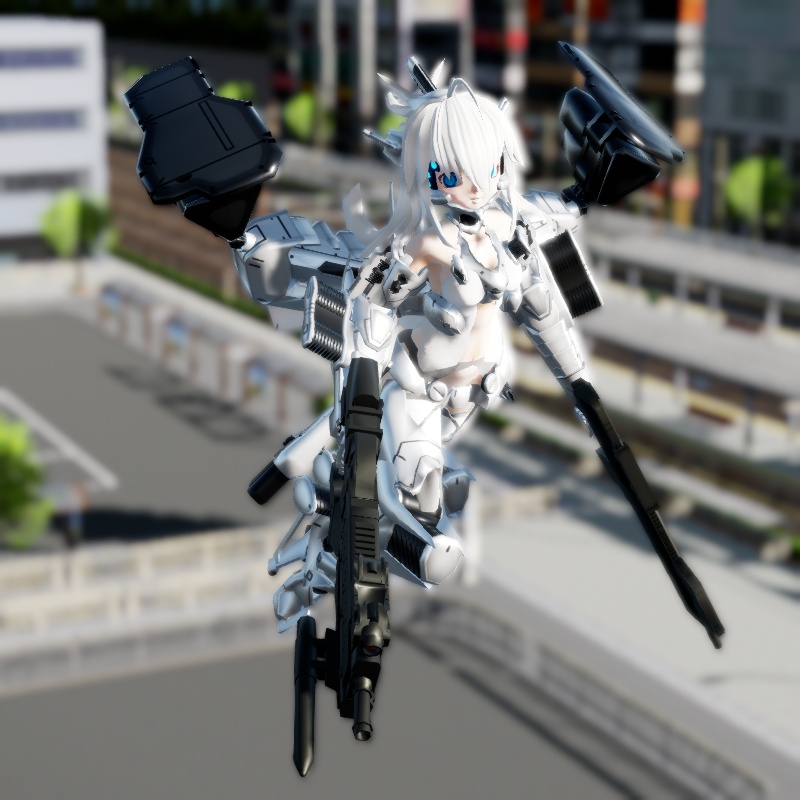
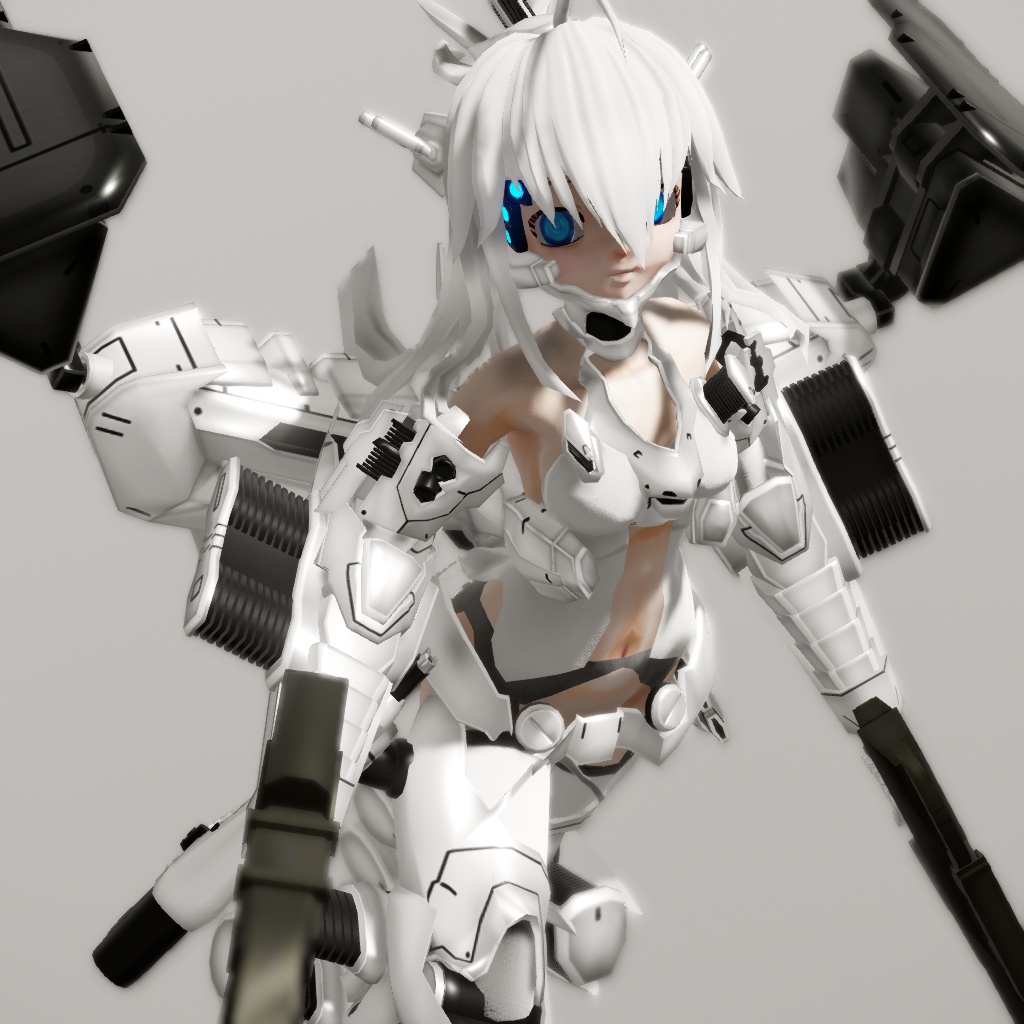
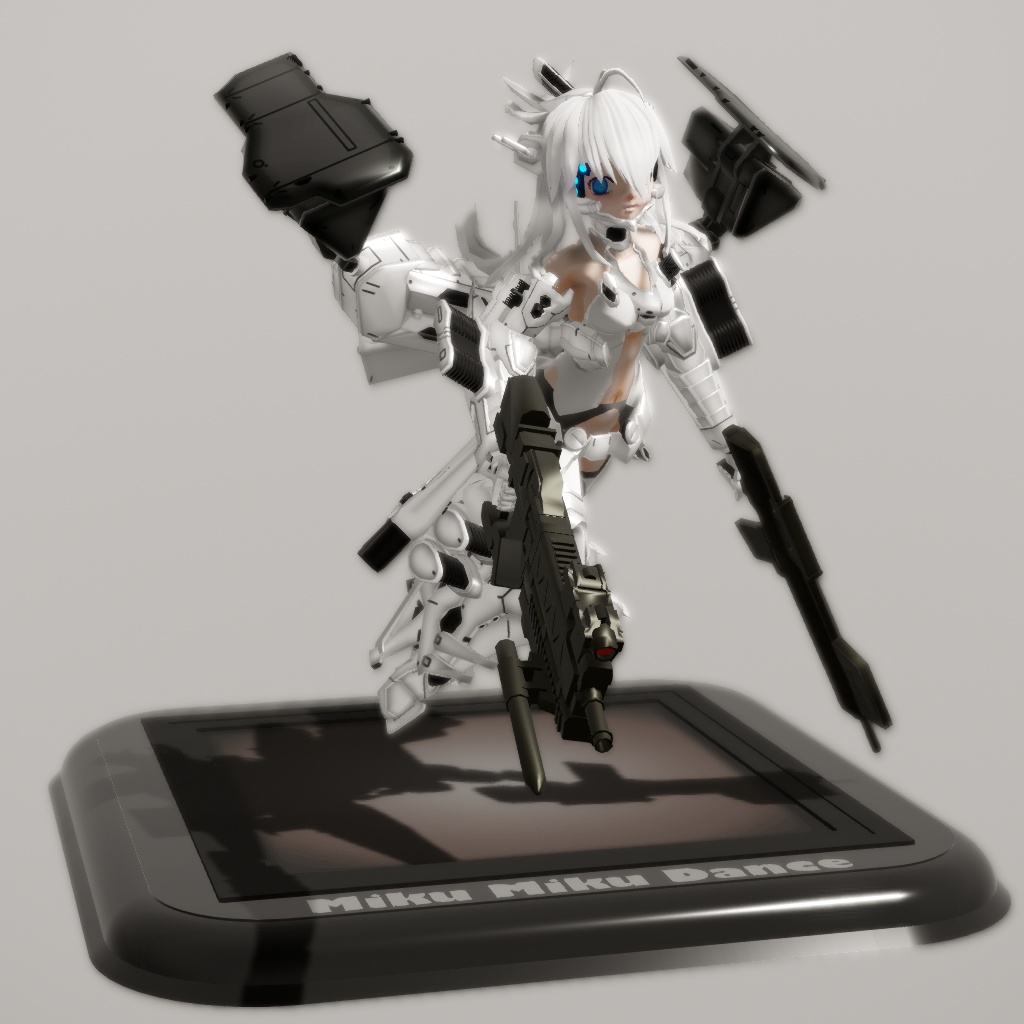
Here is how Glingko looks with all her material specifications in place. Although she is predominantly white with dark accents, when done in this manner, there is sufficient variety in terms of materials to make her more interesting to look at; but it can get better than this in the next step.
Adjusting the global light settings
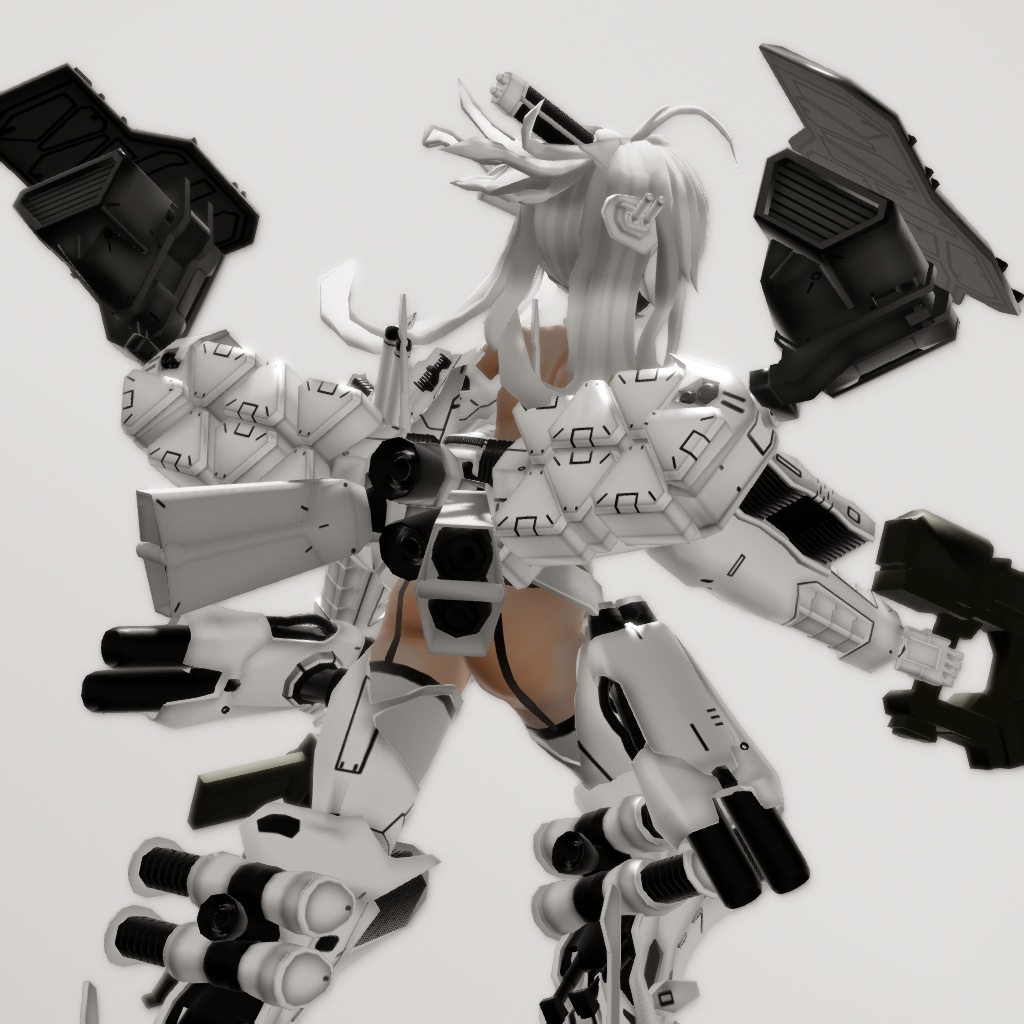
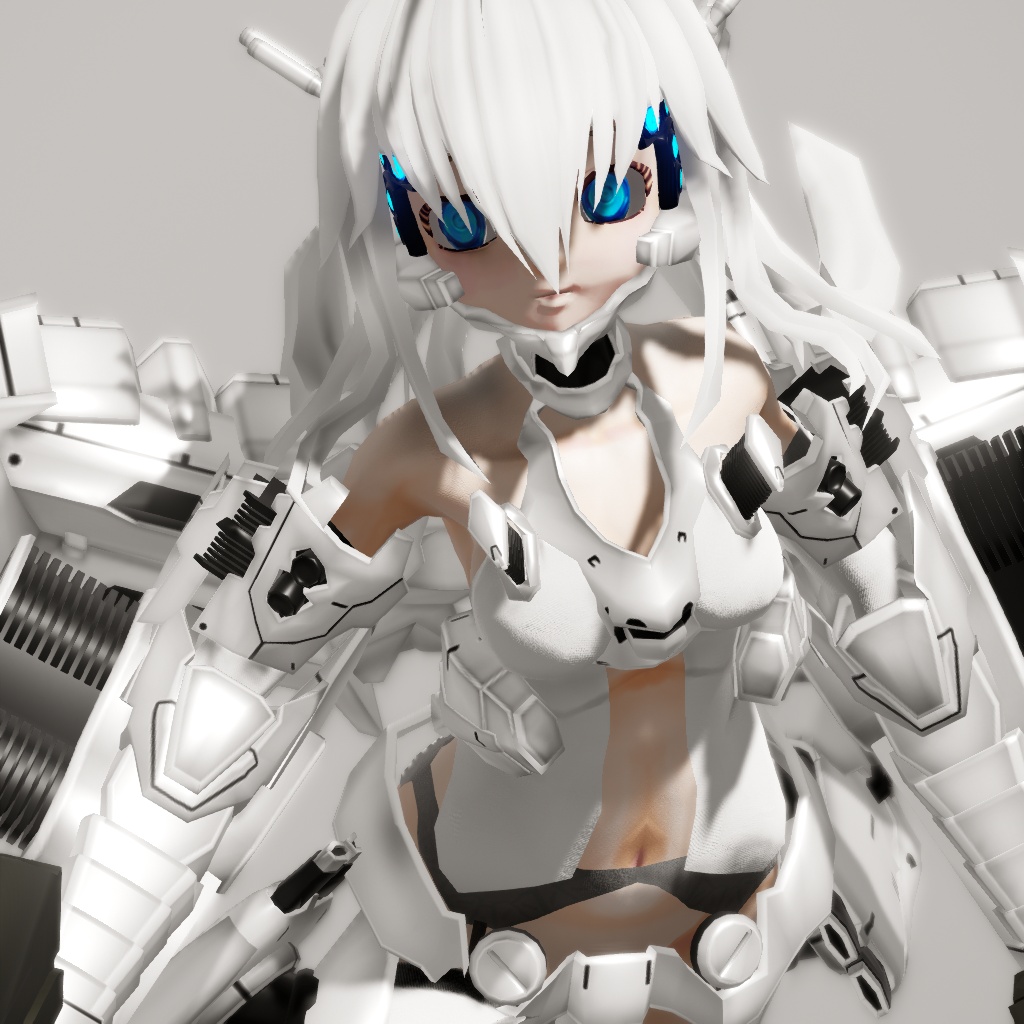
The next series of images shows Glingko with the global light settings properly adjusted for the scene. These images were rendered at 1024 x 1024 pixels and you can see these by clicking on the individual images. The settings list is rather long, so these will be listed in the Appendix section at the bottom of the article.
This is the front view. With the global lights set, the full richness of the material really become much more vibrant. There is a good mix of textures making the model much more visually interesting.
The rear of the model is just as interesting visually, plus the skin tones really helps bring colors into the scene. With the material strategy that we used, the original textures are enhanced such as the paneling work on the jet pack.
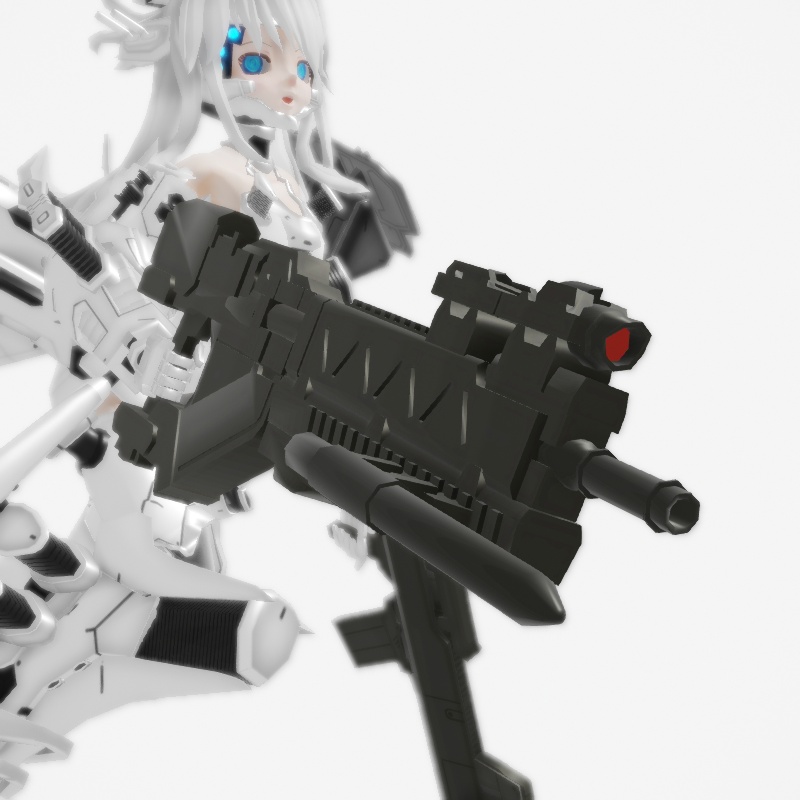
Even fairly up close, the methods that we employed can stand up to close scrutiny.
Glingko looks good enough with this render scheme to make a pretty convincing anime figure model. A model like this will normally cost over US$100, but using MMD we can get her for essentially just a little effort. You just have to love RayMMD; it is really an absolutely outstanding shading suite. When the White Glingko model was first released back in 2011, it was just not possible to shade her like this.
Credits
White Glingko – ACMMD
MMD 9.32
RayMMD 1.5.0
Figure stand [ download link ]
Appendix
Skybox
TopV- 0.50
TopExponent- 0.40
MediumV- 0.25
BottomV- 0.45
BottomExponent+ 0.50
EnvDiffLight- 0.35
EnvSpecLight+ 0.25
EnvSSSLight+ 0.10
Ray_controller
SunLight+ 0.15
SSAO- 0.50
SSAORadious- 0.10
BloomThreshold 0.25
BloomRadius+ 0.50
Exposure – 0.35
Contrast+ 0.25
Saturation+ 0.10
Gamma+ 0.15
Temparture+ 0.15
Have fun with MikuMikuDance!
– SEE BELOW for MORE MMD TUTORIALS…
— — —
– _ — –







Ray-MMD 1.5.0 – 11.1.2018.
Ray-MMD 1.5.2 – 13.3.2018.
Are all the multuple fx files in an editor folder the same or is there a difference? For examole in Standard folder there is 10 fx files. Are their settimgs different?
Where is the tutorial that explains how to hook up a normal maps to the editor fx files?
I have reached a limit of what I can achieve with mixing default fx files with normal maps.
1.) Can I feel free to edit the default editor files or should I make copies in another folder?
I already know how to edit fx files, I just need to know:
2.) Can I feel free to copy paste an editor fx file and its corresponding fxsub file, into my folder with normalmaps and edit from there?
Or:
3.) Can I just copy a normalmap into the according editor folder and make a copy of an editor file and rename it and edit from there?
Thanky in advancy!
I did it! I learned to use the editors together with normalmaps! I just wondering does “Anisotropic” in Raycast mean the same as “Anisotropic Filtering” for textures? Pls…