Skip to content
Learn MikuMikuDance – MMD Tutorials – Free 3D Animation Software

Learn MikuMikuDance – MMD Tutorials – Free 3D Animation Software

Download Free Animation Software – Let's Learn How to Do Everything!

  • Step-by-Step MMD instructions
  • DOWNLOADS
  • Troubleshoot, Fix MMD
  • Site Contents
  • Reggie Replies Q&A
  • Homework!
  • What IS MMD?
    • Download MikuMikuDance Newest Latest Version of MMD
  • “HOW TO”
    • Raycast RAY-MMD Effect Tutorials
  • BONUS PAGES
    • Why convert PMD models to PMX?
  • HALL of CHAMPIONS
  • Tutorial Categories
  • About
    • Privacy Policy
  • Toggle search form
  • The Audacity Generate Menu lets you add silent breaks to you WAV file.
    WAV Files Make Your Music Play on MMD MikuMikuDance Music and WAV Files
  • The MME Oppai Effect adjusts the breast size of your MME models!
    MME Oppai Effect enhances MMD Model’s figure… one for the boys! MMD Tutorials
  • RAY-MMD: A method to get great results fast and easy!
    RAY-MMD: A method to get great results fast and easy! MMD Tutorials
  • Using the right codec when Rendering to AVI in MMD HD Videos in MMD
  • MikuDance.info has a constantly updated list of new MMD models and accesssories.
    MikuDance.info – A Very Useful Site for MMDers! Downloading New Models
  • Download MME v037 in English install MikuMikuEffects special effects Download MME MikuMikuEffects
  • VDE-4 Champion: YamiMori Video Dojo Champions
  • Animation Styles: Park and Bark vs. Choreography Creating Motions

An MMD town stage: Making Kerorin Town Great Again – Part 3

Posted on October 29, 2019July 8, 2024 By Trackdancer No Comments on An MMD town stage: Making Kerorin Town Great Again – Part 3

An MMD town stage: Making Kerorin Town Great Again - Part 3

A feature article on LearnMMD by Trackdancer2015!Here is Part three… the final part in this series…

See Parts ONE and TWO… Enjoy!

Making Kerorin Town Great Again – Part 3

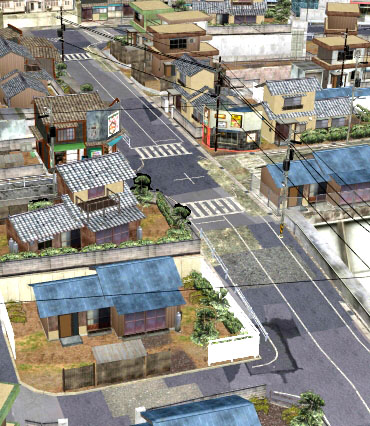
Assembling the Town Model

A nice view of the Kerorin Town MMD stage.

The Master Plan

This is actually very simple but a little fiddly to set up initially. Once completed the plan will offer:

  1. A method to move and rotate all of the town modules in unison in any direction just by using only two bones.
  2. A template which assembles the town for you so that you can avoid the tedious steps of setting up the town from scratch each time you want to use it.

An issue that you need to be aware of…

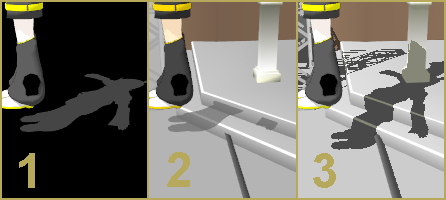
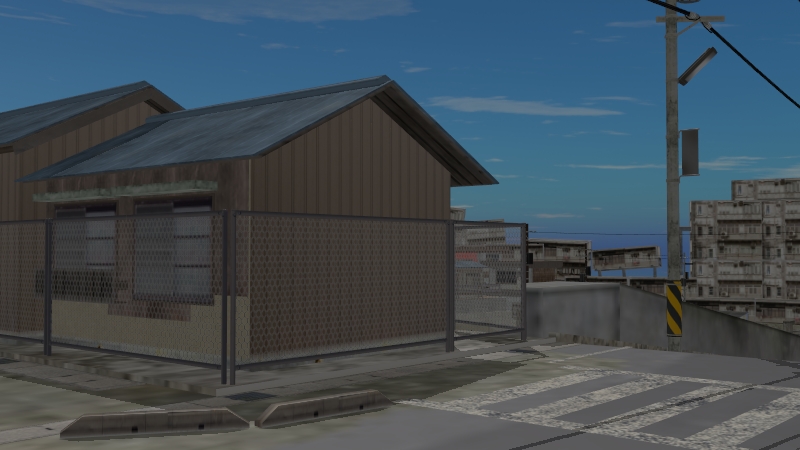
Some of the modules contain parts that uses transparent textures. These would be the chain link fences and the vegetation. Because of the way MMD handles models with transparencies, under circumstance or just even from some view angles, it is possible to see through objects in an unrealistic manner.

There are two fixes for this issue:

  1. Use an MME effect to minimize the damage.
  2. Resort the draw order of the town modules.

Our plan will use method 2. The solution is not set in stone. So you may need to adjust the draw order if issues occur.

The module load order and MMD’s draw order

Rather than loading the modules in an ad hoc fashion, we will load them in the order that causes the least amount of drawing issues. But be advised that even after loading the modules in this order, from some view angles, drawing issues may still occur. The solution is to resort the draw order list and here is the underlying principle: draw modules with transparencies causing issues after the modules that were seen through.

This chain link fence structure on module kr3_block_a can cause issues if MMD’s model draw order list is not properly sorted.

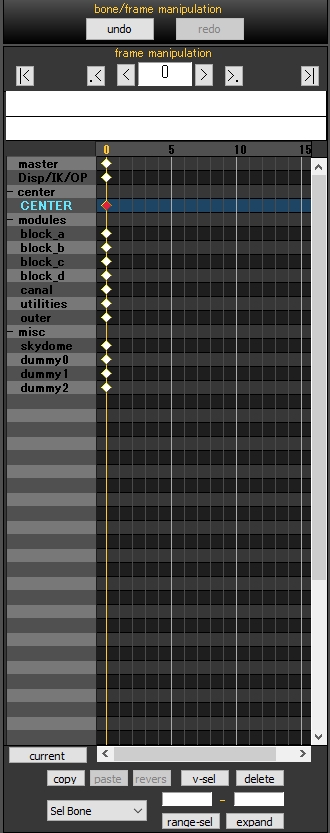
Here is the recommended draw order sort list:

MENU: background (B) > model draw order (O)

Load your modules in the order listed above or manually sort them out using the same panel. When you load other models into MMD, these normally need to be drawn before any of the town modules. If a sky dome is used, it should be at the top of the list. See this tutorial if you want to learn more about MMD’s draw order functionality: Understanding MMD Draw Order

Super Glue everything…

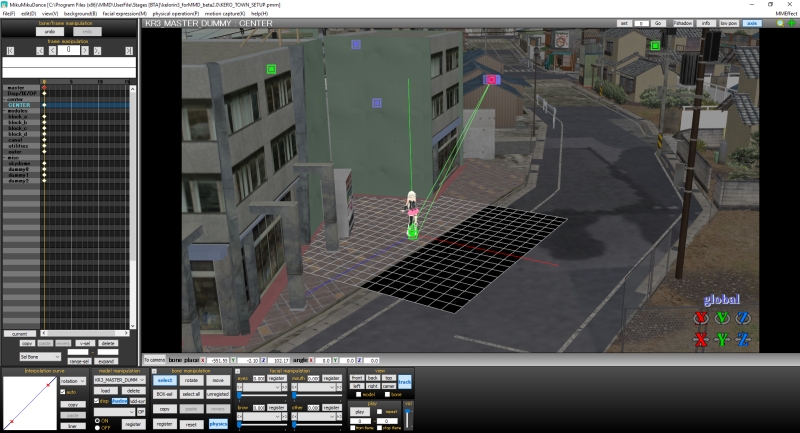
This next part will be tedious and needs careful attention. Make sure you are at Frame “0” before proceeding.

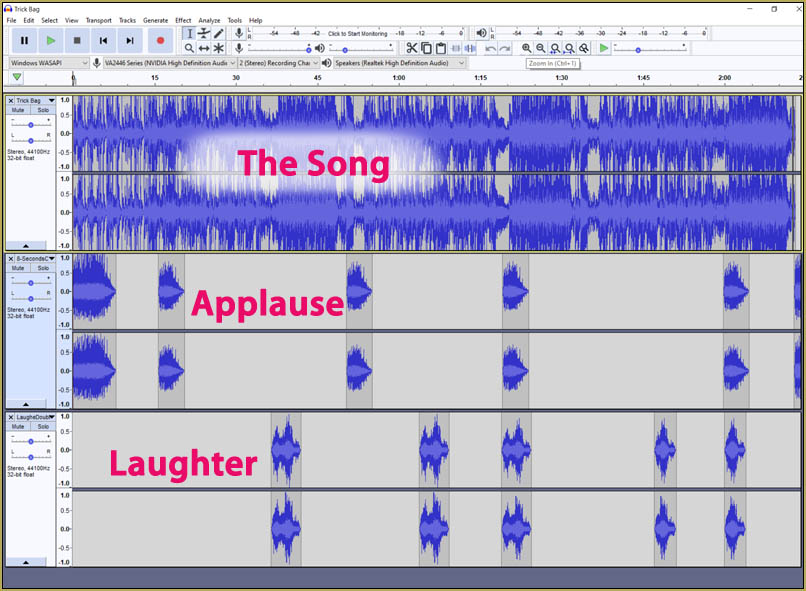
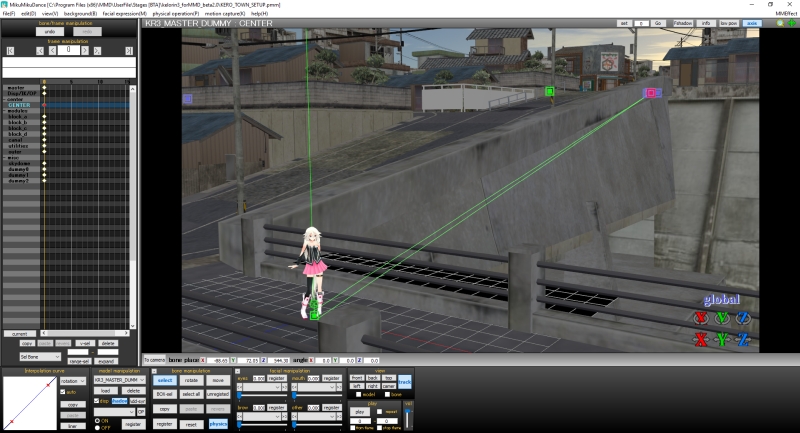
For each town module (refer to image above):

  1. Open up the Outside Parent panel.
  2. Select the kr3_yyyy_x bone.
  3. Assign the target model. (This is always the master dummy bone module).
  4. Assign the subject bone to the corresponding target bone.
  5. Remember to click the OP register button when done.

There is hardly any feedback from MMD when executing this procedure and this is why you need to pay attention to what you are doing. Note that the canal module only has a center bone but the procedure is the same. Just assign its center bone to the master dummy bone module’s canal bone.

When done, test that it all works by selecting the the master dummy bone model’s center bone and moving it. All the modules should move with it. If any module is not moving, check the OP assignment.

By just moving the Master Dummy module’s CENTER bone you can orientate the entire town model to any part that you desire. In the image above, the CENTER bone is the red bone at the top left of the hill. The green bones are the mother bone and skydome controller bone respectively.
With this system, all parts of Kelorin Town are easily accessible as you just move the part of town that you want to work in to MMD’s main operational area (the area defined by the floor axis).

The final step

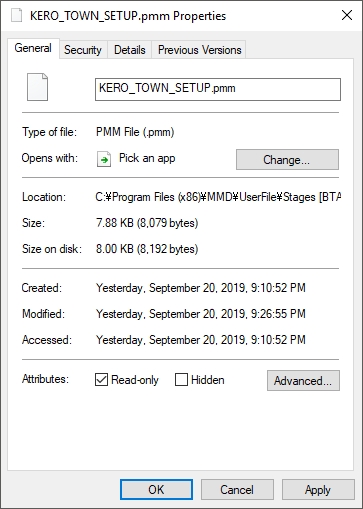
Before loading any working models or MME effects, save the file as a .pmm template in the same folder as the town model. This way you will not have to go through this set up procedure again every time you want to use the Kelorin Town model. You might also want to write protect this file to prevent you accidentally overwriting it when working with the town on subsequent projects.

Write protect your template file by checking off the Read-only attribute in the files Windows Properties panel.

Operational considerations

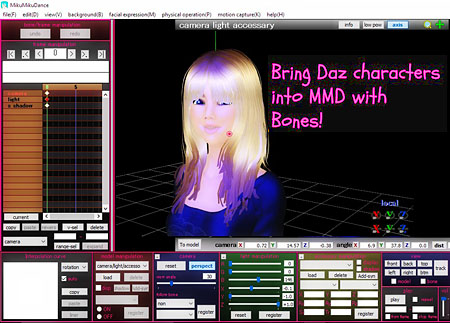
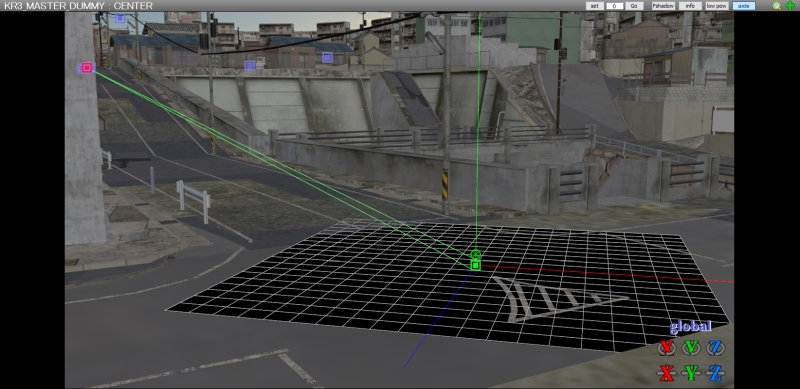
To move and rotate the entire Kelorin Town model with this system you only need to use two bones:

  • Use the CENTER bone to MOVE the model to the location you want to work.
  • Use the MOTHER bone to ROTATE the town around the operational area after you arrive at the location.
  • Select these bones from the Groups list display so that you do not have to keep finding them.
  • Work using the GLOBAL coordinate system.
To select a bone from the GROUPS list display, simply click on its label. The label will highlight when the bone is selected.


Locate the operational area using the CENTER bone. Work in GLOBAL mode and use the widgets to make the movements. SHIFT-CLICK-DRAG will allow for faster movement. CTRL-CLICK-DRAG for fine movements. CLICK-DRAG is the default behavior. Note that it is much easier to select the CENTER bone from the GROUPS list as it could be anywhere and often times, not within the view port. But you can still move it even if you can’t see it. Just use the floor axis grid as a guide.


Once you have located the operational work area to the part of the town that you want to work in, you can use the MOTHER bone to rotate the operational work area. This CENTER bone/MOTHER bone functionality is very powerful and easy to use. The same method can be used with other large urban models.

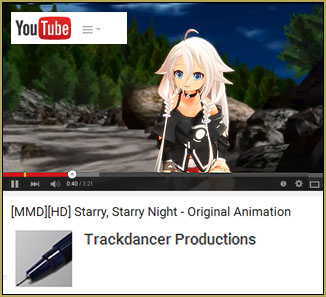
If you need further clarification on how to use this system, please watch the short instruction video below:

Thanks for reading. We hope you found these articles helpful. If you have any questions, feel free to post these below in the comments section.

Credits and Links

Town models by Kelorin Jo BTA

Kelorin Town version 2.02

Kelorin Town version 3.0
Password is here: http://seiga.nicovideo.jp/seiga/im7540869
(The tutorial uses this version)

IA Rocks [Unofficial] : Trackdancer.deviantart.com

MMD 9.31
PMX Editor
Irfanview 64
AviUTL
GIMP
Effects: ExcellentShadows2 / Ray_MMD

Appendum

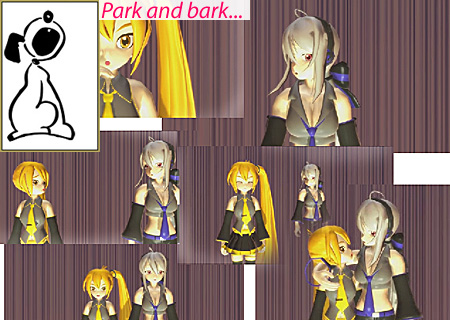
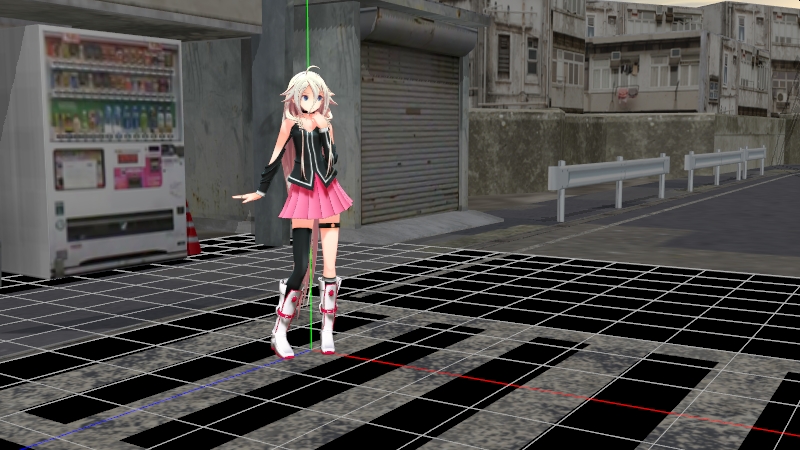
While setting up the image at top of this article, I took a break and used that set up to “play” with to test out some ideas. Some how I ended up making the video below. It puts some of the ideas explained above into practice so you might like to see it just for your own reference.

Kelorin Town is full of creative potentials to explore, so just let your imagination run free and have fun with it!

https://youtu.be/fbG9QI8WnUE


– SEE BELOW for MORE MMD TUTORIALS…


— — —


– _ — –


Visit the LearnMMD.com Homepage! Plenty of Mikumikudance instruction and info!

More MMD Tutorials...

Reader asks how to create MMD artwork... stuff like posing, camerawork?

A reader asks... Is there a tutorial on how to create MMD artwork, like those you ...read more

Learn MikuMikuDance in Small Steps! New LearnMMD Video Series

Learn MikuMikuDance in Small Steps. Where can I find easy-to-follow MMD instructions on YouTube? How ...read more

Apply Multiple Effects on an Entire MMD Model Using M4Layer Effect

How can I apply multiple effects to an MMD model? Can I use more than ...read more

MMD Plugin Manager... I Found a Treasure!

What sorts of MMD Plugins are there? MMD Plugin Manager? MMD Plugins. Plugin MMD. More ...read more

2023: Hatsune Miku is 16 Years Old by design and in reality!

Finally, in 2023, Hatsune Miku is 16 years old! When did Miku make her first ...read more

SEARCH LearnMMD.com... it's Easy!

Search LearnMMD.com to find your answers! With the posting of this article, LearnMMD.com has 758 tutorials ...read more

MMD Stages, MMD Tutorials, Trackdancer2015

Post navigation

Previous Post: Beginner’s Guide: Using Ray-MMD ver 1.5.0 – Latest version of Raycast
Next Post: An MMD town stage: Making Kerorin Town Great Again – Part 2

Related Posts

  • Adjust the Shadows in MikuMikuDance KillerBeer
  • Import Daz models with Bones using Blender, Noesis, Xnalara Blender
  • MMD Starry Winds Effect Makes Amazing Night Time Scenes! MMD Tutorials
  • Recommended Software Library for MMDers Animation Shortcuts
  • MMD Light Manipulation Panel helps set the mood Global Lighting
  • YouTube thumbnail image is so important!
    Create your Most Attractive YouTube Thumbnail image "the making of" my video

More Related Articles

I added laughter and applause tracks using Audacity software. Add Life to your MMD soundtrack with Laughter and Applause! VDE-3! Making Soundtracks
The MME Oppai Effect adjusts the breast size of your MME models! MME Oppai Effect enhances MMD Model’s figure… one for the boys! MMD Tutorials
LearnMMD.com _ MikuMikuDance MMD Tutorials Convert SFM/GMOD Models Into MMD Flawlessly! Haztract
How to Use the Squash and Stretch Effect for MMD. ARIZONA
Ray-MMD Godrays… argggh!!! MMD Tutorials
Half-Lambert Shader. How to Use the Half-Lambert Shader in MMD Half-Lambert Shader

Leave a Reply Cancel reply

Your email address will not be published. Required fields are marked *

Download the latest version of MikuMikuDance!
See the MMD Step-by-Step instructions page!
Learn how to make your own MMD motions!
LearnMMD.com
  • Cookiefun Channel Camera Crew Model Free Download Downloading New Models
  • Beamman’s Water v5 Effect needs Editing before you can use it! Beamman's Water v5
  • MMD Project “I WANNA PARTY!” features great motion files by o Savvy o "the making of" my video
  • Using Beamman Particle-styled MME effects Beamman's AuraParticle
  • Starting-out Using MMD starts you on a learning path.
    Starting-out Using MMD Reader discovers missing elements. MMD Basics
  • Fireworks Kai effect
    Using the Fireworks Kai effect for MikuMikuDance. ARIZONA
  • MMD Download links – Some of my favorite MikuMikuDance Sites Download MikuMikuDance
  • Beamman’s MME SelfBurning Effect Sets your MMD models Ablaze! MME Effects Tutorials

Copyright © 2022 Learn MikuMikuDance – MMD Tutorials – Free 3D Animation Software and Instructions..

Powered by PressBook Premium theme

Go to mobile version