


What is SimpleMagic? Why can’t I see anything when I load it into MMD? Why are there so many volumes? How does Beamman’s SimpleMagic work? How can I download Beamman’s SimpleMagic?

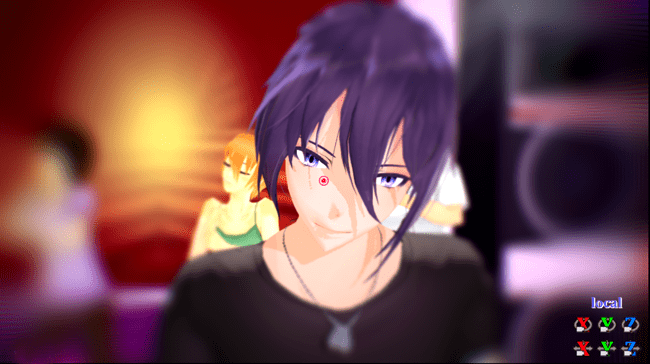
Beamman’s SimpleMagic creates Explosions, Fire-Balls, and Swirling Flames!
![]()
SimpleMagic is an effect series produced by BeammanP between 2014-2015. They are heavy particle effects that take the form of dynamic action entities such as explosions, thunder, missiles, fire, wind and water.
The series is split into 4 volumes, separated thematically. The first volume contains elemental effects (explosion, fire, ice, thunder and wind). The second volume contains fighting effects (beam, gun, hit, and water). The third volume contains space effects (gravity, impact, meteor and missile). The fourth volume contains a mixture of effect types (BlowHit, Explosion2, Move, Shockwave, Slash and SlashHit). You can find Beamman’s preview videos for all these effects, as well as their download links, at the bottom of the tutorial.
General Information
All SimpleMagic effects load in the exact same way. All you need to do is load the .x file and the corresponding .pmd controller into MMD.
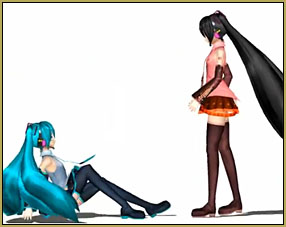
At first, you will not be able to see the effect. This is because the effect is animated in such as way that Tr = 1.00 is the beginning of the animation, and Tr = 0.00 is the end of the animation. Tr refers to the Transparency of the accessory, which you can edit in the yellow accessories box.

When trying out a SimpleMagic effect, I recommend setting the Tr to around 0.60 to start off with. This will show what the effect looks like in the middle of the animation, which gives you a better idea of what the overall effect will look like. Beamman also distributes SimpleMagic volumes with AutoLuminous4, which helps to make various parts of the effect glow brighter. Every .fx file has its own parameters that you can edit in a code-editing software such as Visual Studio Code or Microsoft Notepad. All parameters are at the very top of the file when you open it, and can be edited by changing the number at the end of a line.
If you want a more detailed explanation on how to edit code parameters, you can check out this fantastic tutorial by KillerBear: Take Full Control of MME Effects by Editing .fx Files. There are also some values further down in the code that you can change, such as RNDTEX_WIDTH, RNDTEX_HEIGHT and float.
Each Volume contains a ‘Textures’ folder, which you can edit to modify these magic effects. For more detail on this, you can read this tutorial I wrote a few months ago: Editing Effect Textures Creates Brand New Effects!.
From this point, the volumes differ slightly.
SimpleMagic Volume 1
The controllers for all Vol.1 SimpleMagic effects have the exact same morphs. Unfortunately, these controllers do not have English options, so all morphs will read as “Null”. I recommend translating each controller as if it were an Japanese model using PMXE and Google Translate. Or, maybe, try switching to the Japanese version of MMD if you can read Kanji, or editing the language settings in the controller in PMD Editor. The eye morph controls the opacity of the effect, the mouth morph controls the brightness of specific parts of the effect, and the brow morphs control the RGB colour settings. Using the RGB settings, even very lightly, will reveal extra details in the effect.
Within the code of each Vol.1 effect, you can edit parameters such as the number of particles, how much smoke there is, how many flashes there are and how much fire there is. In effects such as Ice, you also have ice particle, wave and light parameters. You can also edit the colours here if you want to be very exact.

SimpleMagic Volume 2
These controllers are exactly the same as the Vol.1 controllers, except for GunHit, which does not use the Tr method of stopping/starting animation, and also has 4 extra morphs in the ‘other’ section. The first morph makes the overall effect larger, the second splits the effect into many smaller entities, the third activates the animation, and the fourth controls speed. Water does the same, except the third and fourth ‘other’ morphs have swapped places. Both come with a premade motion data that you can load into the controller.
Within the code of Vol.2 effects, the parameter options carry over from Vol.1. GunHit and Water have the additional parameters of BomScale (explosion size), SetScale (explosion radius), particleSpeed (speed of animation) and CutSpeed (the constant speed of the explosion).

SimpleMagic Volume 3
These controllers are exactly the same as the Vol.1 and 2 controllers, except for Impact and Missile. For Impact, the ‘mouth’ morphs remove some of the smoke and makes the flying rocks lighter, and the ‘other’ morphs control size, spread and animation speed. For Missile, the ‘mouth’ morphs control the colours of the smoke tails, the ‘brow’ morphs control the colours of the flame at the end of the missile, ‘other’ morphs control the size of the fire, and the position of the missiles on the Z axis.
Within the code of Vol.3 effects, the parameter options carry over from Vol.1. In Gravity, you also have added parameters of the amount of thunder and DuplicateNum, which controls the amount of black circle elements appear. Impact has the same parameters as GunHit and Water in Vol.2, as well as the ‘loop’ versions having parameters to control how many spurt areas you can spawn, and Grv parameters to control how high and wide the rocks spurt out. In Meteor, the ‘HitMarkNum’ controls how many craters you can spawn, as well as the Grv parameter. Finally, Missile has parameters to control the amount of missiles that spawn.

SimpleMagic Volume 4
Once we get to Vol.4, things start to get a little more complicated.
For the effects BlowHit, Explosion2 and SlashHit, Beamman introduces a second controller called Auto_Controller. This controller connects to the [effect name]_Auto.x effect, and it allows you to easily manipulate the effect. The ‘eye’ morph adds a new explosion area to SlashHit and BlowHit, while removing an area in Explosion2. The ‘mouth’ morphs removes the effect, the ‘brow’ morphs spreads the effect out, and the ‘other’ morph activates the animation.
For these auto effects, the Tr method of activating animations does not apply, so you don’t need to worry about setting frames. These effects still hold the original colour controller, and should be used with the effects that do not have ‘auto’ in the name. These controllers have the exact same morphs as the controllers in Vol.1. Effects such as Move, Shockwave and Slash use the same colour controller as Vol.1 with the same morphs.
Within the code of Vol.4 effects, parameters differ depending on the type of effect within a folder. In BlowHit, Explosion2 and SlashHit, the _auto effect has parameters to edit particle count, colour, BomScale, SetScale and particle speed. It also has amount and size of additional flash effects. The other BlowHit and SlashHit effects contain colour, flash, and particle number parameters. The other Explosion2 effects also contain these, but with additional smoke, wave and light parameters.
ShockWave and Move both have colour, particle number, flash and light parameters, and ShockWave has an additional wave parameter. Slash has particle number, flash, colour and slash number (which controls the opacity strength of the slash).

Using SimpleMagic for Images
Because these effects are animated and therefore inherently designed for videos, using these effects for still-renders is not so straightforward. However, there is a method of editing that makes it possible to use in still-renders that works across all the SimpleMagic effects, except for the _auto effects. For this example, I am going to use Missile.
Load one of the Missile .x files into MMD, with the controller. Register Missile with Tr = 1.00 at frame 0. Then, go to frame 1000 and register missile.x’s Tr to 0.00. This means that the effect animation starts at frame 0, and ends at frame 1000. The longer the time in between the animation start and animation end, the slower the effect will be.
Using the right arrow on your keyboard, hold it down to slowly travel through the animation until you find a suitable frame for your still render. Then, on that frame, load up your other assets and render!
Conclusions
Many MMDers seem to be under the impression that SimpleMagic is a very difficult effect to use, when in reality it’s quite the opposite- it’s literally a case of load and register to frame! I hope this tutorial helped you out!
Resources
Download Simple Magic Vol. 1-4: https://w.atwiki.jp/beamman/
Beamman’s effect page has MANY effects, and you’ll need to download each SimpleMagic volume separately. Scroll down until you find the SimpleMagic vol. 1 effect, download it, and go back to the Wiki page to find Vol.2… and so on.
Typically, here are the download link locations:

SimpleMagic Vol. 1 preview video: www.nicovideo.jp/watch/sm22749757
SimpleMagic Vol. 2 preview video: www.nicovideo.jp/watch/sm23871006
SimpleMagic Vol. 3 preview video: www.nicovideo.jp/watch/sm25198252
SimpleMagic Vol. 4 preview video: www.nicovideo.jp/watch/sm26927822
Credits
Kasane Teto by Arue
Stage by chestnutscoop
Effects by Beamman, nil, o_tamon, Sovoro, Wire-P and chestnutscoop
This tutorial was requested by Natalie, thank you for the request Natalie!~
Have fun with MikuMikuDance!
– SEE BELOW for MORE MMD TUTORIALS…
— — —
– _ — –
![]()


So, one issue I’m running into is that all of these Simple Magic Effects present transparency issues when used with RayMMD. They’re supposed to be opaque, yet whatever is behind them ends up showing through. Here’s an example with impact3.x: https://www.deviantart.com/stash/0aak90b5g8
I do notice the issue is mitigated when you comment the .fx lines starting with “color.rgb”, but I couldn’t fully eliminate the problem. Any idea what to do?
RayMMD adds a layer of complexity to MMD operations… you will need to experiment to solve your issues.
good luck!
— Reggie
Concerning the Impact effect from SimpleMagic Vol.3, is there any way to disable shadows on the debris? Basically, if I use Impact_lv2 (for example) in a project that has the Light Manipulation (in MMD) set to 0 for X, Y, and Z, the textures on the debris are black. I’m trying to find out where the parameter is so that the textures can be retained and not cast shadows. I’ve been editing the Impact_lv2 Effect file in Notepad and I just can’t find it. Is there another Effect file I’m supposed to edit?
I look forward to any response to my inquiry….preferably assistance, but still. Thank you in advance.
I’m not sure what your problem is. I’ve tried to use Impact_lv2 effect in one of my stages, and turning Light Manipulation to 0 for X, Y, and Z does not turn debris black (unless it was made black by other settings), only the direction of light and what *side* of debris turns darker. Turning r/g/b to 0 *does* make it black, but I see no problem with that.
Anyway, I found that commenting these two lines would completely nullify the impact of Light Manipulation on debris; not sure if it’s what you’re looking for.
if(mode == 1){
Col = tex2D(SampIce,IN.Tex);
// Col.rgb *= (saturate(dot(IN.Normal,normalize(-LightDirection))*0.7+0.3))*(LightAmbient+0.333);
Col.rgb *= MainColor;
}
if(mode == 2)
{
Col = tex2D(SampIce,IN.Tex);
// Col.rgb *= (saturate(dot(IN.Normal,normalize(-LightDirection))*0.7+0.3))*(LightAmbient+0.333);
Col.rgb *= MainColor;
}
“Nullifying the impact of light manipulation on the debris”…..yeah; that’s what I meant. I apologize for not knowing my terminologies like that. ^^;
Anyway, I played around with those two lines, and it looks like deleting the
” Col.rgb *= (saturate(dot(IN.Normal,normalize(-LightDirection))*0.7+0.3))*(LightAmbient+0.333);”
part removes shadow-casting. The first line (if(mode == 1)) removes shadows from the debris in mid-air, and the second line (if(mode == 2)) removes shadow-casting from the debris on the ground.
I appreciate this. Thank you very much.