Making JRPG style scenes using MMD
Specifically here in this article we are referencing the JRPG/VN (visual novel) style games which have a distinctive style. This can be summarized as illustrated in the image below taken from Utawarerumono Mask of Deception:
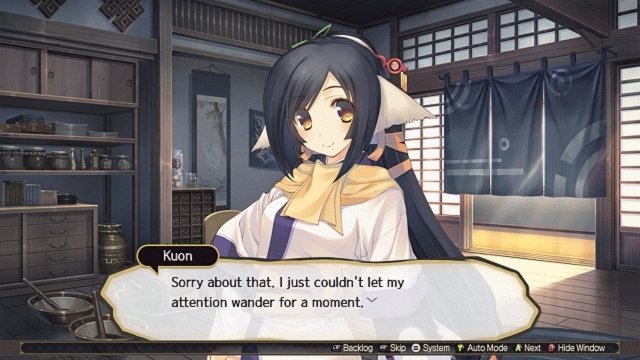
The basic elements are very simple:
- A rendered background image
- An anime style character image
- Text block
- Control icons
All of these elements are easy to replicate using MMD and any halfway decent graphics app. This article will show you one method; but there are as many approaches that can be used to achieve equivalent results. So just take what we write here as merely guidelines.
You will need a background image
Yes, there are hundreds of stage models made for MMD. You can certainly use a stage model to do the same thing but we’re trying to go for a 2D look that is more commonly associated with JRPG/VN game presentations.
Since we want to create a Japan themed image, we will need a Japanese type background. Google Image is your best friend here. You can narrow your search based on subject and other criteria. What we needed for this specific project is a typical neighborhood street scene. So we used the following search criteria to narrow down our search:
- Japanese street scene
- Neighborhood
- Copyright Free
Then we used the settings tools to restrict our search results to only show large images. You will generally want an image close to the same size as your monitor’s screen resolution.
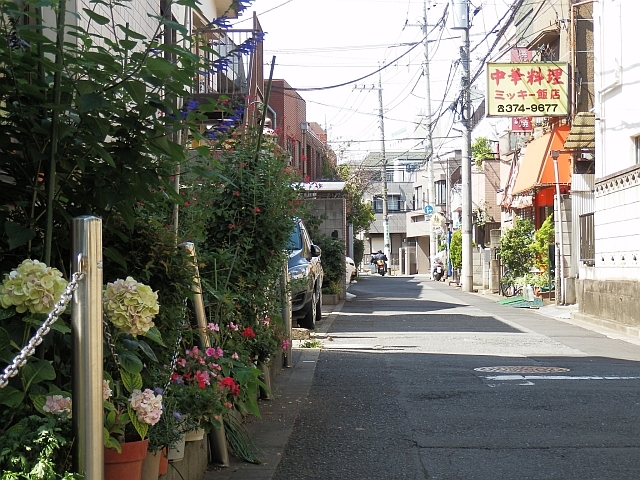
We found this one:
This one is more than large enough for our purpose and it has the added benefit of using a Creative Commons CC-BY-NC-SA license. Great! This means we can freely tweak it and you will want to do this anyway as for our purposes we want a more anime kind of look. This is what some Japanese animation studios do too, to save on production costs: use a photo and tweak it to look like it was drawn.
We used GIMP for our purpose. It is not hard to do and you can probably find tutorials on how to do this, but the basic steps were to:
- Reduce the color depth.
- Run the image through the “cartoon” filter.
- Duplicated the result to a layer above.
- Used the “edge detection” filter on this layer.
- Tweaked the overlay settings to merge it with the bottom layer.
- De-saturated the colors as otherwise the image would be too strong.
The end result is shown here:
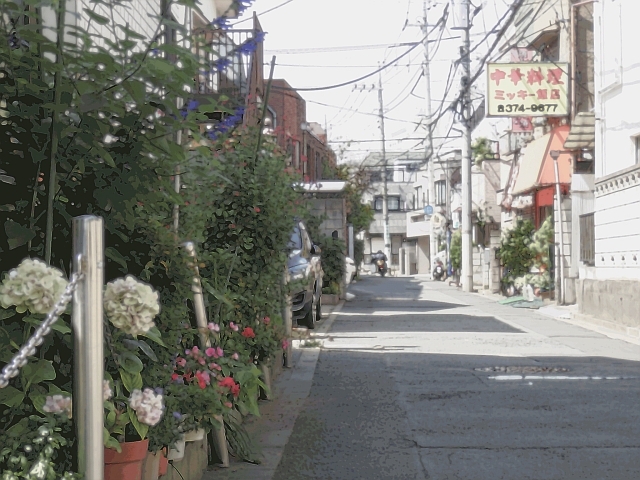
The differences are subtle but they will work much better for our purposes than to use a straight camera shot.
MMD Setting Up
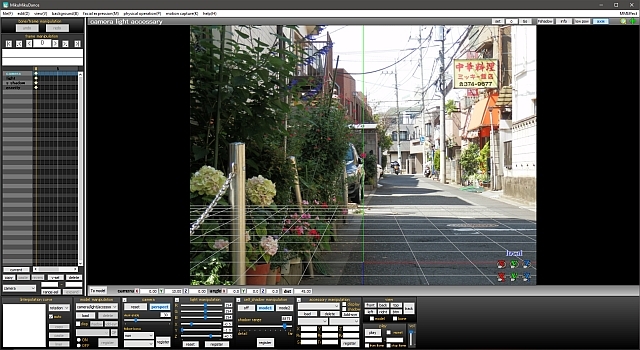
This is important: after you start MMD, set up the screen size to be exactly the same size as the background image. Doing this will ensure the best quality render output. If you need to downsize the image, do this before loading the image into MMD. The image we are using is actually a little larger than the actual resolution of the monitor being used but that’s fine as the difference in size is slight. But ideally, you want your background image to be exactly the same size as your monitor’s resolution.
The image below shows our image loaded into MMD. If you don’t know how to load a background image into MMD, the command function is one of the options under the background(b) menu.
MMD Workflow
There’s nothing particularly special about the workflow for this type of project except as noted in the progression shown below.
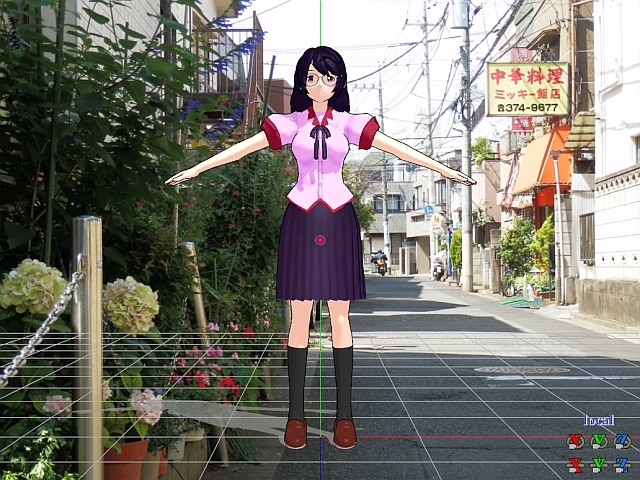
Step 1: Load the model
We will be using an MMD model of Hanekawa Tsubasa. With this type of project, you don’t really need to pay too much attention to the perspective. The background image is merely a backdrop and provided that you were careful with image selection, any issues should normally resolve themselves. Besides which, you’re going to be showing about 3/4 of the model or less.
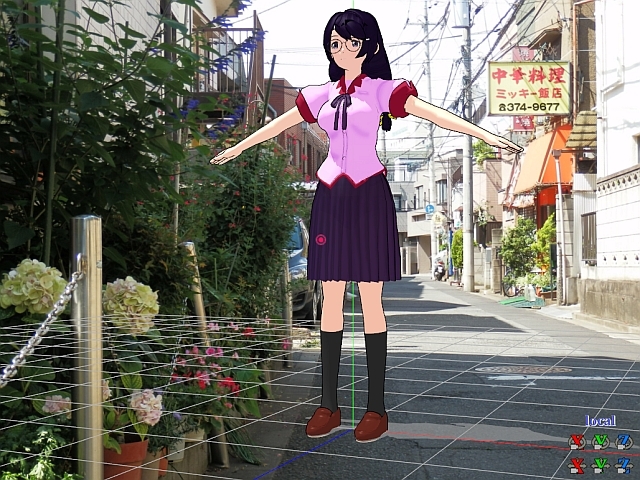
Step 2: Adjust the global lighting
The next step is situational but in general, you will want to adjust the global lighting direction to match the background image. This is easily done using the ground shadows as guides. After this adjustment you can turn off the ground shadows to save on system resources as they won’t be seen anyway.
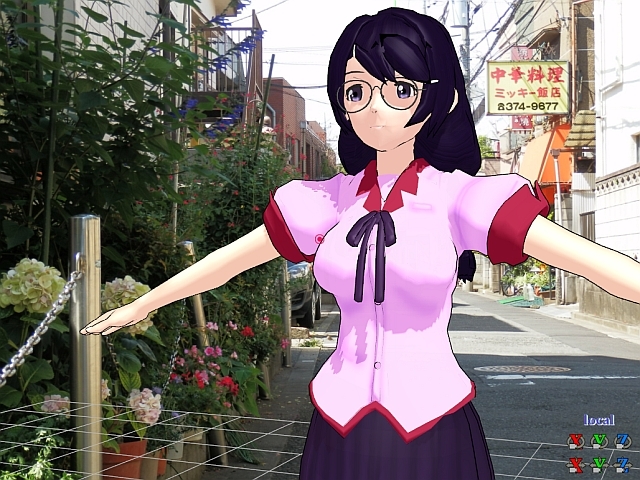
Step 3: Set up your view port
The next step is important. Adjust your view port to match the final view as much as possible. This saves a lot of hassles later. The selected view port settings can be tweaked again afterwards as needed; but your working view should be close to your intended results. Don’t forget to make mental allowances for where your text box will be, if you intend to use one.
Step 4: Pose the model
Posing the model is a straightforward exercise. There are plenty of anime pose references online that you can use for inspiration as was done here. Just remember that even though you will be presenting a 2D view of the model, you still want to make sure that the model is correctly posed by looking at the model from other angles. It is after all a 3D model and requires that it be treated as such in order to get the best results.
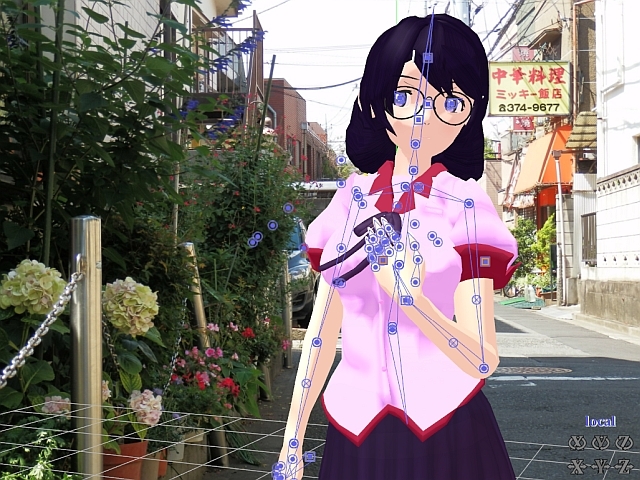
Step 5: Use the correct facial expressions
Perhaps the most important step after the posing is done is to get the expressions right. Expressions on the model helps tell your story. Zoom in close if you have to, as we have done here.
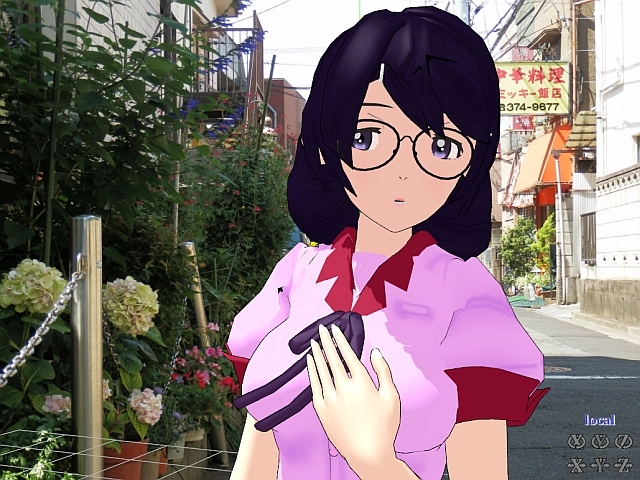
Note that because we are going for a JRPG kind of look, we do want to preserve the model’s outlines. But depending on the model and the set up, you might not want to use the outline at full strength. In our example, the outline thickness has been reduced to 0.5 strength. You may have to revisit this setting again after MMEs have been applied.
Step 6: Apply MMEs
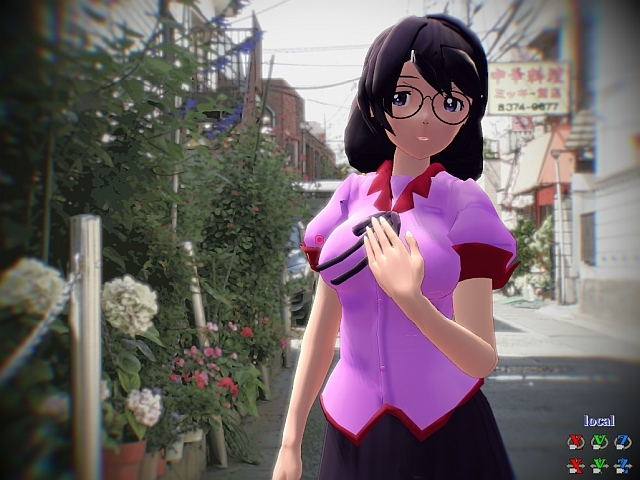
How you shade your model using MMEs depends on what you’re trying to do and the characteristics of the background. We want the model and the background to blend in properly. In this example we adopted the shading schema as indicated below. Note that this is not the only solution, just the route that we have chosen to adopt.
- Main shader: dGreenshader_SUN1.fx
- Blender: HgDiffusion.fx
- Special FX: cheaplens.fx
The results are shown below and if you click on the image you can see the actual quality of the image at its original render size (2048 x 1536 pixels).
This resolution is actually larger than the resolution of the monitor used (1920 x 1080 pixels). This approach works fine on our system as the laptop used to make the render has a very decent NVIDIA graphics card.
If you don’t have a great graphics card, make sure to set both your backdrop image and MMD’s render size to no greater than your monitor’s native resolution. Especially if you are working with a budget laptop, you generally do not want to be attempting to render images in MMD that are larger than your system’s native resolution.
The Finishing Touches
The next part is totally optional as the steps outlined above should already have given you the techniques to produce really stunning JRPG/VN style work just using MMD. Since we are trying to make a faux JRPG image with a text box, you will need to do this in an image editor. Depending on what you want to do and your skill level, you have a choice of apps.
- Use a pro-grade graphics app like Adobe Photoshop or Adobe Illustrator.
- GIMP and Inkscape are just as capable if you are looking to use freeware alternatives.
- You could import the image to your tablet or smartphone and use one of the better photo-editing apps. Some of these have text box functionality built-in.
- In a pinch, you could use Windows Paint or whatever it is called these days. Not the best option but the more current reiterations can do a decent job.
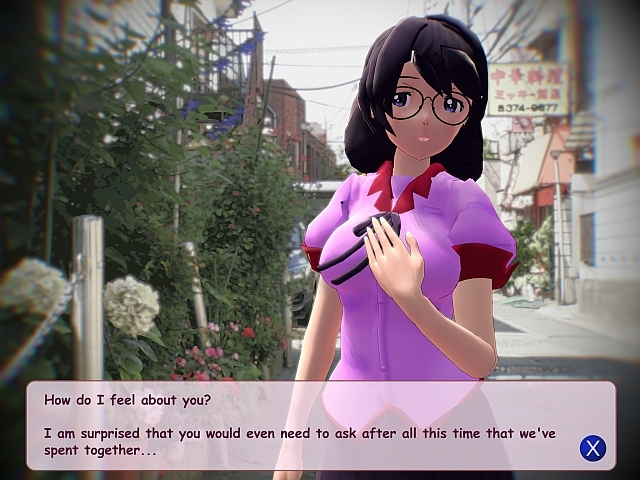
In any case, we used Inkscape for our project. Nothing special here, just add a text box, some text and may be some faux control icons to make it look more like a game. Our final image is shown below and as with the image above, you can click on the image to see it at its original render size.
A Slightly Different Approach
You don’t have to over process the background image for something like this to work using a real world photo and MMD. Now the reason why we didn’t use this approach in the main article above is because it is a little harder to pull off.
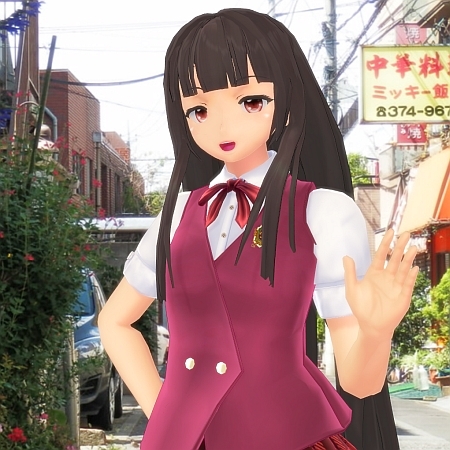
The image below uses the same source photo but slightly bleached to accommodate MMD’s lighting set up which uses a neutral gray light. This tends to make colors in MMD rather dull by default. You can of course alter this behavior using MMEs but when you’re using a background image, it is a little trickier. So it pays to do some prep work on the background image before loading it into MMD.
Konoka Kanoe’s model comes with a really nice set of texture work, so it really helps with the process. So model selection is important. The default models that comes with MMD will probably not work well using an approach like this.
There were only 2 MMEs used to pull off the image below which you can see at its original render size of 1920 x 1080 pixels if you click on the image below.
- ExcellentShadow2
- o_Diffusion
It is as simple as that, it just requires those two effects and a few tweaks to the background image beforehand to get the results shown here. You could take it further and fine tune the colors for a better blend using a good quality image editing program, but as is, the image is already very presentable.
Oh BTW …
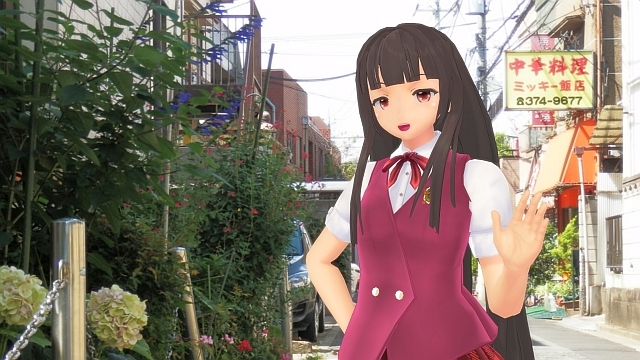
… the same techniques discussed above can be used to make something like the image shown immediately below:
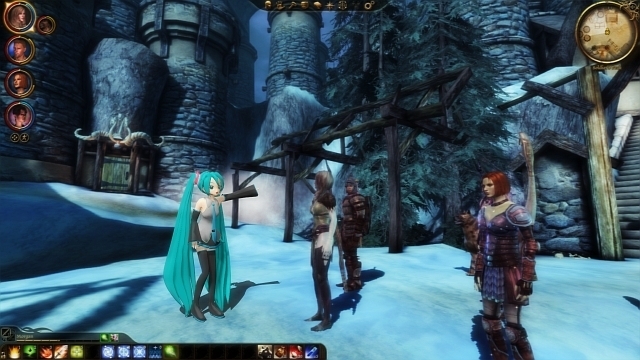
Just for the fun of it, we put the original default Miku into the Dragon Age Origins game. She almost blends in perfectly and it only took about 30 mins to make this render.
The correct MME selection was crucial to make this image happen. Honestly, Miku could be blended much more realistically with some (extensive) post-editing work in a program like Photoshop, but even without going that route, the method used works pretty well for what essentially is just a “joke” image.
MME used here were:
- dGreenershader_NEUTRAL as the primary shader used on Miku.
- ObjectLuminous was used to light up her hair accessory.
- o_Tonemap and SimpleSofton_02 were used as blenders.
CREDITS
- Hanekawa Tsubasa model by taka96:aniki (Bakemonogatari)
- Konoka Kanoe model by hakuhatsu (Negima!: Magister Negi Magi)
- Game capture from Utawarerumono Mask of Deception (Steam/DMM Games)
- Game capture from Dragon Age Origins (Steam/Biogames-EA Games)
- Background photo by Blanche (link embedded in unedited version of this photo displayed above)
- Software used:
- MMD 9.32
- GIMP
- Inkscape
- IrfanView 64
- MME (Miku Miku Effects) used:
- dGreenerShader
- ExcellentShadow2
- o_Diffusion
- o_Tonemap
- HgDiffusion
- Cheap Lens
- ObjectLuminous
- SimpleSofton
- Equipment: LEGION Y530-15ICH
– SEE BELOW for MORE MMD TUTORIALS…
— — —
– _ — –

