


How do you use the ObjectLuminous effect in MMD? How do you get model parts to ![]() glow in MikuMikuDance? What is the ObjectLuminous effect in MMD? LearnMMD MME Tutorials. Where do you download the ObjectLuminous effect for MMD DirectX9?
glow in MikuMikuDance? What is the ObjectLuminous effect in MMD? LearnMMD MME Tutorials. Where do you download the ObjectLuminous effect for MMD DirectX9?
Get Glowing Reviews with the ObjectLuminous effect!
Have you ever watched those videos on YouTube and a certain part of the model or stage is glowing? This is done with the ObjectLuminous effect (It’s actually a group of effects). You can download the effect, it’s labeled as ObjectLuminousAfterGlow, at Beam-man’s site:
http://www43.atwiki.jp/beamman/
 Now put this effect in your “Effects” sub file of your Accessory folder. If not, make one and put all your effects in it (If you do not have MMEffects installed, then see Noko2’s article about downloading and installing MME for MikuMikuDance). This download contains two .x files, seven .fx files and one READ ME file.
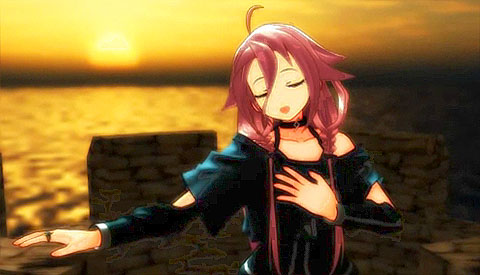
Basking in the Afterglow.
Open MMD and load a model as well as your motion data and WAV file. This would also be the time to turn off the display ground shadow option under the main menu’s view tab. If you forget to do this, the effect will also be displayed on the shadow.
To see this effect clearly, go to the Light Manipulation Panel (LMP) and slide all the RGB settings to 0. Setting the background (main menu) to black background would also help. Get yourself a pad and pencil too. Go to the Accessory Manipulation Panel (AMP) and load the effect. Now click on the MMEffect button located at the top right of your screen. Select the Effect Mapping option. Another window, with two tabs, will open showing the effect and the model’s name. This is the Main tab. The other tab reads OL_EmitterRT.
Now Here Be Dragons.
On the Main tab, select the model’s name then right click your mouse and double-click on Subset-Extract. A list of subsets and check boxes will appear. When  you uncheck the boxes, certain parts of the model’s layers will disappear. If that is a part of the model you want affected; then note that on your pad and make sure to recheck that box. You never want to leave a box unchecked. The main tab is for exploratory purposes only.
When you’ve finished your selections, click on the OL_EmitterRT tab. You’ll now see the same listings as on the main tab. Double click on the appropriate subset name DO NOT use the check boxes. The accessory file window will open with a list of effects: CrossLuminous.fx; ObjectLuminous.fx; OL_BlackMask.fx; OL_MonoSelect_Blue.fx; OL_Selector_ST.fx; OL_Selector1.fx; and OL_SimpleSelect.fx. All of these will glow with different attributes, yet they all load the same way. You can explore these later, but for now let’s double click SimpleSelect.fx An error message might appear-just ignore it and click OK.
This is where it gets weird and counter-intuitive. In order to set the effect, you have to click on the Remove Effect button! (No. you didn’t misread that-just trust me) Do this for all of your subsets and then click OK. You may notice the some of these effects are much brighter than you may like. You can fine tune them in the AMP by registering these changes in the Si and Tr numeric fields.
It is really easy to get carried away with this effect. The adage of “less is more” truly applies with the ObjectLuminous effect. The stars of your film are the model and the action, not the effects.
The ObjectLuminous effect can also be used on stages and accessories. Imagine a scene where your models are walking down the street and the street lights come on or turn off. Another use for ObjectLuminous is creating a flickering neon sign. Subtle touches like this will give your movies a more realistic flair. Turning the effect on and off is done by using the Display check box in the AMP.
I recently uploaded a video to our YouTube showcasing this effect. It’s here: http://youtu.be/0YaUFDMpXaY .
Have fun with this.
Credits:
Default Animasa Haku; Chubby Teto and Skater Gumi by MotionMakerDiva.
Festival Stage by Harner Productions.
Motion Data: Clover Club.
– SEE BELOW for MORE MMD TUTORIALS…
— — —
– _ — –
![]()


How do I get it to glow the color of the object, rather than a bright white?
Can’t say about this one, but AutoLuminous *does* glow with the color of the object; you can try that one.
I don’t see the Model’s name, It only comes up with one tab. (the tab shows the effect name and effect file)
There’s the model mode, when you see model controls, and camera/accessory mode. You switch them by clicking “to model”/”to camera” button in the lower left corner of the viewport.
If this is not what your question was about, please explain your case more clearly.
It works and all but when I do it all it does is bright up the whole model…
i dont have the OL_EmitterRT tab :(
maybe you dont read it, but i help.
your operating system and the effects in the C drive <– this is problem
if your operating system in the C drive but the effects in the D drive or somewhere else it is work for me.
i hope it will work for you too.
i'm sorry i'm not good at english. i hope you understand me
Hello! When I try to render to picture file, ObjectLuminous does not render with the rest of the picture, and I am left without glowing. Any advice?
I don’t know that problem… but, instead of Render to Picture, you might push the Print Screen key on the upper right area of your keyboard… that puts the picture into memory (like Copy)… and then you open Paint or your art program, choose New… and Paste it… and then crop/edit from there. … in MMD, on the View menu the top choice is Separate Windows… and that makes a full-screen image you can print-Screen from.
Or you may try to use AutoLuminous instead.
Hi, when I use the si or tr i doesn’t effect the effect
But I am not able to find it! All I find is Tonemap and ObjectLuminous! Please help me!
Hey Megurine0luka,
You might try the main VPVP site for downloading effects. It’s here:
http://www6.atwiki.jp/vpvpwiki/pages/272.html
Don’t be intimidated by all the Japanese, the name of the effects are in English.
Have fun with this.
-AZ
How do I make the trail of color stop?
Hey megurine0luka,
You can stop the trail of color by turning the effect off in the Accessory Manipulation Panel. Unfortunately, this will stop all the glowing. Those trails of color are one of the hallmarks of the ObjectLuminous effect. You might try playing around with the Si and Tr fields in the AMP at the points where you would want to limit the trails
Now if you want the glow but none of the trails of color then you might want to use the AutoLuminous effect. The effect loads up in the same way that ObjectLuminous does.
I hope this helps you.
it did the same thing for me. on every stage i tried it, it wouldn’t load. it said “post effect can not be specified.”
@Kurea:What Model Do you Use?
When I try and put object luminous on my model, a window says, post effect cannot be specified. help?
Hi,
I wonder whether this effect can be turned on and off during the animation. Say, I downloaded a model with a mechanical eye and I want to make this eye flash matching her speech. Is it at all ever possible with MMD tools?
Thanks.
Thank you for your question!
You can turn this off and on by using the display check box in the Accessory Manipulation Panel.
Just remember, that if that mechanical eye has other parts of the same subset attached along with it.
These will also turn off and on.
Don’t forget to register each change.
Hey Kira,
This is Arizona.
The only thing I could think of that I would recommend is to double check that you loaded the effect in the Accessory Manipulation Panel (AMP) first.
If you try to load it directly from the MMEffect button in the corner, then you won’t see OL_EmitteRT tab.
Hey there, for some reason my OL_EmitterRT tab doesn’t show up next to the “main” tab. Do you know the cause for this? I actually think I saw it there about awhile ago but its not there now…