![]() How do I customize MME effects? Can I edit an MME effect’s .fx file? How can I control the parameters of an effect from the Accessory Manipulation Panel settings? How can I fine-tune the settings of a an effect?
How do I customize MME effects? Can I edit an MME effect’s .fx file? How can I control the parameters of an effect from the Accessory Manipulation Panel settings? How can I fine-tune the settings of a an effect?
Customize MME Effects by Editing .fx Files!
One of the laws of the nature states that there’s no end to discoveries once you start exploring. Apparently, there are more new tricks that this old dog TV can be taught.
In my previous MME tutorial, I introduced the idea of editing .fx files as a way to get more from the OldTV Effect. Modifying parameters directly in the script, though, seems to be a crude and ineffective way to achieve it. You have to edit the .fx each time you want different settings, and as you do, you either lose your older settings by re-editing or you have to keep every version of the basically same effect, cluttering your folder with multiple copies of it. Isn’t there a more elegant and universal method to customize MME effects?
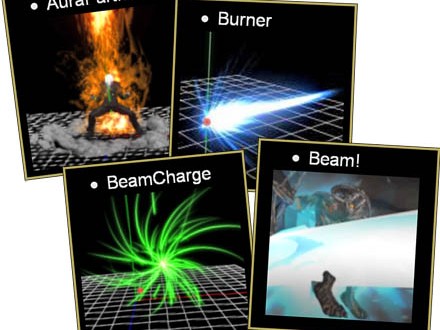
If you try to tune the effect with Accessory Manipulation Panel‘s controls like “Tr”, “Rx” or others, nothing actually happens. Transparency does not change, angle of lines does not turn, no other signs of being aware of controls (at least, other than “display”). It seems that unlike with accessories, those settings aren’t hard-coded into the MMD engine when dealing with effects. On the other hand, among other MME effects, there are those (like Beamman’s Bomb Effect, for example) that are actually *controlled* by the AMP settings… and it doesn’t seem that what the Tr “Transparency” control governs is actually transparency!
How do they do that?
Let’s take a look at ParticleEX_Bomb‘s script: PE_Bom.fx. The very first line of it says… (drum-roll)
float AnmTime : CONTROLOBJECT < string name = “(self)”; string item = “Tr”; >;
This actually *is* the code that gets us the control’s value. The “Tr” you see in the object’s parameter corresponds with the “Tr” setting in the AMP… so that statement says that “Tr” in the AMP will now control the custom variable “AnmTime”. More than that, *every* numeric field in that panel can be accessed this way. It allows MME writers a new degree of flexibility. We do not need to edit the .fx file every time we want to make an adjustment… we set  a control variable into the .fx file once and then make adjustments, on the fly, by changing the value of Tr in the AMP!
Now we see how to customize MME effects. Armed with this new knowledge, we can turn our OldTV into a fully configurable effect.
Let’s try to change the fragment we edited earlier in the OldTV.fx file.
FIRST: COPY the original .fx file and give it a new name: OldTV_Orig.fx (or similar) and keep it so that you can always revert to your original settings. Then, get to work on your custom FX file… right-click, “Open with…”, choose “Notepad” (or whatever your poison is, as long as it’s not rich-formatting. (If you plan to make .fx-changing business a regular habit, you also may want to setup the text editor in “Choose default program…” option for .fx files permanently). Now, let’s go Frankenstein on this one!
//at the beginning:
float RudderTr : CONTROLOBJECT < string name = “(self)”; string item = “Tr”; >;
float RudderSi : CONTROLOBJECT < string name = “(self)”; string item = “Si”; >;
float RudderX : CONTROLOBJECT < string name = “(self)”; string item = “X”; >;…
// … and finally distort
img.x += distortionScale * noisy * dst * RudderSi; //instead of a constant
float4 image = tex2D(Image, img);// Combine frame, distorted image and interference
image.rgb += interference * rand * RudderTr; //can you guess how it works?if(RudderX==0)
{ //instead of erasing the line, let’s make it flexible
image.rgb *= frame;
}
| EDITOR’S NOTE: The WordPress engine used by LearnMMD site edits the posted text as it finds necessary; I can not control it. In particular, it changes straight ASCII double quotes into Unicode curved ones that MME script interpreter does not recognize. If you want to copypaste the fragment above into your own script, make sure to fix them back. |
Now what we previously did by editing the script’s text can be done directly in MMD. By entering a value into the “Si” field of the AMP panel we can change the level of distortion (although for some reason it is multiplied tenfold compared to the original, it *is* adjustable, just use decimals), by setting X to a non-zero value – turn off the frame, and there’s also a new setting we didn’t do before: “Tr” now can set an effect’s visibility gradually rather than turn it on/off like “Display” does. Now we not only won’t have to re-edit the script each time we want the effect to look differently – but we can change it on the fly, involving those transformations in the video as a part of the effect itself.
Our OldTV gets even smarter!
Can we teach it to make coffee too, while we’re at it?
In the next episode: With a Smile! Learn to create unlimited amount of effect-adjusting sliders using facial expressions of a .pmd model!
Need help? email LearnMMD@aol.com to ask questions and get answers!
– SEE BELOW for MORE MMD TUTORIALS…
— — —
– _ — –










I think this is the best topic to ask this:
I need to put this shininess
https://i.ibb.co/G0M9RwF/1.png
on to this leather
https://i.ibb.co/z5K7Wp6/2.png
in order to get this result
https://i.ibb.co/BsyNN76/mpv-shot0007.jpg
What should I edit in the following settings?
#define ALBEDO_MAP_FROM 3
#define ALBEDO_MAP_UV_FLIP 0
#define ALBEDO_MAP_APPLY_SCALE 0
#define ALBEDO_MAP_APPLY_DIFFUSE 1
#define ALBEDO_MAP_APPLY_MORPH_COLOR 0
#define ALBEDO_MAP_FILE “albedo.png”
const float3 albedo = 1.0;
const float2 albedoMapLoopNum = 1.0;
#define ALBEDO_SUB_ENABLE 0
#define ALBEDO_SUB_MAP_FROM 0
#define ALBEDO_SUB_MAP_UV_FLIP 0
#define ALBEDO_SUB_MAP_APPLY_SCALE 0
#define ALBEDO_SUB_MAP_FILE “albedo.png”
const float3 albedoSub = 1.0;
const float2 albedoSubMapLoopNum = 1.0;
#define ALPHA_MAP_FROM 3
#define ALPHA_MAP_UV_FLIP 0
#define ALPHA_MAP_SWIZZLE 3
#define ALPHA_MAP_FILE “alpha.png”
const float alpha = 1.0;
const float alphaMapLoopNum = 1.0;
#define NORMAL_MAP_FROM 1
#define NORMAL_MAP_TYPE 0
#define NORMAL_MAP_UV_FLIP 0
#define NORMAL_MAP_FILE “Leather.png”
const float normalMapScale = 6;
const float normalMapLoopNum = 3;
#define NORMAL_SUB_MAP_FROM 0
#define NORMAL_SUB_MAP_TYPE 0
#define NORMAL_SUB_MAP_UV_FLIP 0
#define NORMAL_SUB_MAP_FILE “normal.png”
const float normalSubMapScale = 1.0;
const float normalSubMapLoopNum = 1.0;
#define SMOOTHNESS_MAP_FROM 9
#define SMOOTHNESS_MAP_TYPE 0
#define SMOOTHNESS_MAP_UV_FLIP 0
#define SMOOTHNESS_MAP_SWIZZLE 0
#define SMOOTHNESS_MAP_APPLY_SCALE 0
#define SMOOTHNESS_MAP_FILE “smoothness.png”
const float smoothness = 0.0;
const float smoothnessMapLoopNum = 1.0;
#define METALNESS_MAP_FROM 0
#define METALNESS_MAP_UV_FLIP 0
#define METALNESS_MAP_SWIZZLE 0
#define METALNESS_MAP_APPLY_SCALE 0
#define METALNESS_MAP_FILE “metalness.png”
const float metalness = 0.0;
const float metalnessMapLoopNum = 1.0;
#define SPECULAR_MAP_FROM 0
#define SPECULAR_MAP_TYPE 0
#define SPECULAR_MAP_UV_FLIP 0
#define SPECULAR_MAP_SWIZZLE 0
#define SPECULAR_MAP_APPLY_SCALE 0
#define SPECULAR_MAP_FILE “specular.png”
const float3 specular = 0.5;
const float2 specularMapLoopNum = 1.0;
#define OCCLUSION_MAP_FROM 0
#define OCCLUSION_MAP_TYPE 0
#define OCCLUSION_MAP_UV_FLIP 0
#define OCCLUSION_MAP_SWIZZLE 0
#define OCCLUSION_MAP_APPLY_SCALE 0
#define OCCLUSION_MAP_FILE “occlusion.png”
const float occlusion = 1.0;
const float occlusionMapLoopNum = 1.0;
#define PARALLAX_MAP_FROM 0
#define PARALLAX_MAP_TYPE 0
#define PARALLAX_MAP_UV_FLIP 0
#define PARALLAX_MAP_SWIZZLE 0
#define PARALLAX_MAP_FILE “height.png”
const float parallaxMapScale = 1.0;
const float parallaxMapLoopNum = 1.0;
#define EMISSIVE_ENABLE 0
#define EMISSIVE_MAP_FROM 0
#define EMISSIVE_MAP_UV_FLIP 0
#define EMISSIVE_MAP_APPLY_SCALE 0
#define EMISSIVE_MAP_APPLY_MORPH_COLOR 0
#define EMISSIVE_MAP_APPLY_MORPH_INTENSITY 0
#define EMISSIVE_MAP_APPLY_BLINK 0
#define EMISSIVE_MAP_FILE “emissive.png”
const float3 emissive = 1.0;
const float3 emissiveBlink = 1.0;
const float emissiveIntensity = 1.0;
const float2 emissiveMapLoopNum = 1.0;
#define CUSTOM_ENABLE 0
#define CUSTOM_A_MAP_FROM 0
#define CUSTOM_A_MAP_UV_FLIP 0
#define CUSTOM_A_MAP_COLOR_FLIP 0
#define CUSTOM_A_MAP_SWIZZLE 0
#define CUSTOM_A_MAP_APPLY_SCALE 0
#define CUSTOM_A_MAP_FILE “custom.png”
const float customA = 0.0;
const float customAMapLoopNum = 1.0;
#define CUSTOM_B_MAP_FROM 0
#define CUSTOM_B_MAP_UV_FLIP 0
#define CUSTOM_B_MAP_COLOR_FLIP 0
#define CUSTOM_B_MAP_APPLY_SCALE 0
#define CUSTOM_B_MAP_FILE “custom.png”
const float3 customB = 0.0;
const float2 customBMapLoopNum = 1.0;
#include “material_common_2.0.fxsub”
Dude… we’ve got better things to do… This is a game of learning and “The answers are out there…” … maybe… … You just have to learn by doing… trial and error. I don’t want to take the time to solve your exacting issues.
https://i.ibb.co/PTyfphj/ice-screenshot-20200209-001931.png
Beautiful image… you seem to be a Master… awesome… got no idea about the effect not loading.
If I understand things properly, specular.png is something you must create yourself for each particular case, based on a texture you want to go specular.
But Reggie’s right, the only sure way to know is to experiment with things by yourself.
“experiment with things by yourself” … make discoveries… and then sign-up to write about your discoveries here, on LearnMMD.com … that’s the whole idea of our site… to become an MMD knowledge-base as we share what we have learned with other enthusiastic MMDers across the planet. As a member of our team, YOU can assist with answering the comments… we get a small handful of legitimate questions every day. Most are simple “getting started” questions… and then there are those similar to the depth that YOU leave for us. Fun, actually!
I’m having a problem with the RainbowRing effect…when I load it it flickers once or twice then disappears. If I set MMD to no FPS limit, it may flicker in a few more times. What’s weird is every other particle system works just fine…I’d like to mess around with the .FX file but it throws all sorts of errors each time I try. Any ideas?
Well, this is weird. I tried the effect and it’s supposed to work out of the box, with no need to tweaking it first. I checked all fps modes and saw no visible difference. Just like with most other effects, you *can* edit its .fx for the way it looks (though you’re recommended to stick to only modifying declared numbers unless you know well the particle mechanics and HLSL language), but I bet that it is not the way you solve the flickering problem. Something in your MMD setup is off, but it’s only by trial and error that you can find out what exactly. The fact that you manage to run other particle effects is especially confusing.
Oh well, let’s start with basics, shall we. What d3dx9_##.dll’s do you have in your C:\Windows\System32 folder? What MS C++ Redistributable versions you can see in Control Panel’s Programs and Features? What is your computer’s graphic card? In Control Panel’s Region and Language->Formats->Additional Settings panel, what are your settings for Decimal and Digit Grouping symbols?
If you use the 64-bit MMD, try to install a 32-bit version into a separate folder, with 32-bit MME as well (you may have to install additional C++ Redistributables too). Load just the effect into it and see if it works differently.
I get an error message
C:\Users\???\Downloads\MikuMikuDanceE_v739dot\UserFile\Accessory\Effects\OldTV\OldTv – Copy\OldTV.fx(186,4):error X3004: undeclared identifier ‘image’
I do not know what that means, I have checked the code over and over again, I changed the double quotes to simple and have made sure to do everything as correct as possible…
I would greatly appreciate your help, and I would like to apologise for my poor English in advance as it is not my first language, so if you do not understand what I’m trying to say, please tell me and I will try to clear it up.
I have no answer, yet… but a quick Google search led me to a similar error and its solution. … so, there is hope… just need to see why “image” is undefined. … ?
Look at the line, “float4 image = tex2D(Image, img);” This is the declaration of “image,” and it’s also the most likely place where your error is popping up.
The most likely cause of this is making a mistake regarding capitalization. For instance, if you had instead typed, “float4 image = tex2D(image, img);” it would give you that error. Notice that the only difference here is that I’m trying to define image in terms of “image”– itself!– rather than “Image”. Or doing it in reverse! “float4 Image = tex2D(Image, img);” will leave “image” undefined.
Line numbers are an essential start to debugging. I’d recommend using Notepad++ at https://notepad-plus-plus.org/ , because it shows you those line numbers in your code. In this case, the “186” in your error code is saying that it’s halting on line 186. What does line 186 say? Does it occur before or after the line quoted above that defines “image”?
Would you copypaste the fragment of your script around 180-190 lines with line 186 marked specifically? The advice above is quite reasonable, but it’s better not to assume what the code would be all else unchanged rather than look at what it actually is.
I’m having some trouble. I’ve tried adding in the code to be able to change the effect in MMD remotely, but it only brings up an error screen when I load the effect. Is there something that I missed?
Apparently, there’s some syntax error in the code that you made while editing. Read the message, it must contain the number of line (and probably even column) that you should inspect.
I tried but I can’t make heads or tails of it
OldTV.fx(24,48): error X3000: syntax error: unexpected toxen “”
24 is the line number, 48 is the column. Without seeing your modified code I can’t say what ever is wrong there.
Here it is
//**************************************************************//
// Effect File exported by RenderMonkey 1.6
//
// – Although many improvements were made to RenderMonkey FX
// file export, there are still situations that may cause
// compilation problems once the file is exported, such as
// occasional naming conflicts for methods, since FX format
// does not support any notions of name spaces. You need to
// try to create workspaces in such a way as to minimize
// potential naming conflicts on export.
//
// – Note that to minimize resulting name collisions in the FX
// file, RenderMonkey will mangle names for passes, shaders
// and function names as necessary to reduce name conflicts.
//**************************************************************//
//————————————————————–//
// Simulation Effects
//————————————————————–//
//————————————————————–//
// OldTV
//————————————————————–//
float RudderTr : CONTROLOBJECT ;
float RudderSi : CONTROLOBJECT ;
float RudderX : CONTROLOBJECT ;
float Script : STANDARDSGLOBAL = 0.8;
texture Image_Tex : RenderColorTarget
;
texture DepthBuffer : RenderDepthStencilTarget ;
float4 ClearColor = {0,0,0,0};
float ClearDepth = 1.0;
struct VS_OUTPUT {
float4 Pos: POSITION;
float2 pos: TEXCOORD0;
float2 img: TEXCOORD1;
};
VS_OUTPUT OldTV_TV_Vertex_Shader_main(float4 Pos: POSITION){
VS_OUTPUT Out;
// Clean up inaccuracies
Pos.xy = sign(Pos.xy);
Out.Pos = float4(Pos.xy, 0, 1);
Out.pos = Pos.xy;
Out.img.x = 0.5 * (1 + Pos.x);
Out.img.y = 0.5 * (1 – Pos.y);
return Out;
}
float distortionFreq
= float( 5.70 );
float distortionScale
= float( 3.00 );
float distortionRoll
= float( 0.40 );
float interference
= float( 0.49 );
float frameLimit
= float( 0.38 );
float frameShape
= float( 0.34 );
float frameSharpness
= float( 8.40 );
float time_0_X : TIME;
static float sin_time_0_X = sin(time_0_X);
sampler Image = sampler_state
{
Texture = (Image_Tex);
ADDRESSU = CLAMP;
ADDRESSV = CLAMP;
MAGFILTER = LINEAR;
MINFILTER = LINEAR;
MIPFILTER = NONE;
};
texture3D Noise_Tex
;
sampler Noise = sampler_state
{
Texture = (Noise_Tex);
ADDRESSU = WRAP;
ADDRESSV = WRAP;
ADDRESSW = WRAP;
MAGFILTER = LINEAR;
MINFILTER = LINEAR;
MIPFILTER = LINEAR;
};
texture3D Rand_Tex
;
sampler Rand = sampler_state
{
Texture = (Rand_Tex);
ADDRESSU = WRAP;
ADDRESSV = WRAP;
ADDRESSW = WRAP;
MAGFILTER = LINEAR;
MINFILTER = LINEAR;
MIPFILTER = NONE;
};
float4 OldTV_TV_Pixel_Shader_main(float2 pos: TEXCOORD0, float2 img: TEXCOORD1) : COLOR {
// Define a frame shape
float f = (1 – pos.x * pos.x) * (1 – pos.y * pos.y);
float frame = saturate(frameSharpness * (pow(f, frameShape) – frameLimit));
// Interference … just a texture filled with rand()
float rand = tex3D(Rand, float3(1.5 * pos, time_0_X)).r – 0.2;
// Some signed noise for the distortion effect
float noisy = tex3D(Noise, float3(0, 0.5 * pos.y, 0.1 * time_0_X)).r – 0.5;
// Repeat a 1 – x^2 (0 < x < 1) curve and roll it with sinus.
float dst = frac(pos.y * distortionFreq + distortionRoll * sin_time_0_X);
dst *= (1 – dst);
// Make sure distortion is highest in the center of the image
dst /= 1 + distortionScale * abs(pos.y);
// … and finally distort
img.x += distortionScale * noisy * dst * RudderSi;
// Combine frame, distorted image and interference
image.rgb += interference * rand * RudderTr;
if(RudderX==0)
image.rgb *= frame;
image.a = 1;
return image;
}
//————————————————————–//
// Technique Section for Simulation Effects
//————————————————————–//
technique OldTV {
pass TV
{
CULLMODE = NONE;
AlphaBlendEnable = FALSE;
VertexShader = compile vs_1_1 OldTV_TV_Vertex_Shader_main();
PixelShader = compile ps_2_0 OldTV_TV_Pixel_Shader_main();
}
}
Apparently, you edited the script in MS Word or some other rich text editor instead of Notepad or something equally simple. All minus signs in it were replaced with hyphens that MME interpreter doesn’t understand. Also several vartiable names were automatically turned into Uppercase, effectively making them *other* variables. Repeat the whole editing thing with an editor that doesn’t presume itself to be smarter than you.
Actually, I did use Notepad. Here’s a link to the edited fx http://www.mediafire.com/download/l0at3x9a01bbxq9/OldTV.fx
I see. Sorry about that. It’s rather WordPress engine played a trick, replacing those minuses in your comment, and making me to accuse you unjustly… and the same engine tricked you previously, when you were copypasting fragments from the page into your script. In lines 24-26 all regular ASCII quotes were replaced by fancy Unicode curved ones. Change them back, and the script will work.
Just did and it works great! Thank you
How can I edit a “falling effect”?
I’m trying to make ’em float and stop rotating.
I assume you refer to a “falling hearts” effect described here: https://learnmmd.com/http:/learnmmd.com/playing-with-mme-using-the-basic-effects-for-mmd-7-39/ (I vaguely remember there might be other “falling something” effects, but most probably they’re controlled the same way). To fix it, open the Falling hearts.fx in your Notepad and find two fragments of text:
float Speed
<
string UIName = “Speed”;
string UIWidget = “Slider”;
float UIMin = 0.0;
float UIMax = 40.0;
> = 10;
and
float RotationSpeed
<
string UIName = “RotationSpeed”;
string UIWidget = “Slider”;
float UIMin = 0.0;
float UIMax = 20.0;
> = 3;
Replace “10” for Speed to 1 and “3” for RotationSpeed to 0 and save the effect. You can try other values until you find what suits you best.
Or you can heed this article to effectively control whatever parameter you need: https://learnmmd.com/http:/learnmmd.com/take-full-control-mme-effects-editing-fx-files/ . The technique used there for Beamman’s Burner fits this one perfectly as well.