


![]() Can I make 3D videos in MMD? Do I absolutely have to have a special rig for it?
Can I make 3D videos in MMD? Do I absolutely have to have a special rig for it?
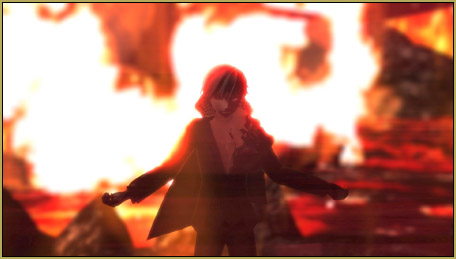
 Stereo MMD videos can be yours too!
3D movies, once an oddity, got a new push in the past decade, and this time it seems to be here to stay. You don’t even have to go to the cinemas to see it. While 3D capable computer monitors still remain an expensive toy for a small niche of hardcore gamers, 3D TV sets are supplied in every electronics shop these days. On YouTube, there are plenty of videos marked with “3D” tag that you can watch if you have one (and if you don’t, Google Cardboard is easy). Question is, how is MMD prepared for the brave new 3D world?
 Natively, MMD already has an option to produce 3D videos. You most probably had seen it every time you rendered your clip… unfortunately, it was permanently greyed out, unless you have a proprietary NVidia 3D Vision kit. Which you most probably don’t. Does it mean that producing 3D videos is barred for you?
Fear not, it still can be done. You’ll just have to go a longer way to achieve it.
First, if you’re new to the art of stereo vision, I’d recommend you to read an excellent Tim Dashwood’s Beginner’s Guide to Shooting Stereoscopic 3D (dashwood3d.com/blog/beginners-guide-to-shooting-stereoscopic-3d/). While more aimed at those who film real-world scenes with real-world cameras, it still contains a lot of theoretical background and handy tips that we’ll find highly useful in our computer-drawn simulated world.
So, what do we need to make a stereo MMD video? Two things: a way to render two video tracks for left and right eye, and a tool to convert them into a single file that can be played by whatever means our potential viewers may have. And both are within our range of capabilities!
I spy with my little eye
 So, we need two video tracks filmed from two different positions representing our left and right eye. It is easy enough to do, if all we need is a static camera for the whole length of our video. Simply render it once, then return to the frame #0, shift the camera few units left or right, and render again. Voila, you’re done! If, on the other hand, you believe that moving camera is more expressive… calculating positions and angles for each point would be hell. So, instead of moving the camera traditional way, we’ll use MMD’s ability to attach the camera to a bone. For that task, a special followcam model needs to be created.
 Open PMXE, go to the Bones tab, and additionally to the center bone that it creates automatically for a new model, create two more bones, both referring to the central bone as a parent. For one of them, you set the X coordinate to 1, and for another, -1. Call them “Right eye” and “Left eye” respectively and save the model.
Now, launch MMD.
Load the project you want to shoot in 3D (I assume you already have the stage, models and all the motions prepared by now). If there’s a camera motion in your project, erase it — you will be doing your own one. Load also the followcam model you just created.
 Switch to the camera mode, rewind to frame #0, attach the camera to followcam’s center bone, and hit Register. Also select “View->Camera lighting tracking” menu command.
Now switch to the model mode again, and select the followcam model’s Center bone. Move it as you’d move any other model’s bone… but this time the whole viewport shifts with it as if you still were in the camera mode. If this experience is new to you, spend some time accommodating to it, then start outlining your camera motion for the video. Remember: *only* move the followcam, not the camera itself!
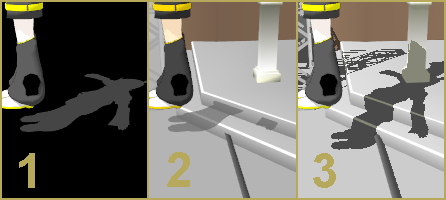
Once you’re done, go back to the frame #0 again. Switch the camera from the Center to the Left Eye bone and render your video (the first pancake *will* be a blob, so don’t bother with large screen sizes and high-quality codecs at this stage; there will be enough time for that when you polish your 3D well enough). Then switch the camera to the Right Eye bone and render once again (comparing to the amount of the work you’ve performed in preparation to that final step, it may feel somewhat anticlimactic… do not relax, though).
…And the two shall become one flesh
So, you now have two video tracks; it’s time to merge them together. Large professional video editing programs like Sony Vegas or CyberLink PowerDirector have that tool in their arsenal… and if you’re professional enough to use those juggernauts in your daily life, you’ll probably figure how to apply them without my advice. They are also quite expensive too, though, so if you’re *not* a professional video designer by career… I can’t expect you to pay their prices for a mere hobby that MMD is, can I? Fortunately, there will be no need for that, as there’s a perfectly legal free tool for what we need at this stage.
Allow me to present you… [drumroll] StereoMovie Maker by Masuji Suto! [applause]. This tiny little program (a single exe file, less than 2MB size, no installer) does not have any sophisticated effects that professional packages boast, but its only single function is exactly what we need.

Launch the program and choose “File->Select Left/Right Movies”. Then, “File->Save Stereo Movie”. The format generally accepted by Youtube for stereo movies is “half side-by-side”, so set up rendering options accordingly. Pay attention to the horizontal size of the resulting movie: it has to be ½ of the original. Then choose the the codec to render the file, and start recoding.

Upload your finished video to Youtube. In extended settings tab, check the “3D video” checkbox. You can also add “yt3d:enable=true” to video’s tags. Once you’re done, watch it using whatever means you have for watching 3D and enjoy fruits of your creation. Do you like what you produced?
…Well, most probably, no.
Asymptotic perfection
3D is tricky. You should have no illusions about that. There are many various ways to botch the brittle semblance of reality that is produced by stereo cameras. I’d recommend you to re-read Dashwood’s Guide once again, but this time, pay attention to whatever could go wrong in your video.
One of most important problems is the balance between stereo base (the distance between cameras) and the distance between the camera and the target. Too big the base, and the eye won’t be able to concentrate on closer objects; too small, and there will be no stereo effect at all to speak of. From the guide, we know that the closest object in the screen should be no closer than 30 distances between “eyes”… but mostly we’ll have to act by trial and error.
Hint: you can buy a cheap pair of red-cyan stereo glasses to appraise the quality of your 3D picture right in StereoMovie Maker without recoding the movie. Select “Stereo->Gray Anaglyph” to see whether the base and the distance has been chosen properly. You can use Left and Right keys to imitate base’s altering on the fly.
Even though you can compensate short distances by adjusting camera base, I’d recommend you to avoid shots too close. Remember: while the stereo effect tries to make you believe that objects can be really close to your eyes, in reality you still have to focus them at the RL distance to your TV set. There’s a limit to how much you brain will agree to be deceived.
MMD physics, sadly, is not your friend in filming 3D. It uses a random factor in calculating bodies’ movement, so even without camera parallax, two clips filmed one right after another won’t be identical. You may see the same braid of hair flying one way with your left eye and another with your right. For your MMD videos in 3D, you’ll have to turn physics off.
The same can be said about certain MME effects, particles in the first place. They also often use random factors and will not produce identical results with same starting conditions. You may film pairs of short clips involving certain MME effects *without* camera parallax to superimpose them in SMM and see whether any particular effect is suitable for filming in 3D, but I wouldn’t recommend to hold high hopes. Body-enhancing shaders, on the other hand, are most welcome and recommended to emphasize models’ relief.
A better mousetrap
Now that we know how we’d like to improve our camerawork, it’s time to replace the primitive followcam model we built with more flexible one. Here’s the one that I built for myself, although if you’re fluent with PMXE, you can try and create your own one (for example, give stereo capabilities to the camera unit that Bandages described).
 First thing that you see when you load it is… the camera. Just for convenience, I made it visible. To make sure it won’t be standing in your way when you start filming, toggle its “Disp” option before rendering actual tracks.
Since we figured out how important it is to keep an eye on camera’s stereo base, it includes an option to adjust it. By default, the base is 1 unit (coincidentally, this is more or less the average distance between regular models’ pupils, so, choosing it as the stereo base puts you as the cameraman and you actors on equal terms). Using “Base narrow” and “Base wide” morph sliders, you can vary it from 0 to 11 units.
Why 11? Because it is important not only to be able to adjust the base, but also to know how *exactly* big or small it is and how much do you want it to be, and choosing right constants, you can make it easier to count, using morph slider’s numeric field. For “Base narrow”, the actual base is (1 – x) units, where X is the position of the slider; for “Base wide” it will be (1 + x*10).
It  is also necessary to have a tool to easily measure the distance to the nearest object. “Target distance” slider makes a pink circle picture appear before you; shift it until you see it cross model’s body. Aim for the closest part of the model that is visible to you. The numerical value of the slider multiplied by 100 will be the distance you want to know. You can use the “Target transparency” slider to make it more permeable if you want. Also shift it with the “target” bone if the object you want to measure is not in the cener of the screen.
 Next tool is controlling the angle of eye convergence. With the “Cross eye” slider you can turn both cameras at once as if focusing on a nearby object. Whether to film with strictly parallel cameras or cross-eye them seems to be a controversial issue among 3D-artists… then again, with MMD, the price of an experiment is not that high. In my experience, *small* degree of convergence produces best results. Do not try to make the object the center of both cameras’ view, instead aim for farthest details of your background and make sure they differ no more than an inch of your screen.
There’s one more tool  that you may or may not find useful to manually adjust followcam’s position. Set the “View angle” slider to the same value that camera’s “view angle” parameter is to create screen border marks, then start moving the followcam. When crosshair’s outer edges reach edges of the screen, and the pink “target” (placed somewhat farther) is exactly at the center of it, you know that the camera guided by your followcam model will see exactly what you see with the “natural” camera. You can hit Register now.
Actually, in the current version of the model, crosshairs is *not* precise. Only top and bottom edges match screen’s proportions exactly at every view angle. Side edges, while looking adequate at view angle 30° (currently MMD’s default) deviate somewhat from sides of the real viewport, so you should only care for them to be symmetrical. Sorry for this inconvenience, but I haven’t figured yet how to make those sides look like they should.
Now that you have proper tools, make another attempt at stereo filming.
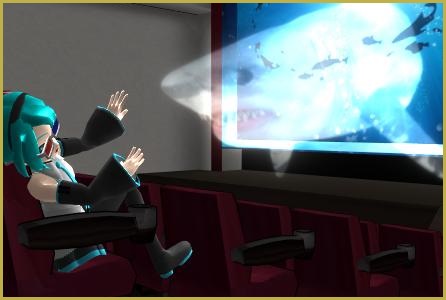
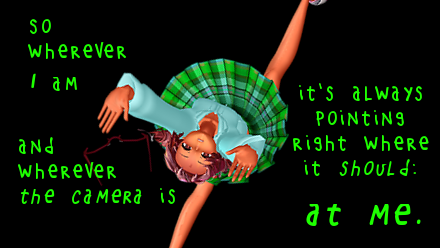
^ Here’s a video I made while writing this article. Doing it helped me greatly to understand intricacies of 3D. Good luck to you with your own endeavors!
Bonus level: Life imitates art
As I said above, you can’t use regular camera motions when working with the followcam, which makes worthless all those .vmd camera motions you download as a supplement to various dances. Still, if you find some camera motion particularly good and really, really REALLY want to keep it in your 3D video, there’s an easy (well, compared to alternatives, at least) way to recreate it.
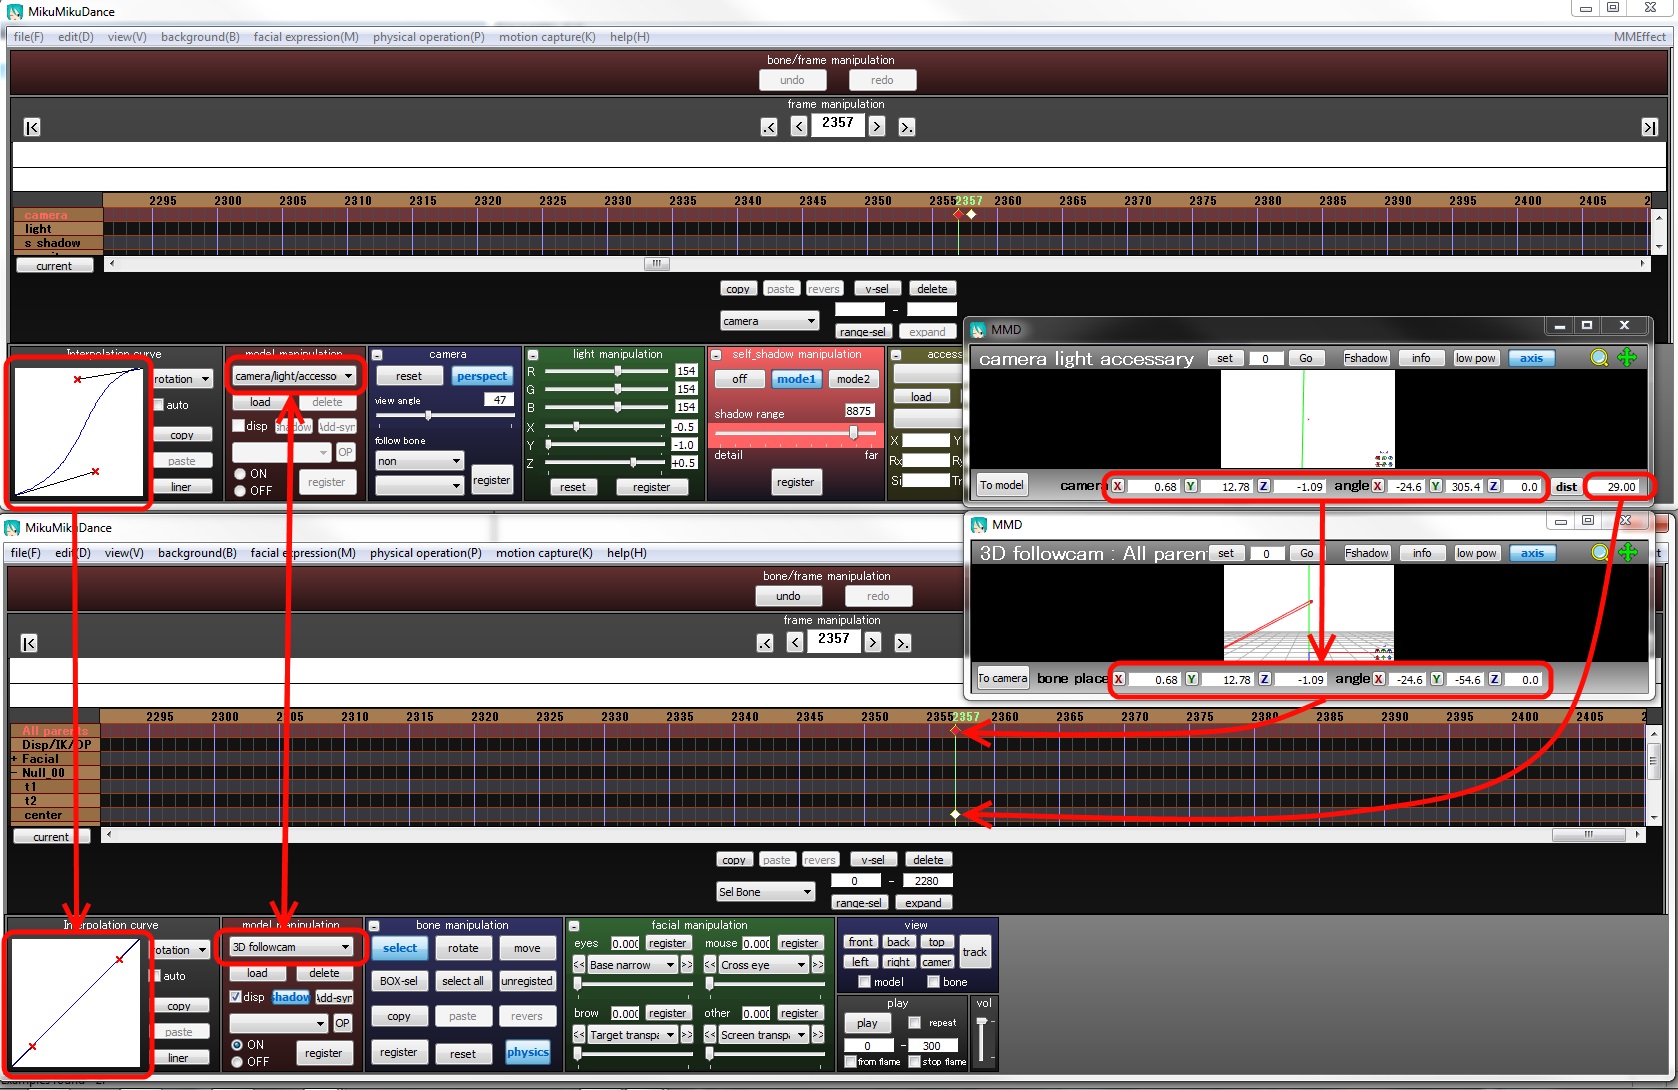
First, to make the process as quick as possible, organize your workplace. Open two instances of MMD and tile them one next to another. In one of them you load the original camera motion (there’s no need to load anything else; you won’t be using other parts at this point, and the load on the CPU that two simultaneous copies of MMD produce is big enough). In another, load the followcam. It also helps to detach render windows from the main interface (“view”->”separate window” menu command) and position them even tighter. If Interpolation Curve panel’s “auto” checkbox is selected in the followcam’s instance of MMD, uncheck it.
Now start transfering data from the real camera into followcam, diamond by diamond (I *wish* there was a way to copypaste the whole batch in a single stroke; alas, MMD only supports copypasting between matching bones, so it’s grinding time). The native camera has its own specific parameters that models’ bones do not work with, though, so we’ll have to distribute it. The X,Y,Z coordinates and angles should go to followcam’s *motherbone* rather than Center.The “dist”, on the other hand, goes into Center bone’s Z coordinate with negative value. Thus, your followcam will recreate camera’s motion most faithfully.
Once you’re done, export the followcam’s motion as a .vmd file, load your project for real, add the followcam to it, and apply the .vmd again. It still needs to be revised, though.
First, you need to check the native camera’s motion for interpolation curves. We didn’t do it before, since it’d slow you down immencely (especially since there’s no copypaste between separate MMD instances, so you’d have to recreate each curve by hand), but if you want the motion as smooth as it was, check every camera’s diamond for interpolation curves (don’t forget to select “all” or you’ll miss something), and wherever there are, pass them to the followcam. Again, rotation and movement curves will go to the motherbone, but if there is a curve for “distance” in the camera motion, it will have to be copied into Center bone’s “z axis move”. As for “view angle”… that’s a separate story.
I’d urgently recommend you not to play with dynamic view angle. First, it will be an additional strain for you to adapt when watching it in 3D. Second, you will have to reassign every diamond in your camera motion instead of simply assigning it once in the frame 0 and forgetting about it… and you will do it again and again *every* time you have to switch between center/left/right eye bones. Not the kind of work you want on your hands, trust me. Reconsider your cameraworks to only have a single view angle through the whole clip.
There’s a certain nuance you must be aware of when converting your camera motion onto followcam manipulations. In the camera mode, MMD allows any possible numerical values to be placed into angle X,Y,Z fields. For model bones, though, it automatically recalculates any input into [-180°..180°] interval. In other words, you can set up a transition from 0 to 359 for the Y angle so that the camera would spin a full circle clockwise around the object it looks at. Trying to do that with the followcam, though, you will only get a tiny shift counter-clockwise instead. To compensate for such collisions, use followcam’s YSpin+ and YSpin- morphs that rotate the camera 360° clock- and counter-clockwise (there are also ZSpin+ and ZSpin-, should you need them).
The visible part of the camera is made with DarkKonata’s accessory.
Miku model: by Animasa.
Stage model: Cinemas by amiamy111
Shark model: Bruce by Valforwing
3D glasses model: by Sefina-NZ
Onscreen picture: Life under the ocean wallpaper
Half-Lambert and Autoluminous MME effects are used.
The video features:
Portal Room stage by Trackdancer.
Chell model by MahoAshley.
Turret-tan model by Uxiebunny
– SEE BELOW for MORE MMD TUTORIALS…
— — —
– _ — –
![]()


Regarding view angle, if it frequently changes, I think you could change between eyes with less work. Attach a dummy bone to an eye using outside parent, and set followcam to the dummy bone when modifying field of view. Then you can switch eyes without changing camera data at each point.
If you load the camera data and motion data into a new project, you have to set the camera’s follow bone for every view angle change, so it’s still work and a place to mess up but only half as much work. If there are a lot of view angle changes, should set it up so the follow bone is the first bone of a model, so no need to open bone list.
But for 3D, the strain of adjusting the eyes is probably more important.
Note that this is a case where you don’t press ‘Frame Register’ in the outside parent dialogue. That would freeze the dummy bone at a relative position away from the 3D camera/eye, whereas you want to be at the same place, so you only press ‘OP register’. If you accidentally click ‘frame register’ while the dummy bone is in its original position distant from the camera, just reset its location to 0:0:0, such as by clicking those buttons below the render area.
Yeah, that’s why I’d recommend better not doing it at all.
I saw a Japanese user asking (in Japanese) how to use VMD Editor, whatever that is, to modify a motion to add or delete an all-parents bone or something, using a spreadsheet.
This tool could probably open camera data and allow you to paste it into motion fields for a model. I think this is it: https://www6.atwiki.jp/vpvpwiki/pages/218.html
It could also do other things. You could probably use it to fix MMD’s simplistic automatic interpolation curves so velocity changes are continuous, instead of having sudden jumps or drops at frames; if you’re good at math.
Interesting stuff! I visited that link you reference… a lot of good info is there. Loading that page using Google Translate seems to work pretty well. I noticed that the link you reference is for Page 218… I clicked-around a little, changing the URL for other pages… and, YES… the other pages are there, as well. … it’s a vast storehouse of MMD information. Thank you for that link!
Yeah, one of the tools links to a thread, which links back to the wiki at page 217. One that I investigated seemed like it might be like a tool that might be linked here on LearnMMD, that promises to ‘smooth’ motions though I’m not sure how effectively.
MikuMikuCrowd is an interesting tool, though I don’t see myself using it. As you or someone else commented here, “MMD is mostly a song-and-dance affair”.
I think what I learned from slowly reading a video for MMDMotionFilter is that 1) motion capture for MMD, even with cameras with depth measurement, could still be improved, and 2) apparently not many people know about or use the “helper bone” plugin: https://www.youtube.com/watch?v=kJPr_9hN8vc
I personally don’t intend to even try to use PMX editor, since I’m using Wine and it doesn’t even run MMD perfectly, but it seems other people might like the plugin.
I watched the video… I had never heard of the Helper-Bones… good stuff! Maybe one of my LearnMMD teammates can write a more detailed tutorial about using them. I will pass that link along to them in my next team-newsletter.
I have played-around with that motion-smoother tool that our EverythingAnimation wrote about. It works… but I would only use it for short bursts of motion, not for a whole animation. It analyzes a motion data and then generates bone diamonds for every bone in every frame in the sequence… solid blocks of diamonds that save as a huge PMM file size. … takes a long time to SAVE and it takes forever to OPEN that saved PMM… can crash MMD. The end-result does show nice finesse in the visual motion.