


 Download NCHLShader2. How do I use NCHL Shader? How can I make my MMD models look more realistic? What shaders should I use? How do I use MME shaders?
How to use NCHLShader2
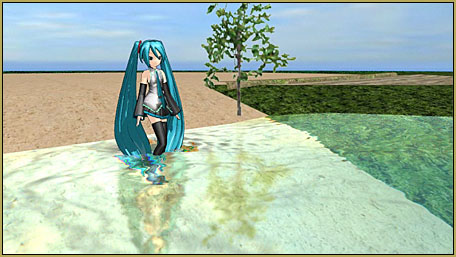
NCHL Shader by nil is a very fun shader to use. The possibilities with it are endless; you can mix and match shaders, tweak the lighting source here and there, edit .fx files and create new ones… And, you get very nice results. With a little bit more editing, it could even look almost… Realistic.But back to the tutorial. My helper for today is ISAO’s Ponytail Sora Amaha. Hi, Sora! Doesn’t she look cute? As you can see, Sora has the NCHL Shader on; she looks great, doesn’t she? Her hair is shiny, her skin is properly shaded, and different parts of her have different levels of shine. Plus, none of her colours look faded or oversaturated.How do we use NCHL Shader?First, load up your model and adjust the lighting. I always leave it at [X: +0.0, Y: -0.2/-0.3].
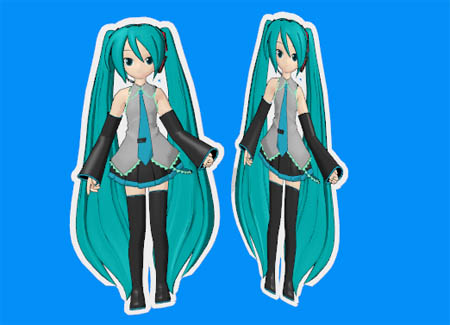
 Sora, please behave… You’ll be cute again, I promise.Remove any spheres…You have to make sure that your model does not use any sphere maps. This is extremely important, because NCHL Shader seems to be allergic to them. Once it picks up a sphere map, it will freak out and make the polygons of the model more pronounced. As you can see in Sora’s hair, the shinier the shader used, the more obvious the polygons.
 Calm down, will you? This was an example.
 Ah, she’s angry. I’m sorry.This problem is easily solved by either opening up the model in PMDe/PMXe and deleting all the sphere map text, or making a copy of the model’s folder (maybe rename it so it’s easier to see the difference), and delete the sphere map files. Try not to lose the original model files.Load the shader…Next, load the shader itself. You can also go into the [Others] folder and find various customized shaders; Basic for basic shading (slightly lighter than NCHLShader outside the folder), Glossy for glossy materials (such as plastic, rubber), Hair, Metallic, Metallic2, Skin (for face and bodies), and Velvety (for cloth).
Feel free to mix and match shaders; you can even edit them by editing the values in the .fx files and saving them as a whole new shader. As for how they’re editable, I’ll leave it to you since they’re easier to be understood if you tried it yourself by changing the numbers here and there, while MMD is open so it’s easy to see what’s changed.Back on topic, she should look like this now.
Yeah, I know it’s dark, we haven’t put in a light source yet… but first. Shadows.ExcellentShadow2…Right now Sora looks rather 3D and all, but there’s a distinct lack of self-shading… We’ll fix that by opening ExcellentShadow2 provided in the effect folder. Just a little bit more, Sora. As you can see, there’s now self-shading on Sora; and the shadows aren’t too clear or aren’t too blurry either, though you can easily tweak by adjusting the Si of ExcellentShadow. You can also adjust how dark or light self-shading is by altering the Tr, though I’d rather wait until a light source is added, to see results better. Then, open up HgSAO in the HgSAO folder. There’s not much of a difference now so there isn’t an image, but it’ll be obvious later.
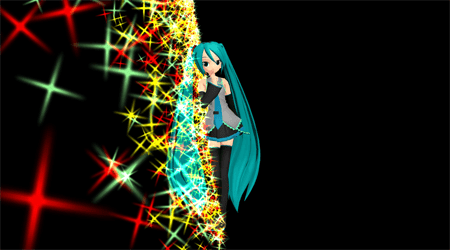
And that primary light source comes in the form of AmbientController.AmbientController… Come ooon, there’s light now!It’s not bright enough, but that’s because we still have several light sources more to add! The main point of AmbientController is to be a primary light source, and it also dictates the colour the main lighting should be. Of course, the model can still be affected by normal MMD colour lighting, but still…
For AmbientController, X/Rx both represent red lighting, Y/Ry green lighting, and Z/Rz blue lighting. Minimum is a 0 and maximum is a 100, for each box. Si determines how bright the light source is. So feel free to go wild. My personal settings are [X:90, Y: 90, Z: 100, Rx: 90, Ry: 80, Rz: 100, Si: 5], but of course, you can change the settings as you like, since different lighting settings work differently for various models.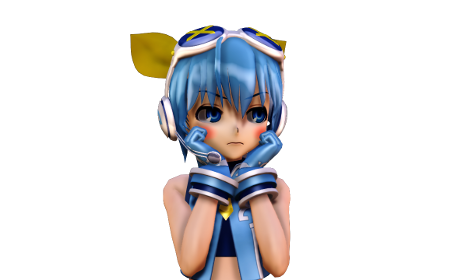 SoftLightA/B works similarly, if not the same as SSAO+Tonemap; notice how the shadows are now darker and more defined, and the colours now seem more vibrant than before! It can be adjusted via Si; increase the value to make the shadows lighter, and vice versa. I normally load both, and leave it A at Si: 2.5, and B at Si: 1.Oh man, I almost forgot Backlight Controller.Backlight Controller
 For giving you that extra ‘oomph’ in your pictures, you need a back lighting source! Similar to Ambient Controller, X,Y, and Z are R, G, and B respectively with minimum value being 0 and maximum being 100, and Si determines how bright the source is; but the similarities stop there. Backlight Controller shines in the opposite direction of the main light source (Ambient Controller), so unless you want mismatched shadow directions, Backlight Controller is mostly for brightly lit/luminous areas, or simply for the cool factor.We’ve done it!
 And that’s it for my tutorial! Thanks for reading, and cheers!– SEE BELOW for MORE MMD TUTORIALS…— — — _ — –
![]()

When I load the excellent shaders it says that it failed to load the file
I was being silly and didn’t realize that I had to go into the accessories. Now my model isn’t dark like yours is in the pictures. I tried it on my “test monkey” model and his clothes where dark https://images.app.goo.gl/xtqYbRWkHBcuSVi49
So… now he looks AWESOME, right? … is that the result you were looking for?
Here’s the download :P
https://bowlroll.net/file/52182
I was wondering is this effect only good for static pictures?
I was trying to use it with motion data but the background model’s floor keep flickering white and the camera keeps panning into white space (I assume thats one of the shaders). Is there a workaround or is this just not a movie method?
Just to check: have you turned off “view->display coordinate axis”? That one makes the scene ground flicker if it is on Y=0 regardless of effects.
Pretty vague tutorial. I followed it like the last guy and nothing is going right. Would prefer a video tutorial or more precise instructions.
Hi,
When I install the excellent Shadow, the MMD will give an error first, then stop working.
Can you help in the conversation?
What does the error message say?
Failed to procces post effect:
DirectX Error : Invalid Call [8876086c]
Update video card drivers and make sure you have DirectX 9.0c.
Thank you <3
So I followed the directions to the letter, and my model still looks the same as before I applied the shader. All spas have been removed, but there is literally no difference in the model. What am I doing wrong?
Well, apparently you did something that was *not* exactly to the letter, but if *you* don’t realize where you misstepped from directions, how *we* are supposed to know? Saying “I did everything right” is the same as saying nothing at all, just as informative. You have to outline your every action, step by step.
Did you try it on one model only, or several?
The rudeness is not appreciated as I was asking you out of desperation, trying it several times on several models on different computers. I was curious to see if anyone else had encountered this as well. Please never mind about actually trying to “help”. I was hoping for suggestions on things I could double check, since I DID follow this exactly, with several models on different computers. I see this is not the case here.
Rudeness has nothing to do with it. As long as you don’t provide *detailed* information about what you’re doing, it won’t be “the case” *anywhere*. Steps outlined in the tutorial are visible to us both; steps you’re taking are known to you alone. You may be *convinced* that the former match the latter exactly, but in reality, this is practically *never* true, and unless you start voicing your every action step by step, nobody will be able to tell you where lies the difference.
One advice: after loading the model into MMD, switch into camera mode and *then* start applying shaders.
Actually, I had this problem as well on my new computer. I’d been quite familiar with the NCHL2 shader at the time, so it was surprising when I installed MMD on my new laptop and found that it wasn’t working, despite me clearly knowing how the shader worked. I was definitely doing it right, and I knew I was. It turned out I needed to update my video drivers.
You shouldn’t jump to conclusions and treat people who are merely asking for help as if they’re stupid.
So how do i delete the spheres, like you mentioned before?
Open the model in PMDE, select the Materials tab, check every material, and if there’s anything in “Sphere” field, clear it.
The screenshot in this article was taken on an outdated version of PMDE, but you’ll find your way around.
Hi,
sorry for bothering you about this again, but I decided to go back and try to run the latest version of PMXE, following the steps that were already provided to me. I even found d3dx9_32.dll and I copied it to multiple places in the PMXE folder (system, launcher, etc.), but it still does not open. I’ve got all of the DirectX9/c++ downloads required. Am I missing anything?
For some reason, the Softlight A and B don’t work for me. Everything else seems to, but when I load up either Softlight (or both of them) the background (If there’s no stage) turns black, and the model gets even darker.
My laptop won’t let me use excellent shader. It says PreEffect cannot be specified. And the Nchl shader looks funny when I apply it.
I deleted the spheres.
When I put it on my model it gets messed up and when I put on other ones like basic etc it looks the exact same as it did before I put the effect on. And I have the spas off the model so I don’t know what’s happening
I got the effect to finally work but when I change stuff in ambient controller lines show up on my model what do I do?
How did you figure it out?
Hello!
I have downloaded the most recent version of the PMX editor and I have all of the requirements for it to run (the c++ pack, NET thingy, etc.), but it STILL won’t open. I even figured out how to unblock it, which I did. what’s going on?? I really want to use the NCHL2 shader but I can’t if PMXE won’t operate. I click it and it simply does not open :(
Even though you said you did, let’s check it: open Windows Control Panel’s Programs and Features section. What Visual C++ and .NET Framework items are listed there? In Windows\System32 folder, are there a bunch of files named like “d3dx9_##.dll”, where ## are numbers in 20-40 range? What is your version of PMXE?
I have the latest version of PMXE from this website… and I can’t find the windows/system32 folder!
(sorry, I feel like i’m being annoying)
The windows/system32 folder… Click the Start button… go to My Computer… double-click the C-drive icon… scroll down to see the Windows folder… inside that folder is the System32 folder. … yes?
Yes! OK! I found it. the three things I found were d3dx9_32.dll, d3dx10_42.dll, and d3dx11_43.dll.
(and I do have the latest version of pmxe ^-^)
Check Troubleshooting page for the section about installing DirectX 9.0.
There’s a simpler solution than editing away all of your models’ .spa files. Go into you NCHL directory and check out Main.fxh. NCHL is using your models’ spa files both as a specular map and as a normal map. This is really cool, if you want to edit your models to use normal maps, but if you don’t, of course most spa files don’t work as normal maps. In order to disable normal mapping, looking for the block starting at “if (useNormalMap)” and just change that section to the same as the “else” that follows– viola! Now you get NCHL for all your models with a single, simple edit.
On the other hand, if you feel like deep spelunking, you can tweak NCHL to take advantage of *both* normal maps and spa maps, but you’ll have to provide your own normal maps. I have to tell you, it looks really fantastic.
BTW, thank you so much for the site, I just started playing with MMD 3 days ago and I would be lost without LearnMMD.
You seem to be knowledgeable on the subject of using various types of maps in 3D graphics. As you get to feel more “at home” with MMD and PMDE, would you care to write about it? LearnMMD.com could use some more of advanced-grade tutorials, and this niche is badly underexplored right now.
I’d be happy to write text, but if I ever feel like wrestling with GIMP I’m probably working on my textures instead of putting together screenshots :) If text is useful, or if anybody needs some help understanding anything so that they can make a nice pretty tutorial, I’d be happy to help.
another thing I found out after experimenting with this effect:
If your model looks way to bright after aplying the effect:
if the model is editable, go to PMDe/PMXe and go to the material that is too bright. Turn the reflection down to about 2 this should fix that.
Remember to turn off edge lines. It`s under Edit, Thickness of Edge line and slide it to 0 or put 0 in the box and press enter. Your models may look weird if you don`t do this.
Correction: It`s under the View tab