Sleepover Gone Wrong
(REMAKE)
~The “Making of” Project~
——-
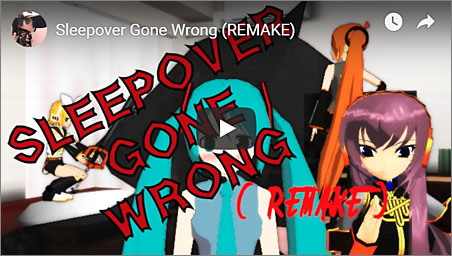
 Originally I was going to recreate an old animation I made years back when I had an older YouTube channel before I deleted it by accident. (Long story short) Which was about a sleepover that the three VOCALOIDS: Miku, Rin and Luka were having. During their sleepover, they were searching for a song to dance to and as they danced to the song they ended up finding, (It was not with the right dance motion though…) they came to a stop when they sensed something behind them…
A dead skeleton/ghost thing (from Legend of Zelda: Twilight Princess, a game made by Nintendo) came out of the ground. The VOCALOIDS were a little freaked out but, not as freaked out as Luka…
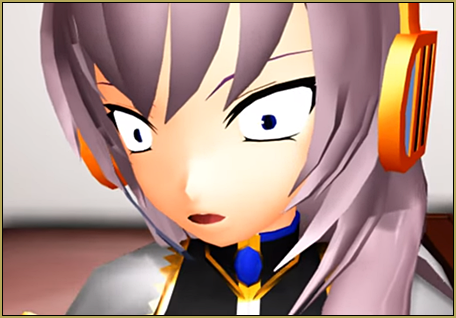
…She fainted from it…
Rin then summons a keyblade (from the Kingdom Hearts games by Square Enix) and starts doing the Ievan Polkka dance while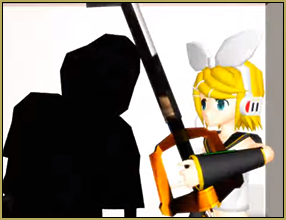 using it as an attack to hit the skeleton in the head to try and hit it back into the ground, where it belongs.
This time in my remake, it has MUCH more effort put into it and even has more to it than the original I made way back then.
I sadly couldn’t find the models I used back then but, I used these old models I found to bring back the nostalgic vibe into this video still. The effects I used also helped with the vibe as well! I’m glad that this animation turned out pretty well in general actually!
The effects I used were previously used effects of back when I made the original animation: AdultShader and Diffusion7.
(Which I’ll talk about later…)
My goal though was to try to remake an older animation–making it better but still it’s the same, yet… improved with a bit more to it. You know what I mean?
I will also include ‘How To Use’ notes in here so you can learn how to get started with the effects I used to make this video! Along with links at the end of this article!
The effects will need for you to have installed MME into your MMD folder.
For example…
[How To Use Diffusion7 and AdultShader]
Diffusion7: download the effect and then it can be loaded from the olive-colored Accessory Manipulation Panel (AMP) in the lower right of your MMD GUI.
Find a link to the Diffusion 7 effect.
AdultShader: effect can be found here.
You apply Adult Shader to particular models you choose by going to the MMEffect in the top right corner of your screen and choosing Effect Mapping. Then you see a list of your models. Select a model, choose the button Set Effect, and navigate to the AdultShader folder and choose AdultShader.fx … see that the effect is applied to your selected model.
… and TA-DAA!! You have the effect on! Not all effects are that easy though, just a warning. I use to always play around with shading effects rather than anything else because they were easier to understand… but now, I’m slowly trying new effects… as you’ll see in this video and/or this article!
Once you get the hang of it, you can also mix effects! If you right click on the effected model/accessory, click ‘Subset-Extract(E)’ and then a list of body parts will appear! If you uncheck the boxes, one by one, you will see the body parts disappear. This is how I can find out which part of the body I want to mix another effect with.
Once you choose the body part, you can replace it’s effect without replacing the whole model with your new effect!
At first, I used to remove the effect first, but then I realized that you can replace the effect without doing so. Just load up the effect on top of the already applied effect when you first made the model possess the effect.
——-
The Party Is Just Getting Started
——
This was actually the second part of the movie but, I started this part to get it done and over with while it was still in my mind.
(Don’t make the same mistake I did by not making a rough draft first before making a video with a story!)
The first and third scenes was going to be easy to remember though since it’s pretty much the scenes I already made in the original…which I remember VERY clearly!
Back to this scene though.
The party starts with Miku, Rin, Luka AND even Neru all in one room. They are all sitting down, doing their own thing while watching the TV screen being controlled by Miku who was trying to turn it on to choose a song.
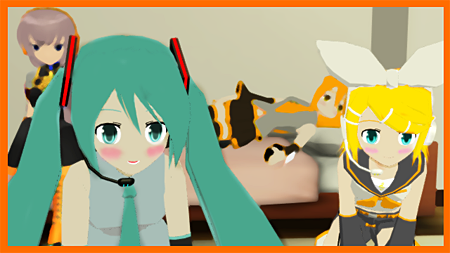
Once the music worked, Neru becomes disgusted or..something about the song bugs her? (It’s up to your imagination for this part since I didn’t really have a plan for why Neru is like this in this video but, the twist happens much later in the animation…so, keep your thoughts until the end!
That’s the thing about some of my animations…you have to use your imagination for some parts…)
She sighs and turns her head around to sleep as she continues to lay in bed. Luka notices this before Miku did, but Luka just let Neru do her own thing–letting her sleep… but then, when Miku notices, she gets annoyed with Neru and hits her with one of her two ponytails. This makes Rin and Luka jump because of the invisible sound wave it caused.
After hitting Neru, Miku turns around–doubting she could still change Neru’s attitude and thoughts about the song she chose. As she sighs, she breaths in and still gets herself pumped up and excited for the dance as Luka and Rin joins in for…
…the MangaLines effect scene! My first time using the effect!
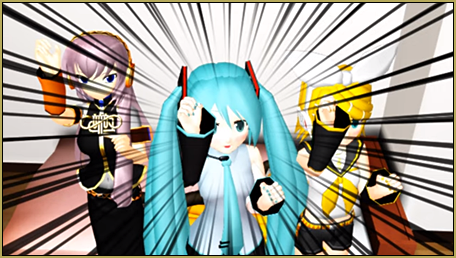
Neru in her anger and pain tried getting up from the bed but instead, she jumps off the bed and leaves the room, closing the door hard.
The three felt awkward about it at first and looked at Luka who shrugs it off.
Miku smiles and then well…
The dance starts!
[How To Use MangaLines]
After downloading it, you load up like you did with the Diffusion7!
Choose the ‘.x’ file on the top of the list that should appear as ‘MangaLines_Center’ and WA-LAAA~! It’s on, just as you wished!
It was A LOT easier than I expected when I first tried it!
The MangaLines will move along with the camera so, you don’t have to worry about controlling it yourself!
——-
Creepy Opening
—–
Like mentioned earlier, I did the first part later on. This is the one I made after I did the ‘The Party Just Got Started‘!
Just like the original, I made a scene in the very beginning of the camera moving and panning from UNDER a computer desk, over picture frames and the same type of idea happens behind the window as the VOCALOID characters dance. That was later on though.
The only difference in this remake is that it’s a different room since I couldn’t find the room I used back then so, the camera moves and pans over different things but…same idea. It moves under the bed, flies into the roof, pans over the lamp, the TV stand, the TV it’s self, the books and finally faces the door–rushing towards it as if something was going to happen as the screen becomes white…
The screen becoming white though…that part happens when I edited it on a program I have been using for video editing called: VideoPad.
The reason for this idea on both versions was to make a creepy vibe, as if the camera was a first person perspective of a monster or ghost.
(Even though there isn’t really a ghost or monster in the upcoming parts of the video…unless a skeleton counts as a ghost? Maybe it does…it’s pretty much a ghost in the Zelda game where the model was based off of anyways…)
Although…now that I thought about it…with it wondering around the room like that, it must of been a VERY curious supernatural thing to do something like that!
——-
The Dance
——-
Just like the original, I made the characters dance to a whole different dance motion than what was suppose to be the one for the song.
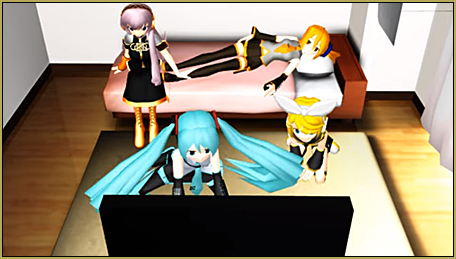
The dance motion was also downloaded and used. I didn’t make the dance motion.
This was all just to focus more on making the animation as original as possible.
(Just slightly different and longer. Plus, I haven’t made a character dance before. I would feel awkward trying to make a character dance for the first time because it may get weird looking on a video that I’ve worked hard on. I plan on making my own dance for a song someday though to start practicing it!!)
For some odd reason though, the dance happened to be faster than planned and/or faster than it looked when I was animating the part. Which is fine though because, if I remember correctly… the dance as not very long in the original anyways.
I also had to change up some bone movements and work on hair physics because the dance motion wasn’t the greatest with these models. (So far, I’ve been manually working with hair physics… just to practice it for now…)
The footing was a nightmare though!
No matter how I positioned the feet, the models and even the stage itself… at least one foot from one of the characters will still go through the floor. I tried to fix it as good as I could though by adjusting the character’s centers/master bones, feet… and I even adjusted the stage if it was needed. Which was a little tricky since I already made some scenes after the dance so, I tried to find ways of fixing it without affecting the rest of the animation.
During their dance… something was haunting them. An unknown living vibe, lurking in the atmosphere, breathing heavily. It happened to fly around the room without anyone knowing, starting from under the bed. Until…
Luka felt a sudden cold air from beneath her and as soon as she felt it, she looked down and saw something that was only in a blur as it flew up onto the roof, in an unexpected speed that causes Luka’s hair to flow all the way up into the air along with this phenomenal object as it flew past her, right in front of her face, it finally shows it’s physical skeletal form as it slowly rises from within the bed…
(I didn’t know if the scalp glitch that happens when this scene shows was fixable with this model or not, so I just left it that way…)
Originally, the skeleton was suppose to come out of the floor but…the room I downloaded was too small and the way the characters were positioned…it just didn’t feel right. I shrugged this problem off because well… my videos tend to have at least one part that is totally random. It always has been like this even back in the old days.
Thus, the Rising from the Bed has been born!
After Luka sees the freaky sight of a skeleton appearing out of nowhere from the bed, it gets to her. She faints. Just like in the original…don’t ask why I made her be the type who would faint though because… well… I don’t know myself. (Haha!)
Miku and Rin looks down at the fainted Luka, wondering what just happened after they get back from their standing pose from their current dance pose that they were on last. That is…until Rin felt something to her right. She glares at what possibly made Luka, out of all VOCALOIDs, faint. That’s when she sees the skeleton.
As Rin activates her “brave and protecting her friends” act, she summons a keyblade from Kingdom Hearts and charges at the skeleton to……attack it?
This was when I decided to use the AuraParticle effect when I figured out how to use it.
I was a little confused about the AuraParticle effect because it was my first time using this type of special effect. 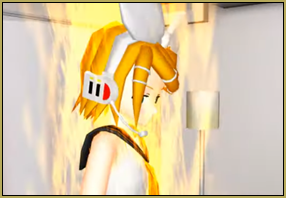 I’ve been only focusing on shading pretty much my whole life because I never had the courage to try new effects, until now! When I first tried-out the AuraParticle, it showed up as a white and faint glow. I was wondering why it was always like this when I tried these type of effects. I asked Reggie and the LearnMMD staff about it and they told me to load a black background. It worked but, I got even more curious after remembering an old tutorial I saw around last year when they mentioned about the arranging trick in the ‘accessory edit’ on MMD and, the ‘draw order’. I remember it mentioning something to do with the ‘th’ number box. I don’t remember how the tutorial went exactly but, I remember that there was an importance to this function. I tried rearranging the AuraParticle with other things that were listed in the draw order but, not much have changed except for positioning the effect slightly. I then thought, “I wonder what happens if I changed the ‘1’ in the “th” number box to a zero? Since it didn’t seem to work with adding a number higher than 1. Maybe because I didn’t have much on MMD at the time when I was only testing the effect out? It’s got to be it.”
After confirming the numeral change, it actually worked!! The actual color and positioning of the AuraParticle was all correct!!
When I mean about positioning though was that since my model was in a model (not accessory) stage, the effect would be on the model but won’t be visible unless you look under–off map. When it was changed to “0” (zero) though, it actually was visible on the model!
(I didn’t need to worry about changing it to “0” when the model was on an accessory stage.)
Before she charges to the skeleton though, she tries to let Miku know that she may have a fight with this dark being. Miku stood in shock for a bit and realizes what Rin wanted. She bends down and drags Luka out of the way.
Very similar to the original, when Miku pulls Luka away, all you can see is Luka being pulled into the edge of the screen twice. Once per camera position.
(Just to add humor)
The only problem about the keyblade scene was that…
The computer I’m currently using(?) can’t read the drop-down box of the ‘OP’ function to attach it to the Rin model because Rin is made in Japanese. Strange thing is…my computer CAN read the Japanese on the MMD program itself; just not the drop-down boxes and notifications. Very odd. This is okay though because, I did manage to get the keyblade on her hand at least…attached to the one finger though. Not everyone holds objects the same way after all, right?
Now the real question is…
Will Rin really defeat this evil dark being?
Keep reading to find out!!
[How To Use AuraParticle]
Find the file as if it was Diffusion7.
Once you find your AuraParticle ‘.x’ file, it should show up. If not, remember what I learned! Either load up a black background or, go to the ‘Background’ on the top toolbar of MMD. Click on the ‘Accessories Edit’ Then go to the box next to a “th” and change the number to ‘0’.
There ya go!
Wait…
It’s thin…
Almost…too thin…
That’s alright! Go to your ‘Si’ box in the olive Accessories Box! Change the number from ‘1.000’ to ‘2.000’ or, even higher than 2.000 if you like! Then, you can watch your AuraParticle grow up fast and mature before your eyes! You have raised it well!
[How To Add Motion Data To Your Model]
I think it’s possible to load it by simply going to ‘File’ on MMD’s toolbar and then choosing the dance motion after choosing ‘Load Motion Data’ but…what I’m use to doing for some odd reason (I may get rid of this habit eventually…) is something longer than that.
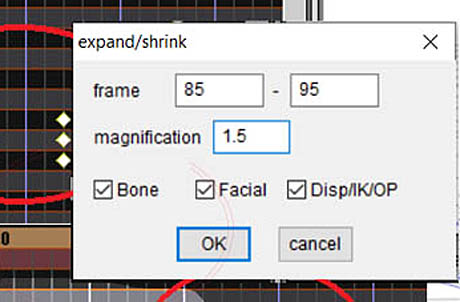
I go to ‘Edit’, ‘Select All Bone Frame’, ‘Facial Frame’ and ‘Disp/IP/OP Frame’. THEN, add the dance motion.
Although, I’m sure that if you did it the simple way, you’d still need to do this after you load the motion in order to move you model without it slowly moving back to where it was first loaded up on, as if it was being pulled to the center by an invisible energy from either mid-air or from an another model!
(The force is strong with MMD)
What I did to prevent that was select all of those and then go to ‘Edit’.
After getting there, you click on ‘Apply Center Position Bias’ and move your character that way.
——-
Keyblade Meets Skeleton
——-
…Nope! She doesn’t defeat the skeleton! Instead, she ends up doing the Ievan Polkka with the Keyblade as an advantage to hit it in the head, non-stop! Just like in the original!
 The skeleton’s worst nightmare;
being forced to stay in one place;
getting hit in the head forever by an orange lover’s wrath;
No where to hide. No where to run.
. . . .
No, I’m kidding. Rin’s arm has to get tired eventually! So, what will happen after Rin bugs the skeleton by hitting it in the head? We’ll see…
For this scene, I tried to match what happened in the original animation but, if I remember correctly from back then, I didn’t put much effort in Rin’s arm. I use to just let it wave up and down as it hit the skeleton. This time, I at least bent her arm so it would look more comfortable as she hits the skeleton.
Out of curiosity, I also got to try an effect I haven’t used in forever! The metallic effect! I only used it on the keyblade though…
…I could try adding the effect on the characters later as well…
The gravity was also set up and not done manually for this scene. Since it would only be the chains moving, I thought it shouldn’t be too bad if I set it up instead. You can see Rin’s hair flicker a bit but, it’s not that noticeable.
At one point, I thought of trying out the Ray Moon Floor effect on a model (which came with a stage I downloaded), just to see what it would be like…
Bad idea.
I added the effect on Miku and she looked like a zombie. “A sad zombie” according to one of my friends when he saw it.
That’s when I realized… if that effect made a model look like a zombie… how well would it look on the skeleton?
Turns out it was not that bad actually! Not much changed but, what do you expect from something that already looks like a zombie in the first place?
[How To Use The Metallic Effect]
You apply this effect using the MME Effect Mapping function like we did for AdultShader.
Summon the MME and double click on the model in it’s list and then load up the effect once you find the ‘Full and Metal Glass’ folder. Go in there and eventually you’ll find 2 folders: ‘Full_and_glassDP’ and Full_and_MetallicDP’. You can use the glass one if you like but, I used the metallic one since the two has different looks. Just to let you know…it can REALLY change your model, depending on how it’s made though…
I won’t spoil it, you may find out yourself! It’s actually pretty fun to goof off with! Luckily, MME effects don’t effect your model forever. Just during the MMD performance.
[How To Use The Ray Moon Floor Effect]
Originally I got this effect that came with a Moon stage so, I’m not actually sure if it was really meant for anything else but, you find pretty interesting results when you experiment!
You load the effect up by going to MMEffects and well…do the same as if it were the metallic effect! Find the effect, load it up on your model/accessory. Then…have fun goofing off and seeing things you’d never imagine yourself seeing!
Just like every effect, it’s best to goof off before using it on any serious animations! So go crazy!
… NOT TOO CRAZY!
——-
Neru’s Return
——-
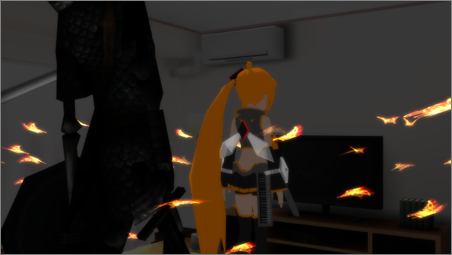
The lights flicker on and off, causing Rin to stop hitting the skeleton. Butterflies (that were on FIRE!!) started to appear out of nowhere in the dark when the lights went out.
Rin turns around to see a very faint light grow in the ground and then, out comes Neru!
Although…she changed and looks a lot different than usual!
As Neru was fully summoned from the ground and scoffs (or laughs?) at Rin as she could picture her reaction to the new look and being summoned out of nowhere. She also knew exactly where the skeleton was, too, and then that’s when I used Reggie’s “Evil eye” effect to make her look more dramatic when she glares at the skeleton, right before attacking it.
This was probably the first time I made a character kick in the air on MMD so, it wasn’t the best. I tried to make it seem like other parts of the body move along with the kick as well but, I guess I only moved the bones too slightly–making it less noticeable and the kick just seems too simple. At least, in my perspective at the moment…
It’s still better than something I would of done on the past though! That I can say! That’s the one thing I’m happy about this kicking animation.
After kicking the skeleton down as it collapses into pieces onto the bed, Neru tries to regain balance as she notices that she landed on the bed.
If you jumped on your own bed when you were a kid, you probably know the feels of balancing on it.
(It’s worse on a water bed…don’t try that at home kids! In fact, don’t jump on your bed in general!)
While trying to regain her balance, Rin tries to help her but in Neru’s confidence, she declined Rin’s help. She actually manages and notices Rin was looking at the butterflies in wonder. Neru smiles even more than when she hit the skeleton and snaps her fingers which causes the butterflies disappear and the lights were turned back on.
Rin’s face is priceless the second when the lights were turned on. I’ll let you watch the video to see it though!
[How To Use The Fiery Butterlies]
This was the same as loading up Diffusion7! Load it up on that olive-colored AMP box and you’ll see…
Wait…why are there white invisible butterflies?? That wasn’t in the script!!
Oh…wait…I just had the flashback of back when AuraParticle did this to me!
Now, I think you know well enough to go to the ‘Accessories Edit’ and changing the “th” to ‘0’.
Before pressing “OK”, make sure you have a fire extinguisher…those butterflies are a fire hazard!
[How To Use The Lit Up Summoning Circle]
Did you really think it was a summoning circle!? I’m kinda glad but, no. It’s not. It’s actually the defualt ‘Floorlight01’ accessory which I was able to control using a dummy bone. (Or in MMD’s case, a Dammy Bone!)
You don’t need the dummy bone but…it’s helpful to position without typing in and trying where numbers will place the light.
How do you attach it to a dummy bone, you ask?
Once you load up the Floorlight in the accessories box, you set it in that box to Dummy Bone rather than the Ground.
Now your asking how I can change the size of the light?
Pretty much (not all the time) the same as every other accessory…you change the size by changing the ‘Si’ number! If you want to make it look like it was off and then it starts growing, glowing brighter and brighter…
You want to start the accessory’s at ‘0.000’ from one frame to an another frame. On that next frame, you can then finally change the ‘0.000’ to any number you want. It depends on how big you want the light to open up!
One of these days, I gotta try finding an actual summoning circle effect…
That’d be fun!
——-
Flooding Bathroom
——-
As for something a little extra, I added an another animation–still related to the main video–as something to add onto the credits.
I actually decided to try using the Metallic/Glass effect ONTO the characters but, their faces looked creepy with it on. So, by doing the Subset-Extract option on MME, I replaced their faces and skin with the effect that I used on the previous scenes to replace the effect on their faces and skin.
AdultShader.
This video shows Luka getting up from fainting in a flooded bathroom where Miku brought her to.
I guess Miku thought the water would help? Either way, it did!
Right when they feel more relaxed when Luka got up, something jumps into the bath…
They didn’t look directly to where they heard the splashing but they knew something splooshed it’s way into the bath!
Almost right after when the skeleton fell in, Rin jumps into the pool to go after it.
Neru afterwards.
This makes strange/freaked out faces on that are hilarious on Luka and Miku!
The video then ends along with the credits and then, a slideshow shows of some silly screenshots I took during the making of this video!
[How To Use Beamman’s Water]
By reading about it in many other articles/websites, you probably noticed it sounds complicated. I even thought it was pretty complicated!
This time though, I’ll try to make it sound more simple by typing up on how I managed to get water in MMD! Learn about Beamman’s Water Effect.
First what I did was well… the AMP Accessory box is our best friend when it comes to effects… usually.
Load up the water effect from there. There are MANY water types but, I’d choose any because you can always resize it in the accessory box.
After loading it, it should appear.
(It depends which effect where you downloaded it from…I got it from someone who already set it up to be used by simply using it. I changed some of the kanji to english, just in case though…)
If it doesn’t look right, you gotta load up a stage or a dome. It should look pretty afterwards! It makes you want to go swimming now, doesn’t it?
——-
CONCLUSION
——-
If your still reading this, congratulations!! YOU MADE IT TO THE END!!
This is just going to be the conclusion where I talk about how I felt about writing this and the animation. In fact, did you know I was making this article as I worked on this project? It was hard work but, fun! If it was possible, I could get use to this as a job actually! Although I didn’t edit this until I finished the video.
I wasn’t actually going to add a video onto the credits but, I thought about how cool it would be like to try and add a whole scene onto the characters instead of having a character with a transparent background on the credits.
(Which I usually do in my videos)
I may even do this more often for future bloopers in my videos!
I took a break of animating on the day after rendering each scene, which is why it took a long time. Plus, I had to find timing to continue on my work because it’s hard to concentrate otherwise. There are things I still need to work on rather than typing articles and animating so, it probably won’t be always expected that I’d quickly work on the things I enjoy doing. Such as animating and typing!
Thanks for reading my very first article on LearnMMD!! I hope to write more in the future!
Now for the links…
——-
Links:
——-
[NOTE: These notes are only links to the effects used!
The links to everything else will be displayed on the Youtube video’s description!]
–Full_and_MetallicDP
(https://www.deviantart.com/xoriu/art/MMD-Shader-Preview-3-456570375)
–Ray Moon Floor
(https://www.deviantart.com/ketokeas/art/Moon-Kingdom-MMD-DL-537661121)
–Diffusion7
(https://onedrive.live.com/?id=EF581C37A4524EDA!108&cid=EF581C37A4524EDA)
–AdultShader
(https://www.deviantart.com/mikumikulizzie/art/MMD-MME-adultshader-download-307764199)
–MangaLines
(https://harigane.at.webry.info/201209/article_1.html)
–AuraParticle
(https://www43.atwiki.jp/beamman/)
–Butterflies
(https://www.deviantart.com/chestnutscoop/art/MMD-Fire-Butterflies-DL-373916048)
–Water
(https://ux.getuploader.com/BeamMan2/)
– SEE BELOW for MORE MMD TUTORIALS…
— — —
– _ — –




awesome job keep up the good work
Hi Lightning!
Thanks! You keep up the good work too!