


 What are normals? What are normal maps? How can I use normal maps in MMD? How can I fix my normals? How do I make hard edges in MMD? How do I make normal maps? How can I modify normal maps?
What are normals?
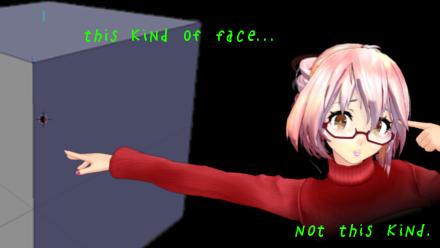
A normal is the line that extends out orthogonally from a face.
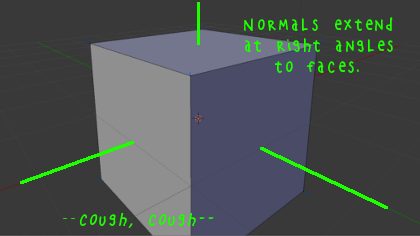
Orthogonal is a fancy way of saying that it extends at right angles to the face. For instance, if your desk was a face, the normal would extend straight up– or straight down.
The word is confusing, because you may have heard of normalization, which means something different. Normalization means when you take a line and lengthen or shorten it until it’s length is exactly one unit. And normals are normalized too! But they’re two different things, and a lot of things are normalized that aren’t normals.
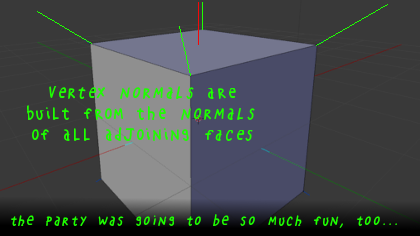
Once you get to MMD, there isn’t any such thing as a face. There are only vertices. So PMXE takes the normals of all of the faces using a vertex, averages them, and assigns that to the vertex. This is good for making smooth surfaces.
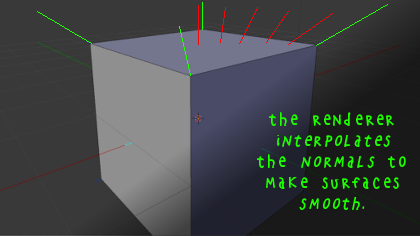
When MMD draws pixels, it looks at the three vertices that make up the pixel’s face and figures out where the pixel lies in relation to those vertices. Then it sort of averages the normals of the three vertices and uses that value for that pixel. It uses something called interpolation to make the normals change smoothly along the face.
Normals are about lighting
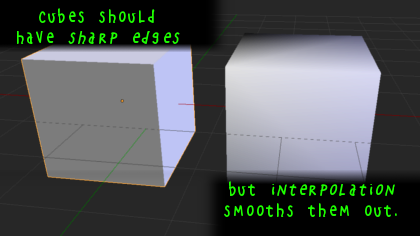
Since normals are really important in lighting– which is really, really important in rendering– this smooths out the lighting. Even when your vertices are chunky, the lighting will flow. Sometimes, it’s a lot smoother than we’d like….
When MMD renders a pixel, the pixel’s normal is as important as the pixel’s location. Next half moon, take a look at the sky: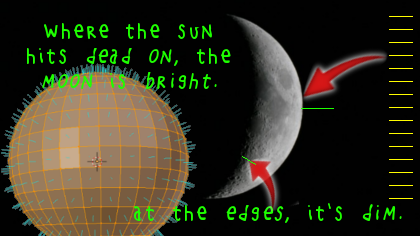
Even though it’s night, the moon is far enough away that it’s still being lit by the sun. When light strikes a surface head-on, it’s very bright, and so in the picture above, you can see that the sun must lie off to the right. As the angle between the sun and the moon’s surface changes, less and less light gets reflected from the moon to our eye.
MMD does the same thing when it draws models. It uses the normal to figure out how strongly that pixel should be affected by lighting. And there are other effects, like specular highlights and sphere maps that also use this normal. For instance, sphere maps need to bounce off of a surface to figure out what to draw, and the angles that they bounce at depend on the normal of what they’re bouncing off. Just like a super-ball bounces strangely when it hits an odd angle.
Changing normals with new vertices
Since the vertex normals are the average of the adjoining face normals, we can change them just by creating a new face. Now that we understand that, we can use this! The cube that we made earlier didn’t look very cube-like, but by cutting new faces into it, we can adjust how hard its edges look.
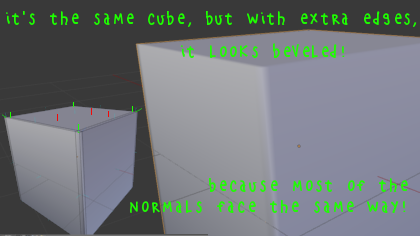
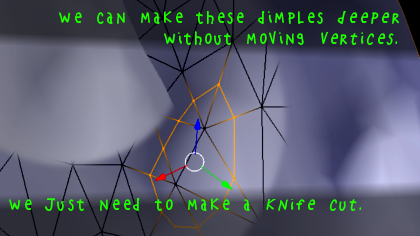
This isn’t just for hard edges! You can make pits or hills seem deeper or taller just by making a knife cut around the feature.
Okay, but how do I fix them?
Mostly, modelling packages like PMXE or Blender will manage your normals for you. There shouldn’t be much you have to do under ordinary circumstances. But we all know that circumstances aren’t always ordinary.
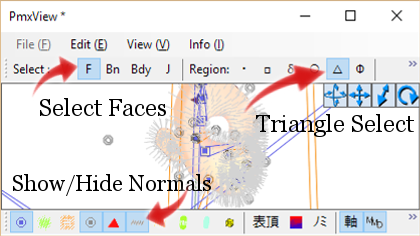
Throughout all of this, I’m going to be using EosCustom3D’s translation of PMXE 0.2.2_t1.1. Your version might look different and you might have to hunt around for some of these options.
Reversing normals
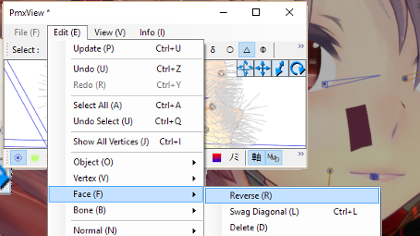
Remember how the normal on your desk could go up– or could go down? Both directions are orthogonal to the surface of your desk. Tools like PMXE don’t always know which direction you want the normal to face. When PMXE gets it wrong, you get backward faces that might not show up on your model. To fix this, select the face in PMXE and use edit-> face-> reverse. Your normals are now fixed!
Recalculating normals
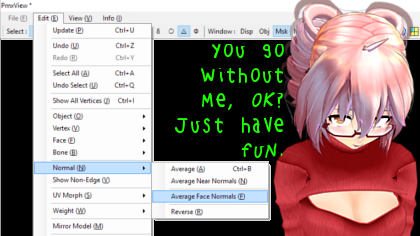
For various reasons, sometimes normals just get messed up. Maybe it was a different program you used. Maybe you made some manual edits that didn’t work out. Who knows? It’s okay, it’s easy to fix. Just select the vertices with weird normals and use edit-> normals-> average face normals. This will recalculate the normals of all of your selected vertices.
Joining normals
Sometimes you need to make a continuous surface that is composed of multiple sheets of vertices. Maybe there are multiple materials involved; maybe you’re doing it to create a texture seam. When this happens, vertices on the edge of each mesh don’t know what they’re supposed to be attached to. Their normals don’t look right, and you get discontinuous lighting.
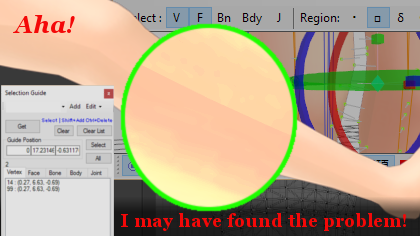
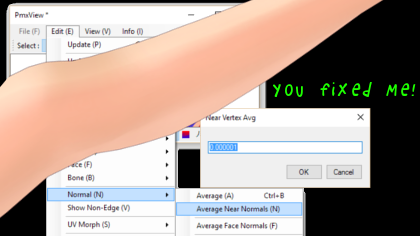
Thankfully, this is really easy to fix. Select all of the vertices that might be a problem and use edit-> normals-> average near normals. Then enter a small number that represents the maximum distance between the normals you want to join. A very, very, very small number like 0.000001 is usually appropriate, because these normals should be right on top of each other!
What this does is look for clumps of vertices. When the vertices are close enough, it figures out a new normal based on the normals of all of the clumped vertices. Then it assigns that normal to all of the vertices in that clump. It’s a lot like joining near vertices, but just for normals!
Manual Edit
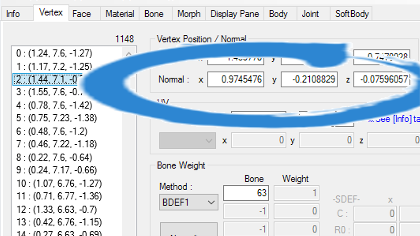
You can directly enter normals in the vertex tab. Mostly, this is tedious and not worth the effort. But you can use it, for instance, to create a very sharp edge.
What’s a normal map?
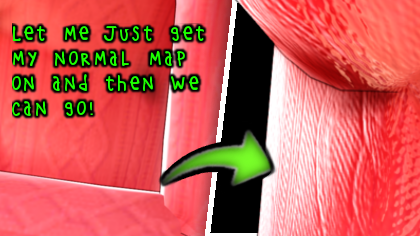
A normal map is a special kind of texture. Instead of containing color information, it contains vector information. Each pixel of the texture image– each texel– describes an extra normal that it wants MME to add to the regular normal when rendering the image. Since a single face can consist of a lot of texels, that adds a lot of detail, much more than you’d ever be able to create just by making more vertices.
Even though normal maps don’t really contain color information, you can still look at them in an image editor. It’s possible, but difficult, to draw them by hand. They’re usually made from very highly detailed versions of a model or calculated from a hand-drawn, black-and-white height map. Since texture artists frequently draw shadows into their textures, there are utilities that you can use to generate normal maps from regular textures, but they don’t always work very well.
If you just want to get started with normal maps, you’ll probably want to use normal maps that other people have made. There are two different kinds of normal maps:
Model-space normal maps usually look like a rainbow. The vectors they code are measured relative to the whole model. Tangent-space normal maps usually look overwhelmingly blue. The vectors they code are measured relative to the individual faces they describe. For MMD, you’ll want to use tangent-space normal maps.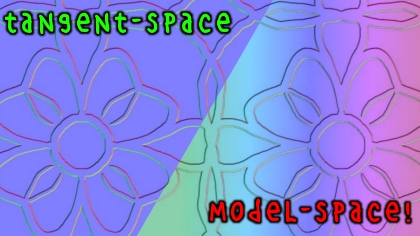
Unfortunately, vanilla MMD doesn’t support normal maps. But there are a lot of good effects packages that do!
Understanding normal maps
If some of the stuff in this section doesn’t make any sense, don’t worry! It’s not that important. Come back to it when you want to understand more.
You might think that normal maps are shaping your model. But they aren’t, not really. They’re only adjusting how light affects your model. Sometimes, that’s going to create some strange effects. It can lead to situations where you can’t tell if something is bulging inward or outward, for instance. This is a lot like the way a 2D picture of a cube can seem to turn inside-out. In more modern rendering engines, normal maps are often accompanied by a displacement map that actually does move the pixels in a face.
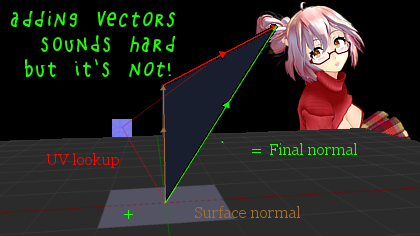
Tangent-space normal maps code their angles as vectors— normalized, 3D points used to represent a line from the origin (0,0,0)– that are added to the existing face normals. Red represents the distance in the X axis, green represents the distance in the Y axis, and blue represents the distance in the Z axis. That’s why they’re so blue: a well-designed normal map should generally face the same direction as the face, out toward the viewer. To code these colors to go both directions on their axes, normal maps are coded so that 0.5 (or 128, or F0, depending on how you’re looking at colors) represents no movement along the axis. Values lower than that go one direction and values higher than that go the other direction.
Editing normal maps
One of the first things people want is to make normal maps stronger or weaker. Now that you understand how normal maps work, this isn’t hard to do in an image editor or in an .fx file. The key is that you adjust the red and green channels together or not at all. As your blue channel gets closer to 0.5, your normal map will seem to get stronger and stronger, because the depth component gets weaker in relation to the XY components. To make it weaker, you adjust your red and green channels closer to 0.5. Doing this kind of modification in an image editor like GIMP involves heavy use of color channels and additive, subtractive, and multiplicative blending layers. It’s easier to do inside of an .fx file where you can use color values– vectors– well outside of the 0 to 1 range.
There are a lot of safe things that you can do with a normal map in an image editor. Color changes are usually a bad idea, but distortion, scaling, and movement are all fine. Blurs are fine too, but they don’t always do what you expect them to. Copy/pasting elements works great too! Just blend them into a field of blue (0.5, 0.5, 1.0 RGB).
Alternative Full
Alternative Full is an effect that scales seamless tiling normal maps to create an incredible level of detail. Unfortunately, it uses a front-end that’s only in Japanese. But Fukka made a great tutorial on how to get started with it here! Don’t be afraid to hunt through the files. With some cleverness, you can take advantage of Alternative Full without having to use the front-end. The download includes a lot of great normal map images that you can use.
NCHL
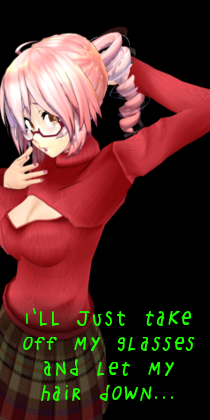
NCHL is an all-in-one effects package that offers support for clamped normal maps. By default, it expects to find these normal maps in the sub-tex slot of your model, which will leave your model looking a bit blue when you’re not using NCHL. When you apply NCHL material definitions to a model or material with a sub-tex or sphere map assigned, it will start using that texture as a normal map. That slot is used for other kinds of textures, which is why NCHL can make some models look very, very strange. It’s just trying to use textures in a way for which they were never intended.
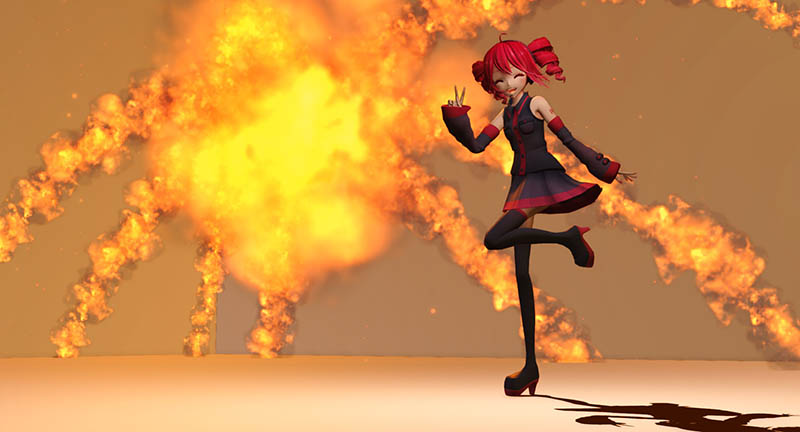
Just one more thing, Teto, and you’ll be as healthy as a horse. It won’t hurt a bit…
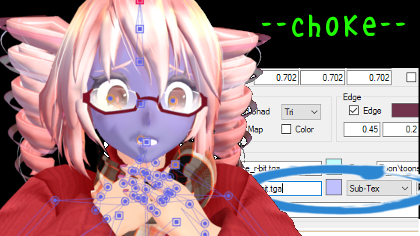
NCHL doesn’t include any normal maps. The way it uses them, they mostly need to be created especially for the model using them. Many MMD modelers have started including clamped, tangent-space normal maps with their distributions. When you download a new model, take a look through all of the files included– they’re there for a reason!
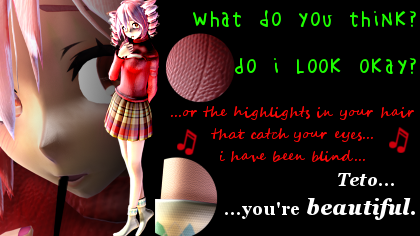
remii made Tda Little Devil Teto! Check out his nico nico user page!
Correction, 26/08/16
I made it sound like normal maps work by adding their normal to the face normal. They don’t, not really. Instead, they rotate their mapped normal based on the face normal, and then use that rotated normal. Vector addition is easy, but this kind of rotation is complicated. Thankfully, it’s still not hard to add normal maps to effects, because the smart people who figured out how to do this made their work available to everyone, for all of us to use.
– SEE BELOW for MORE MMD TUTORIALS…
— — —
– _ — –



Getting face normals aligned properly in PMX Editor saves so much headache later, especially when an imported mesh ends up with dark shading seams across curved surfaces. Taking the time to manually split vertices for intentional hard edges took me a while to get the hang of, but it really cleans up the way directional lights hit the model.
Lately when I just need quick environmental backdrops to composite behind an MMD render, I’ve been generating background plates with google veo 3.1 instead of building a whole 3D stage from scratch. Running a simple prompt like “dimly lit empty dance studio, warm overhead lights, slow pan” takes about a minute and gives me a decent MP4 clip to drop onto the back layer in my editor.
Good info… thank you for sharing!
— Reggie
If you’re interested in creative ways to use your 3D models and animation, you might want to check out Hotel Lobby AI, a unique tool that turns two photos into an AI-generated rap duo video. It’s perfect for sharing fun, personalized content on TikTok or Reels, and could be a great complement to your MMD projects by adding a new layer of engagement. Learn more here: Hotel Lobby AI
Thanks for the info and the link!
— Reggie
If you’re exploring ways to enhance your MMD animations with more realistic lighting and effects, you might be interested in how generative AI is revolutionizing visual content creation. Banana AI offers a seamless platform for transforming text prompts and static images into cinematic videos and production-ready visuals, making high-fidelity animation accessible to digital artists and creators. Learn more about their innovative multi-model technology and how it could streamline your creative workflow at this article.
Thanks for the info and the link!
— Reggie
Hard edges and inverted vertex normals always used to mess up lighting passes when importing custom accessories into MMD, especially around sharp seams. Breaking down how tangent-space normal maps fake surface angle without bloating poly counts makes troubleshooting those weird dark shading artifacts a lot clearer.
When I’m prepping base textures before converting them into height and normal maps, GPT Image 2.5 has fit nicely into that early stage. With the image editing tool I’ve been using, I can tweak a small section of an embossed pattern or fabric weave while keeping the surrounding texture coordinates untouched, which saves a fair bit of manual masking.
Thanks for the tips!
and thanks for the link!
— Reggie
That breakdown of normals and normal maps really clarified things for me, and I’d also recommend checking out PhotoRepair at photorepair.app for fixing lighting and surface issues. site
Thanks for the tips!
and thanks for the link!
— Reggie
Baking normal maps for MMD meshes is where I spend most of my time lately, and one thing that keeps tripping me up is working with low-res source textures — the baked detail looks soft and the shading goes mushy, especially on dark unlit areas. I’ve been running those texture assets through Photo Enhancer Free before baking, just to get cleaner detail into the map so the normals read properly once applied. Still have to handle the actual normal adjustments in the mesh, but having a sharper starting texture saves a lot of guesswork when I’m trying to decide if an artifact is a normal problem or just a weak source image.
Great info. Thank you for that link! That’s fun stuff, indeed!
— Reggie
I’ve spent the week fighting flipped normals on a model, so the bit about hard edges was the part I read twice. Shading going smooth across an edge that should be sharp is what always trips me up, and seeing it laid out plainly helped.
Different kind of fiddly work last night: a visa form I had to send in, and only my phone to hand. I put the photos through this free in-browser document scanner, squared them up, and ended up with one printable PDF — the compression aims at the size you pick, so it can land a bit over, though the portal took it anyway. Files are never uploaded, the whole thing runs in the browser tab.
Wow… Thanks, that’s an interesting link.
— Reggie
A damaged portrait restored and brought back to life is what drew our small indie team to image processing for Spanish speakers. I personally use Mejorar Calidad de Imagen to colorear fotos en blanco y negro, so this explanation of mesh normals, hard edges, and normal maps in MMD helped clarify the difference between correcting geometry shading and adding surface detail.
Thanks for the info!
— Reggie
The distinction between fixing mesh normals, creating hard edges, and using normal maps in MMD is useful. I make small tools, so clear mechanics also matter when I promote them. I use this bidding board for products: bids start at $1, rank is what you paid in the last 7 days, and every bid expires after 7 days. It is paid placement, plainly stated.
Good luck with that!
— Reggie
This guide on surface data really helped. It reminds me of setting up nodes in my nitrogen map generator. nitrogen map generator
Good luck with your Nitrogen Map generator page!
— Reggie
desc_mid + url https://lensup.ai/
The explanation of normals as arrows pointing away from a surface finally gave me a picture I can remember. My friend rotates the model until it looks right, while I check every setting twice—a KnowUsWell quiz gave the two of us a funny way to talk about that difference; do flipped normals usually show up first as dark patches?
I sent your comment to the author of that tutorial… if he gets back to me with an answer, I will forward it to you.
— Reggie
Thanks for this clear explanation of normals and normal maps, especially the distinction between vertex normals, bump maps, and normal maps.
I’m the independent developer of NormalMap AI, a free browser-based tool that may be a useful addition to the utilities mentioned in this article: https://normalmap.ai/?utm_source=learnmmd&utm_medium=comment&utm_campaign=backlink_2026
It converts a color/albedo image into normal, roughness, ambient occlusion, metallic, height, and ORM maps, with a real-time 3D preview. The uploaded-image workflow runs locally in the browser through WebGL and is free to use.
Demo: https://www.youtube.com/watch?v=H-13KG5UeDY
I hope it is useful for readers preparing texture maps for MMD or other 3D workflows.
Great stuff, really nice work! I did pass a note to the author of our LearnMMD tutorial, I am sure he will want to see your work!
— Reggie
Is there a way to join normals in bulk? I have a game-rip model with a lot of visible seams cause the vertices are facing all sorts of directions. Your solution of Edit–>Normal–>Average Near Normals works perfectly but I really don’t want to select every vertex group on the entire model individually and do that for each of them. That’s a hell of a long time to do.
You don’t have to select them individually. Average Near Normals works on the basis of how close each vertex is to another– it finds those groups of vertices for you. So you can probably just select all and then use it. The only things you have to be careful of are edges that you want to be hard and places where greater than two faces join at a single edge.
I’m 93% sure the answer will be disappointing, but still: is there a way to simulate *bump* maps in MMD?
Mostly when people say bump maps, they either mean normal maps, or they mean an older, similar technique that has been completely supplanted by normal mapping. If you have an old, grayscale bump map, you can convert it to a normal map very easily– check the “utilities” link above.
Are you thinking of displacement mapping? https://en.wikipedia.org/wiki/Displacement_mapping . I don’t know of any MMD effects that permit it, and I think it would be almost impossible to do well within MMD’s limitations.