


![]() How do I make ColorShift effect match the beat of the music?
How do I make ColorShift effect match the beat of the music?
Use VMDSpectrum Analyzer to animate effects

A reader asked us for help about making the ColorShift effect “to make the color appear on beat”. Well, “out of the box”, the effect has no such possibility. All that is available for controllong the vanilla effect is to manually adjust its accessory’s Si parameter to make the scatter of color components bigger or smaller. Analyzing the music by hand this way would be a chore… fortunately, it’s not necessary. The VMDSpectrum Analyzer program can automatically form the necessary chart in a form of .vmd motion file. It’s supposed to work with special visualization models, but we’ll teach our effect to recognize it as well, by slightly modifying its script.

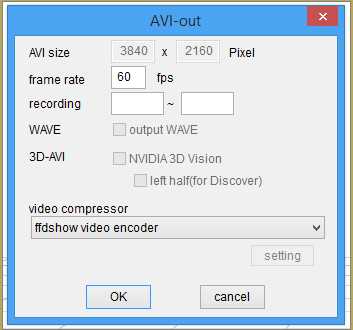
First, launch VMDSpectrum.exe and load your file into it. The only one parameter you really need to adjust is the number of bands that the controller unit will have. Models that are used for audio files’ visualization usually have about a dozen bands representing various sound frequencies, but the ColorShift effect, being a rather simple visual, can only make use of one. So, we set the parameter to 2… why 2? Because of a bug in the program. The last band is always silent, so we need one band more than there actually is. Now save the file… yes, it’s really that simple.
VDMSpectrum Analyzer produced a .vmd motion file where all bursts of sound are mapped to oscillations of a facial morph “band1”. Now we need a controller for such a morph. Open the PMDE editor and create a dummy model with three morphs: “band1”, “SizeMin” and “SizeMax”. For convenience’s sake, I’d recommend to make them of different groups – “eyes”, “brow”, and “other”. This way they will all be visible at the same time without switching. Save the model under a name “ColorShiftM”.
Now we need to modify the script. Open effect’s ColorShift.fx file in the Notepad and add following lines near the beginning:
float SizeMin : CONTROLOBJECT < string name = “(self)”; string item = “SizeMin”; >;
float SizeMax : CONTROLOBJECT < string name = “(self)”; string item = “SizeMax”; >;
float band1 : CONTROLOBJECT < string name = “(self)”; string item = “band1”; >;
As you know from previous articles, these will scan our model’s facial morphs with respective names and pass their values to the script. (Make sure to replace fancy curved double quotes for straight ASCII ones)
| EDITOR’S NOTE: The WordPress engine used by LearnMMD site edits the posted text as it finds necessary; I can not control it. In particular, it changes straight ASCII double quotes into Unicode curved ones that MME script interpreter does not recognize. If you want to copypaste code fragments from this page into your own script, make sure to fix them back. |
Now scroll the script down to find a following fragment:
float scaling0 : CONTROLOBJECT < string name = “(self)”; >;
static float scaling = scaling0 * 0.1;
This is what makes the original effect spread its color parts wider or narrower according to accessory’s Si parameter. We’ll replace it with our controller:
static float scaling = SizeMax * (SizeMin + 10 * band1 );
This is it, you can save the script under a new name: ColorShiftM.fx (note that it matches the name of the model).
Launch MMD. Load a model you want in your video, then load the controller model you made. You won’t notice any difference at first (except the background turning black), but that will change when you adjust controller’s morphs.
SizeMax control will define the maximum amplitude of the effect; by default, you won’t see any color scatter unless you set it to some non-zero value. SizeMin will determine whether there should be any scatter ever when there’s no sound. Set them to your preferred values, then load the .vmd file (remember, it’s for the controller model, not for the dancing girl) and the audio file. Hit Play. And feel the beat with your upgraded ColorShift effect.
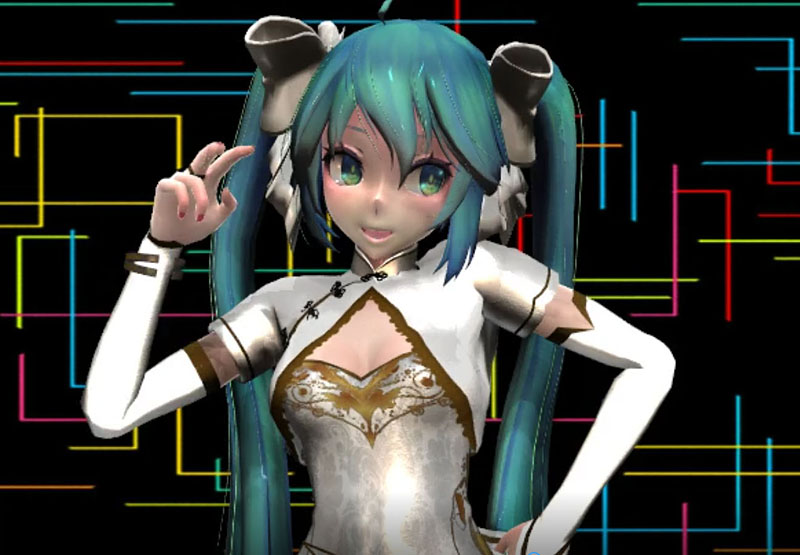
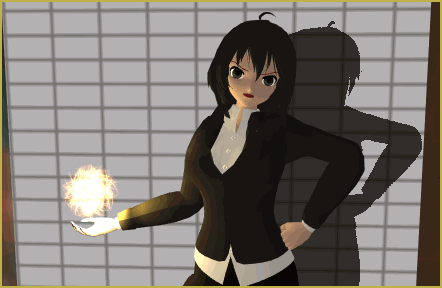
Model used for the illustration: classic Animasa’s Miku with her classic PoPiPo motion.
Bonus level: Free the colors!
In the original ColorShift, we see colors shifted in a particular order: red on top, green to the left, and blue to the right. What if we want more flexibility? What if we want colors arranged in a line, for example?
Look at the script once again. This fragment in the beginning is what defines the order of colors:
float2 VecR = float2(0, 1);
float2 VecG = float2(1, -1);
float2 VecB = float2(-1, -1);
We can adjust those numbers to a desired combination… or we can make it fully controllable. Open the model once again and add three free-move bones: ShiftR, ShiftG and ShiftB. Now replace the fragment above with the one that can read them:
float3 VecR : CONTROLOBJECT < string name = “(self)”; string item = “ShiftR”; >;
float3 VecG : CONTROLOBJECT < string name = “(self)”; string item = “ShiftG”; >;
float3 VecB : CONTROLOBJECT < string name = “(self)”; string item = “ShiftB”; >;
Now by simply moving those bones you can set color parts in whatever order you want (only X and Y coordinates matter; Z is ignored). More than that, if you make those bones children to the center bone in PMDE, you may also spin that center bone as well to make a completely new feature for your effect!
Download a PMX Control Unit…
You can download a ready ColorShiftM.pmx control unit from LearnMMD site, so you don’t have to do all those manipulations with PMDE yourself (though I’d rather prefer if you did: teach a man to fish, and all that stuff). In addition to the above, it has included a couple of additional morphs: SpreadRound and SpreadLine, presetting color bones in a triangle or in a line respectively.
Oh, and if you think that with this new freedom the SizeMax control becomes redundant, cluttering and confusing… you’re absolutely right! It served its educational purpose, now you can get rid of it by removing it from the model and simplifying the formula:
static float scaling = SizeMin + 10 * band1 ;
Now, dance, dance and away!
– SEE BELOW for MORE MMD TUTORIALS…
— — —
– _ — –
![]()
so i keep getting the “post not specified” error and ive been posting the sizemin/max everywhere but i cant seem to figure it out. please help soon
Hello! … Did you try to copy/paste the script in the tutorial… and did you see this Editor’s Note…
EDITOR’S NOTE: The WordPress engine used by LearnMMD site edits the posted text as it finds necessary; I can not control it. In particular, it changes straight ASCII double quotes into Unicode curved ones that MME script interpreter does not recognize. If you want to copypaste code fragments from this page into your own script, make sure to fix them back.
…
Could that be your issue?
Other than that, please elaborate whether you load the .x file as an accessory, or try to apply the .fx script to a model in the MME window.
Welcome back, KB!
I always get an error when I edit the ffect.
Can you give a link for the finnish edited effect,please?
a) It wouldn’t be proper to distribute effect’s edited version without original author’s consent.
b) In my articles, I set a goal to teach users .fx editing rather than provide ready solutions.
Did you fix quotes in fragments you copypaste from article’s text into the script? The MME engine only understands straight ASCII ones (0x22); unfortunately, the WordPress engine that this site uses automatically “improves” them into fancy Unicode ones (0x201C/0x201D), and this is something I can’t control.
In case you did that and still are getting an error, what message does it produce? Usually it contains a “[line_number, column_number]” fragment poining at where exactly the error occured. Find the offending line in the script and post it here if you can’t figure it by yourself.
Fist,thanks for the fast reply!
I think my only problem is where I put the
( float SizeMin : CONTROLOBJECT ;
float SizeMax : CONTROLOBJECT ;
float band1 : CONTROLOBJECT ; ) and
( float scaling0 : CONTROLOBJECT ;
static float scaling = scaling0 * 0.1; )
I only put it wrong in the fx file.The error tells the wrong lines (edited lines).