
![]() How do I use shaders to make photo-realistic renders in MMD? Can I make realistic-looking images in MikuMikuDance? What effects do I use to make realistic skin-tones in MMD?
How do I use shaders to make photo-realistic renders in MMD? Can I make realistic-looking images in MikuMikuDance? What effects do I use to make realistic skin-tones in MMD?
Almost Photo-realistic renders in MMD using Shaders and Effects

NOTE: It is recommended that you click on the Haku images in this article to see the renders at their original size to see exactly how beautifully MMD can actually render images.
Nowadays, many professional grade 3D modeling applications are capable of producing photo-realistic renders. MMD itself lacks the functions to do these renderings so for a long time people have exported MMD models into these other applications to produce more realistic renders.
However, there are now a lot of MME effects that are now available that allows photo-real renders to be produced within MMD itself. There are some technical limitations still that does not allow MMD to create true photo real renders but the results are very close and for making videos, what is available is more than adequate and many of the more experienced MMD video makers have achieve truly stunning results with these resources.
That said, part of the equation is the hardware available to the user; the most important of these assets is a top quality graphics card that is able to handle the demands of the effects required. But you can still make very high quality renders using MMD with a good basic laptop and some of the MME effects that have a lower system overhead demand.
In this article we will show you one method that we use and this method works even on a ten year old laptop with only a Nvidia GeForce Go 7200 graphics card. Wherein this laptop was fairly high end in it’s time, by today’s standards at best it is considered pedestrian, but in the final analysis, the trick is to use what you have to get the best possible results.
For our tutorial model we will only use two models:
Tda Yowane Haku Cleopatra by Hikari Wakamiya and AliceMaid
Day Bed by とりそば
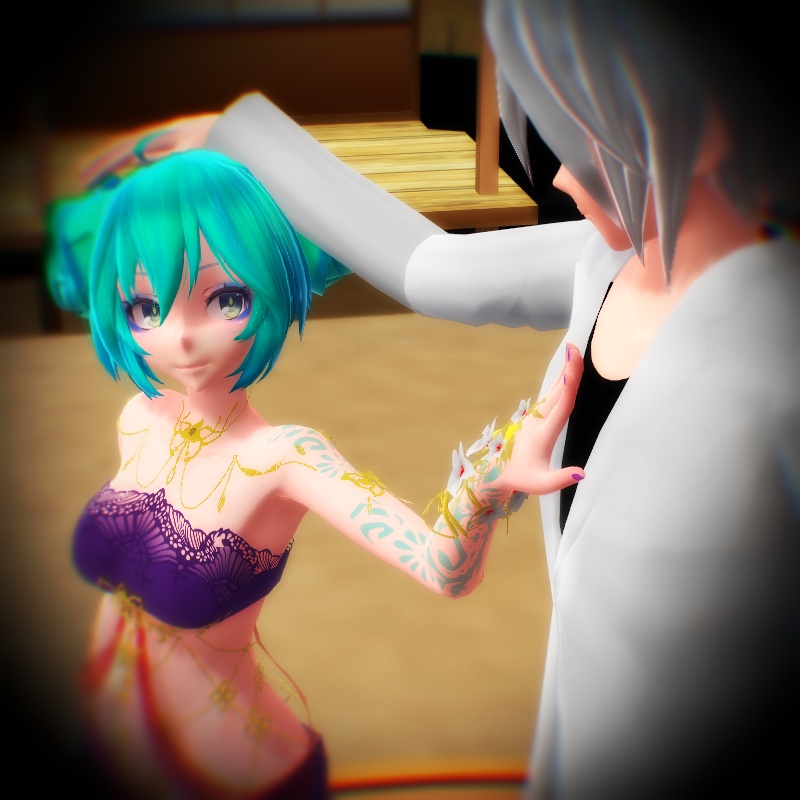
These were set up and posed as shown in the image immediately below. Do note that the choice of using this model to illustrate this process is deliberate. One of the things that I get asked a lot about is how to render skin tones realistically and this model serves as a perfect example of how this can be done.

Before any MMEs are applied have a close look at the model after it has been posed to see if there might be problem areas that may need to be addressed. As expected, this one does too and the close up image below shows where the skin mesh has been crushed in the torso area just under the breasts due to the nature of the pose. MMD model skins do not stretch and compress like human skins so sometimes things like this occur. In a real human, the skin here will either wrinkle or stretch depending on the person’s body type and normally if this was a gravure idol type photo-shoot, if this area was problematic it would be airbrushed out. With MMD, in this instance, the solution is actually quite simple. All we need to do is to remove the model’s outline.

In any case, with most photo real renders, you will want to remove the model’s outline anyway. The model outline is a carry over from MMD anime roots. In many MMD render functions the outlines can be useful, but for realistic renders these need to be removed. The day bed also has an outline and this was also removed.
To remove a model’s outline go to file menu > view > thickness of outlines and set the value to “0”.
A closer inspection of the model revealed some issues with the skirt physics due to the position of the torso and these were simply addressed by turning the physics off in these areas. It is important to pay attention to these little details and get things right before beginning the MME shading process.
The next step is to examine the models to see what needs to be done. The day bed is easy. It has a nice texture map and being a background accessory all we really need to do is to soften the shadows on it and this can be done with an effect like SeriousShader or FullSimpleSoftShadow. We will be using the latter.
Haku is a more interesting challenge. She’s showing a lot of skin and she has that lovely silver hair. Her costume includes a mix of silk, lace, brocaded cloth, metallic jewelry and gems. There are MMEs to treat all of these and we will be doing the following:
Skin: G_Shader_01_S1_Skin.fx
Clothing: G_Shader_01_S1.fx
Note that the G shaders used are complimentary. One is for the skin tones and one is for everything else. The G shaders are organized by skin tone colors and the shadow conditions for the time of the day. Since Haku has almond white Asian skin we went with the default for now.
For the metals on her we used Multi-light source effect _ highly reflective.fx. This effect gives the metals are nice reflective finish.
We wanted to make the turquoise gemstones really shine and so we added Object Luminous to them. This makes them luminous and gives them a slightly magical feel at the same time. The same trick was used to make her eyes sparkle. Object Luminous was applied to the eye highlights. This helps her look more ‘alive’. The Object Luminous effect was applied very lightly: Si=0.15 / Tr=0.5; just enough to see some shine.
The following screenshots shows how she looks before and after these effects were added:
BEFORE MMEs WERE ADDED

AFTER MMEs WERE ADDED

But in keeping with her Cleopatra theme let us give her skin some tanning. Asian skin under a hot sun tends to turn a brownish tan that can be very dark, but being a lady of leisure we’re only going to tan her a little bit.
TANNED HAKU

To do this we switch to another flavor of the G2 Shader suite. This set of shaders is like a makeup kit. Just choose the skin tone shade to match the model you’re working with. It even has coloring for night skins, to give your model a zombie’s complexion or even demonic or fairy colored skins.
We used:
Skin: G_Shader_14_S1_Skin.fx
Clothing: G_Shader_14_S1.fx
Up till now all we have done is to lay down the foundation colors. The next step is to make the image more photo-real and the way to do this is to use shaders that make colors more lifelike or how colors should look like in the real world. A good way to do this is to use the o_effect shaders by おたもん.
These effects are global shaders and they affect the entire image. They are very powerful so use them with a light hand. The way to do this is to reduce their potency by decreasing their transparency in the Accessory Manipulation Panel by tweaking the Tr value.
Also these effects are usually used in combination. You will normally need to use two or more of these effects to get the results you want. In our example we used two so far:
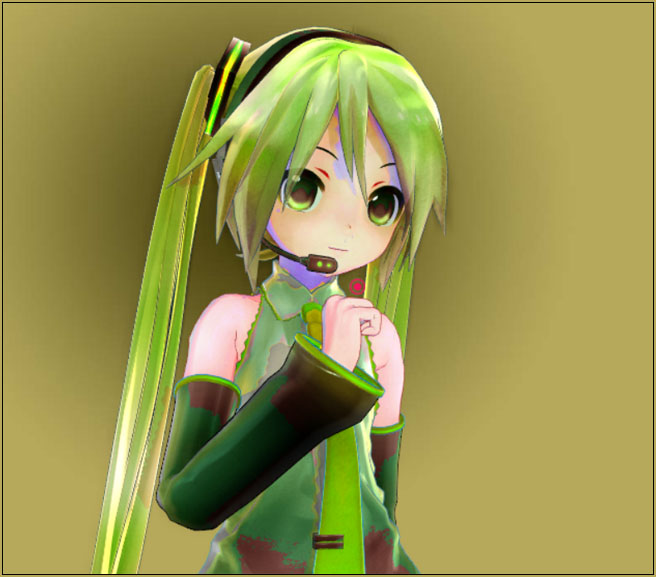
O_SelfOverlay – this saturates the colors
O_BleachByPass – this adds black and greys into the image
We show you what happens to this image when each is applied separately at full strength to the image as well as when applied together. Note that these effects also turn the background to black unless you have something there.
O_SelfOverlay at Tr=1.0

O_BleachByPass at Tr=1.0

Both at Tr=1.0

As you can see, in themselves and even in combination the results are pretty useless. The whole trick is to balance them out against each other by tweaking their Tr values. The way I do it is to keep the combined Tr values of all these effects to 1.0. So let us look at the same image with the Tr values set to 0.5 for each of the effects.
Both effects at half strength (Tr=0.5):

Much better but still too much grays and this is caused by the o_BleachByPass effect, so let’s reduce that and increase the color tones. To do that we add another effect: o_Tonemap. Our Tr budget allocation ended up as follows:
O_BleachByPass – Tr=0.15
O_SelfOverlay – Tr=0.50
O_ToneMap – Tr=0.35
Total of all effects: Tr=1.0 and the result looks like this:

These effects tend to sharpen the image. If this is what you want then that’s fine, but for female portraitures it is usually better to soften the image and so we applied Diffusion 7 to the image to get this effect.
THE FINAL AND MOST IMPORTANT STEPS
The next order of business was to address the rather harsh shadows on her face. This was simply done by changing the direction of the lighting. We also took this opportunity to tweak the light color a little to give Haku’s skin a ruddier, healthier appearance and this was done by increasing the reds and reducing the blues in the color spectrum. Refocusing the camera also gives us a better overall image so here’s where are up to this point. Our settings are as shown below:


For the final reiteration, since Haku really wants to show what she’s got, we changed the screen ratio/size and added the o_Vignette_HQ.fx effect to frame the picture, so here she is in all her glory:

None of the imagery in this article were Photoshopped. These are renders straight out of MMD using only MME effects. So as you can see, you can get some really good, close to photo-real results just using MMD and MMEs. As we stated, the method discussed here is only one way to get this level of results from MMD. More advanced and system intensive MME effects can give even better results.
Don’t be afraid to experiment. All good MMDers do that and eventually each will develop their own methods and systems to do close to photo-real results. The point being is that it is possible. The whole trick is to figure out what works on your system to give you the kind of results that you want. In any case, whatever you end up doing we can virtually guarantee will be infinitely better than rendering from MMD with no enhancements added. There’s no excuse these days to settle for second best when it comes to rendering images or videos for MMD!
CREDITS and LINKS:
Tda Yowane Haku Cleopatra – by Hikari Wakamiya and AliceMaid
Day Bed (DayBed v1.0) – by とりそば
MMD 9.26
EFFECTS:
O_BleachByPass
O_SelfOverlay
O_ToneMap
O_VignetteHQ
See this page for download links to the O_effects.
Diffusion 7
Full_SimpleSoftShadows
Object Luminous
See this comprehensive catalog for these and other MME effects.
G2 Shader ver 2.11
Masslight (Multiple Light Source)
– SEE BELOW for MORE MMD TUTORIALS…
— — —
– _ — –
![]()