![]() What is UV unwrapping? How can I unwrap models? How can I UV map MMD models? What is a projection map? How do I make textures for MMD models? Han can I use Blender to edit MMD models?
What is UV unwrapping? How can I unwrap models? How can I UV map MMD models? What is a projection map? How do I make textures for MMD models? Han can I use Blender to edit MMD models?
UV unwrapping MMD models in Blender
 One of PMXE‘s most glaring deficiencies is its limited UV mapping. While it’s possible to create a good UV map in PMXE with plug-ins, it’s not easy.
Even more professional modelling packages sometimes skimp on their UV unwrapping features. I’ve heard complaints from users of Lightwave and Metasequoia. Even if you’re using something other than PMXE to UV map your models, you might find UV unwrapping a tedious job.
Thankfully, UV unwrapping in Blender is a cinch. Blender is free and powerful, and if you only ever use it for UV unwrapping, it can be a useful tool.
Projection Mapping
First, let’s talk about projection mapping. This is the kind of UV mapping that PMXE does. You can projection map from PMXE by selecting some vertices, then using Edit->Vertex->Create UV Decal from the 3D view. Why does PMXE use the term decal here? It’s because projection mapping is fine for making details like decals. It’s only when you need to map more complicated meshes that its limitations become apparent.
Projection mapping just applies what you see on your screen to the UV coordinates used by the model. For example, if a vertex shows up halfway down your screen and a quarter of the way across, projection mapping will give it a UV of (0.5, 0.25). PMXE rescales the mapping to fill the complete UV range from (0,0) to (1,1), but it’s basically the same thing. So how projection mapping works depends on your view. You can get different mappings from different perspectives or by using orthographic projection.
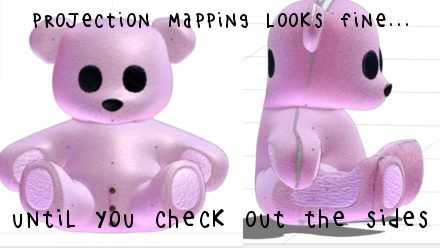
Where projection mapping fails is when faces lie along the projection– usually, on the sides of models. Here, where there’s little change in the position of vertices, there’s also little change in the projection-mapped UV coordinates. That leads to stretching and problems with texture resolution.
Using Blender
Since I’ve already dealt with some of the specifics of using Blender, I’m going to direct you to some earlier tutorials I’ve written rather than explain everything all over again.
This tutorial on texturing explains how to download and install Blender and the mmd_tools add-on necessary to its use with MMD models. It also explains some of the details of using different modes in Blender, how to import models, and how to pull out a new UV view. If you haven’t already read it, you should read it before going any further, at least up through the part where I open up the UV view. (But if you’re reading this tutorial, you’ll probably find the rest of that tutorial interesting anyways.)
This tutorial on weight painting introduces a few other concepts. You might need to read about how to manipulate the camera.
Blender is a tough application to learn. 3D modelling is a complicated process and Blender does little to simplify it for you. Always remember that everything in Blender is context sensitive. It matters where your mouse is and it matters what mode you’re in. The same input will lead to very different output depending on this context. If I don’t mention where your mouse cursor should be, then it should be in the 3D view.
For more information on using Blender, I highly recommend the Noob to Pro series. This is a great way to get used to some of Blender‘s idiosyncrasies.
UV Unwrapping in Blender
The basic process for UV unwrapping is remarkably simple. Import a model and Separate into Materials. Then select one of your materials by right clicking on it and hit tab to enter Edit mode. Select all vertices with a. Open up a UV view by dragging out a new view and changing the view type to UV/Image Editor.
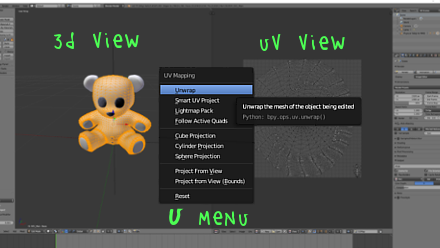
You should see your current UV mapping, if any exists. Mine is a mess. To remap, hit u, then select unwrap from the pop-up menu. That’s all there is to creating a very, very basic UV map. (But it’s not good enough yet.)
Marking Seams
When Blender unwraps a mesh, its first priority is keeping connected faces connected. Only after it does that does it try to eliminate distortion or prevent faces from overlapping. When you have a mesh that’s more complicated than a distorted plane, it can’t do all of those things at once.
But you can help by telling it that it’s okay for some faces to be disconnected in the UV map. You do that by marking seams. If you have enough seams marked, you can prevent overlapping faces in the UV window and minimize distortion.
Back in your 3D view, deselect all of your vertices by tapping a, select one vertex by right clicking on it, then add an adjacent vertex to your selection by shift-right clicking on it. Then, in your tool shelf, switch to the Shading/UVs tab and hit the Mark Seam button. See how the edge between the vertices turned red? That edge is now a seam. You’ve just told Blender that it’s okay to disconnect those faces when UV unwrapping.
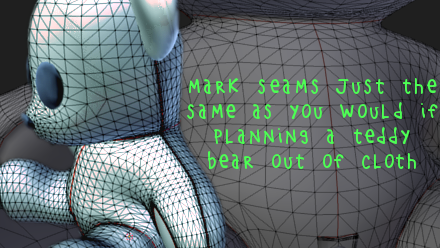
Of course, just marking one or two edges isn’t going to be enough. Marking seams is a lot like planning how you’re going to wrap a gift. You need to mark enough seams to divide your mesh into a series of distorted planes. Deselect all of your vertices. Select a vertex on the bottom of your mesh, then add a vertex at the top of your mesh. On the 3D view’s menu, use Select->Shortest Path. Now you have an entire line of vertices selected, from the bottom of your mesh to its top. Mark that as a seam.
The art of unwrapping
There’s no single technique for good UV unwrapping. How you choose to mark seams depends on how you plan to texture the model.
If you’re going to be using entirely procedurally-generated textures, and entirely procedurally-generated mip maps, your only concerns are maintaining consistent image resolution throughout the model and preventing overlap. You can afford to seam every single edge.
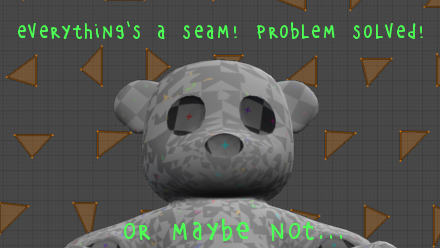
If you plan to hand paint any textures, then you’ll probably find it very difficult to paint over the seams. You should try to keep any areas you plan to hand paint unseamed.
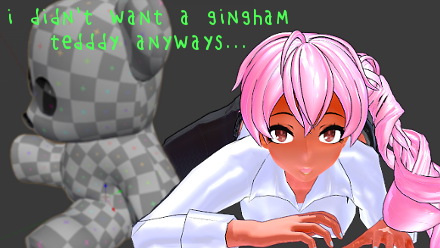
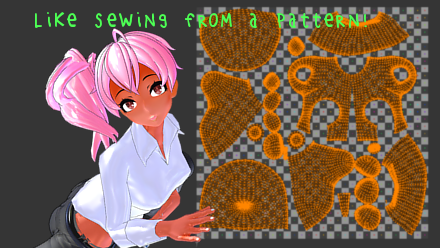
If you plan to use any images that tile over your texture, seams may stand out. You might use tiling images to create a print pattern over a piece of clothing, or you might find that effects like Alternative Full use images that tile over your model. In this case, you’ll want to focus on creating seams that follow the natural lines of your model. With skin, this can be difficult– there’s no appropriate place to seam a bare thigh! But with clothing, you can think about how a particular piece of clothing was actually made. Where the clothing itself required seams, your mesh should be seamed. Try to follow any natural lines that exist.
I’ve gone ahead and seamed this teddy bear along the same lines as if I had sewn it, then UV unwrapped it again. You can see that now my UV map makes a lot more sense.
Exporting
We’re good, right? Export your model. Then take a look at it in PMXE.
By seaming our mesh, we made a model with a bunch of vertices with duplicate UV coordinates. Unfortunately, MMD and PMXE don’t know how to handle this. MMD Tools made it work by duplicating every one of our vertices that lay along a seam.
If you have a texture, try applying it to your model, then removing doubles in PMXE (Edit->Vertex->Join Near Vertices). You’ll see that your texture gets all screwed up along the seams. That’s because at each of these seams, PMXE just averaged the UV coordinates. So be aware of these seams and how they’re going to affect your model.
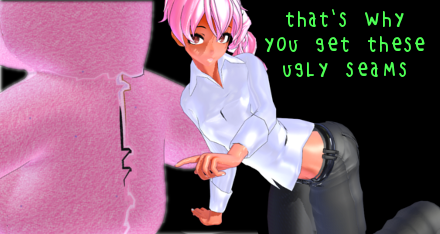
These seams are also an easy place to get bad normals, because PMXE doesn’t realize that they’re supposed to be connected. If you get weird highlight lines on your models along the lines of their seams, this might be the problem. You can fix this by selecting your vertices in PMXE and using Edit->Normals->Average Near Normals.
Mip mapping
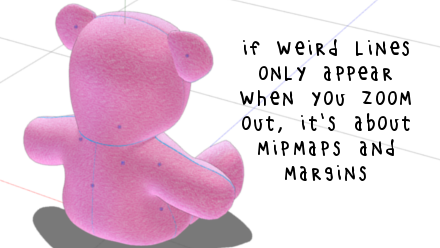
There’s one more concern with UV mapping. MMD (along with most 3D engines) uses blurred versions of your textures depending on how far the camera is from the textured face. It does this to prevent sampling artifacts when drawing distant objects. To make this mip map, it just does a big box blur of your texture image. That works fine, so long as your texture is continuous as it would be with a projection map.
But this can be an issue when seaming has left you with multiple texture islands. When that’s the case, UV islands can be near, even when the faces they represent are distant, and the blur can catch part of one of these neighboring islands. This is the reason for the margin problems that sometimes exist with textures. It’s a good idea to place your texture islands equidistant around your UV map to minimize this problem. So let’s learn how to do that.
Manual Editing
Blender does a very good job of unwrapping. But you may wish to make edits– for instance, to separate islands for better mip mapping. Import your .pmx back into Blender. Separate by Materials, select your material, enter Edit mode, select all of your vertices, and open a UV view. Or, just continue with the same model in Blender, if you left it open.
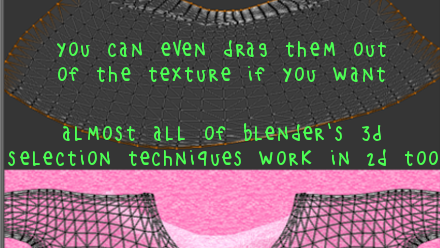
Move your mouse over the UV view, and try using R for rotate, G for grab, or S for scale. See how you can edit the UV map? This can be useful for when you want to combine the textures for multiple materials on a single UV map, or when Blender creates a UV map at an angle that would be inconvenient.
With your mouse over the UV window, hit a to deselect all vertices, then right click on one of the vertices in your UV map. You can rotate, grab, or scale any selection of UV coordinates (although rotate or scale won’t make any sense with only a single vertex selected).
Proportional Editing
With your mouse still in the UV view, hit o to enable proportional editing, then g to grab your selection. Before escape-aborting or left-click-confirming, scroll your mouse wheel away from you until you see a circle. When proportional editing is enabled, your grabs, rotations, and scales will affect unselected vertices as well, falling off until the vertices outside of that circle are unaffected. If you’re going to edit UV coordinates manually, proportional editing is a good way to prevent weird looking distortions.
Selecting UV coordinates
 You can use all sorts of tricks to select multiple vertices. a toggles select all. b allows you to draw a box to select vertices. Ctrl-tab allows you to select by edge, face, or island. Ctrl-l selects all linked vertices. You can use any of these to rapidly select and adjust your vertices.
That’s all there is to it! Export your model, make a texture, and start animating!
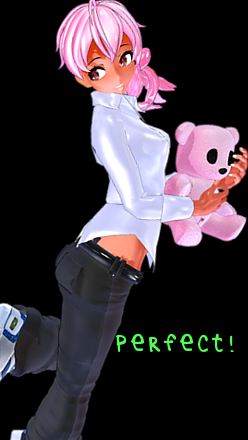
Keep the Faith and credit your sources! I used a heavily modified Tda Tutor Teto, outiftted with a shirt based on Milionna’s school uniform, pants based on 9844’s black pants, Mari Corsair’s shoes, and hair from NoUsernameIncluded. The teddy bear is based on a mesh by Jaspy. Whew, all those credits leave me out of breath!
![]()
– SEE BELOW for MORE MMD TUTORIALS…
— — —
– _ — –



I’ve been having that exact issue of lines appearing only when I zoom out. I don’t have Blender but I do have PMXe and its UV Mapping plugin. They’ve worked well for fixing UV issues for me in the past. Can you possibly elaborate on how to fix this issue? I think I understand the problem based on what you’ve said but I don’t quite get the solution…
To fix it, you basically need to paint a border margin around all of your UV islands on your texture. It’s sampling pixels from outside your official UV when you’re looking at a distance (and/or at a wide angle). If your islands are too closely packed to do that, then you’ve got to remap the UV (shrink the islands.)