


Here is Part TWO in this series…
See Parts ONE and THREE… Enjoy!
Making Kerorin Town Great Again – Part 2
Setting up the Master Control System
The Kelorin town model consists of the following modules:
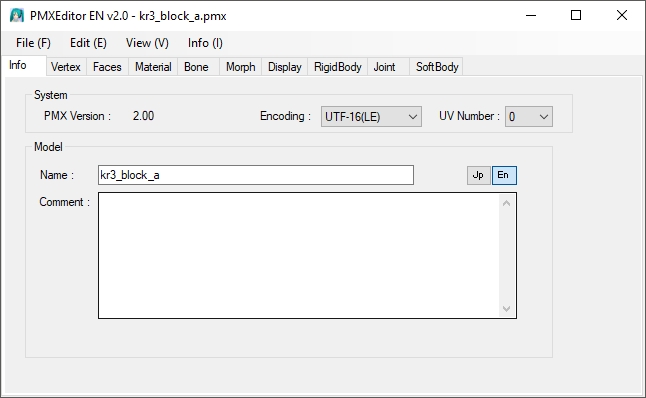
kr3_block_a.pmx
kr3_block_b.pmx
kr3_block_c.pmx
kr3_block_d.pmx
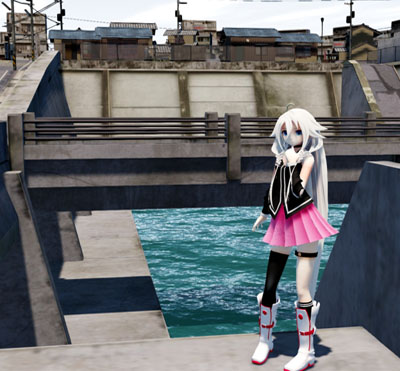
kr3_block_canal.pmx
kr3_block_denchu.pmx
kr3_block_outer.pmx
Step 1: You will need a spreadsheet
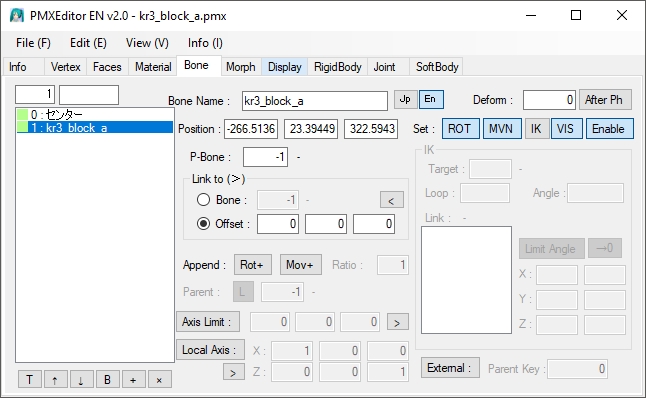
Using PMXE, open up each module in the Kelorin town folder, one at a time. Go to the “bones” tab and find the bone that is labeled: kr3_block_x where x=to the descriptor at the end of the module’s filename.
Copy the x, y and z coordinates of that bone into your spreadsheet. These were the values on my copies of the modules. Yours should be the same, but you will need to double check as it is absolutely important that these values are accurate. If you prefer, you can try and grab these coordinates off of my spreadsheet which can be found here.

Note that the canal module only has a center bone, and uses the default values for that bone. Also “utilities” refers to the “denchu” module.
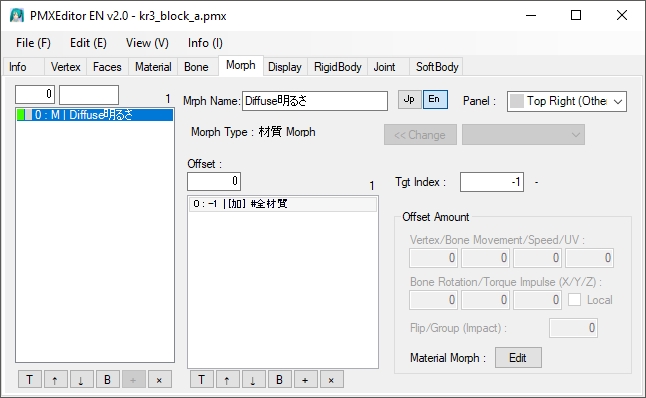
Step 2: Preparing the modules
The following steps will be required for all the modules. We will use the kr3_block_a module by way of example.
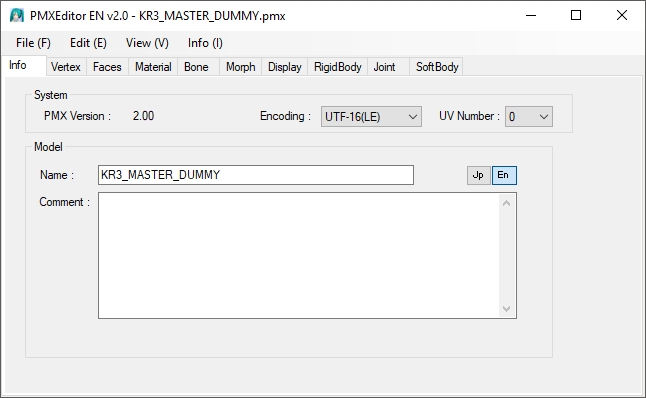
Step 3: Create a Master dummy bone module
This module is the key to the system. Just follow the instructions below to set up this module.

- Add a mother bone using the semi-standard bone plugin.
- Create 8 new bones. One each for each module.
- Populate both the JP and EN sides of the Bone Name field.
- Use the coordinates from your spreadsheet to locate these bones.
- The parent bone for these bones must be the center bone.
These bones are anchor bones for the modules and can either be ROT or ROT/MVN type. The latter offers some flexibility, but in practice these bones will never be moved, so choose whichever type you like. However, make sure VIS and Enable are both selected.
The skydome and 3 dummy bones are optional. Nice to have but not necessary. All of these bones can use either the mother bone as their parent or left at null (-1). Do not use the Center bone as their parent; if you must move them with the Center bone, set this up in MMD using the OP function.
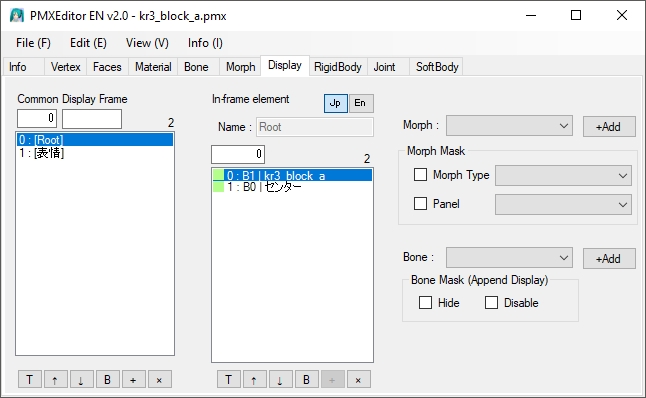
- Create a category for the Center bone and locate the Center bone in this group. If you cannot find the Center bone from the Bone: drop box, chances are that it is in the [Root] list. There is also a good chance that this group was automatically set up in which case you can skip this step.
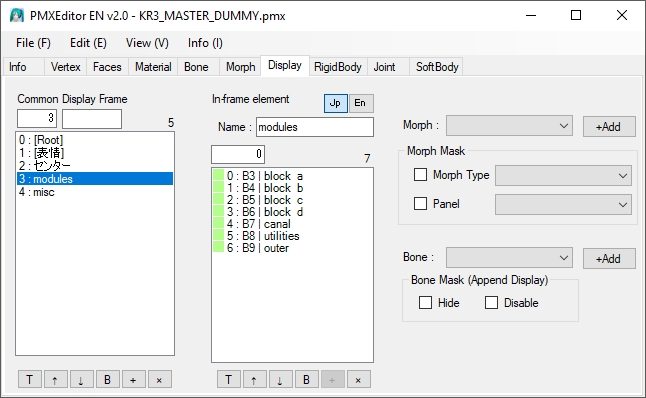
- Create a “modules” category and put the module bones in this list.
- If you have any of the optional bones, create a separate category and put them into that list.
- In all cases, make sure that the EN side of the Name: field is populated.
Save this module in the same folder as the rest of the Kelorin Town modules.
– – –
Credits and Links
Town models by Kelorin Jo BTA
Kelorin Town version 3.0
Password is here: seiga.nicovideo.jp/seiga/im7540869
(The tutorial uses this version)
IA Rocks [Unofficial] : Trackdancer.deviantart.com
MMD 9.31
PMX Editor
Irfanview 64
AviUTL
GIMP
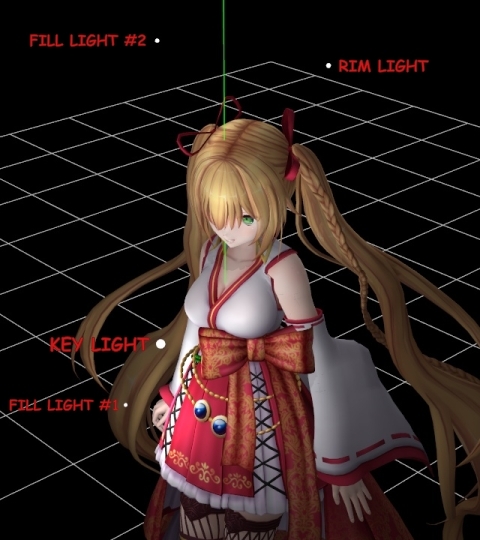
Effects: ExcellentShadows2 / Ray_MMD
Continued in Part 3.
– SEE BELOW for MORE MMD TUTORIALS…
— — —
– _ — –
![]()
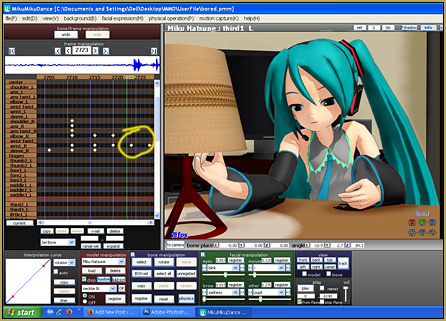


Where is the bones tab?
Open each part of the Stage model in PMXE and then see the Bone tab for that bone’s position… My numbers matched the author’s position numbers.
… I am editing the article to make that more clear.