Make your own version of
Michael Jackson’s
“Smooth Criminal”…
Smooth Criminal video project!
THIS PROJECT starts out as stupid fun.
Visit this YouTube video to download the motion and WAV files for the Smooth Criminal video… load’em up and let the fun begin!
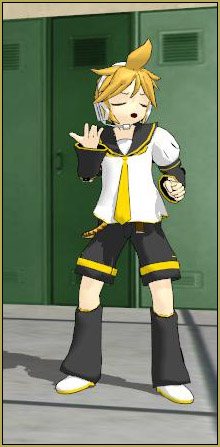
You will need six models… I chose Len to stand-in for Michael, and I wanted the back-up dancers to look uniform, so I chose Kaito for the other five slots; loading him five times! The motion files are clearly marked as camera, Michael, and dancers one through five.
Load’em up!
I loaded my models, loaded their motions, loaded the WAV, loaded the Camera Motion, and pushed play. … a long intro pause… a machine-gun burst to start things rolling… and then AWESOME MOTIONS! Great music… really fun to watch!
Fun… but issues!
As I said, this project starts out as stupid fun… but then, as you dig into it and start to “aim high” for quality so that you can be proud of your finished animation, a myriad of issues make themselves obvious.
Right off the bat I noticed that I had some issues with the motions… Michael would pass through some of the other dancers!
I checked that YouTube video and I see that HIS pass through the other models, too. LearnMMD’s Silent Headset, who first sent me the link to those files saw the raw animation I posted to YouTube and let me know that the models needed Motherbones… that motion data has Motherbone positions in it. So I followed the instructions on LearnMMD.com for adding Motherbones to models… and when I again tried the animation, nothing changed! … turns out you have to give the Japanese-language name for the All Parents bone, 全ての親 … when you make that bone! Once I did that, the animation had new life… and “Michael” was now in command of the stage!
I don’t know why Luis Angel Olivera Morante, who hosts that motion bundle, didn’t use Motherbones in HIS video.

They’re flying!
So, now I wanted to make sense of that opening segment where Michael and two of the dancers are hanging in mid-air. I decided to create a platform for them to stand on. I  created one in Sketchup and used the 3D RAD plugin to make it into a .x model.
Download my little Deck Panel.
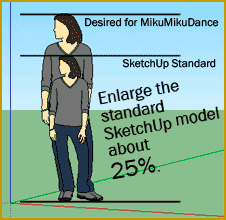
I sized that panel, as needed, to keep a floor under those dancers… an Si setting of 3.5
I attached the deck to a dummybone and moved it up to the dancers.
Silent Headset sent me a link to the original 2012 animation by Denim Moe P no longer works: http://www.nicovideo.jp/watch/sm18622411 … in which we see that Michael and those two dancers are dancing on the ROOF of a 7/11 store! … so that explains the aerial ballet. By putting that deck under their feet, I solved that little problem.
The soundtrack is very low volume…

That downloaded WAV file is not loud enough. I dragged it into Audacity and used the Amplify effect to make it louder… should, perhaps have increased it even more than I did.
A word about Model Selection…
I chose the wrong models for this project!
When I create one of these project articles, I try to use the common models that every MMDer owns: the Animasa models that are included in the basic MMD download. That way, any MMDer can follow my tutorials and achieve the same results that I do.
In this case, it was a mistake. The amazing motions files created for Smooth Criminal were intended for use by modern, complicated models with “more bones” than have the original  Animasa models. If you will try the motion files on a TDA model, for instance, you will see that the “fit” is much better on those models!
When placed side by side, the Animasa Len model looks pudgy and bulky compared to a TDA model… and when you compare the two models as they run through the motion data, there is no comparison; the TDA models “show” much better than the models I used in this demo… so, EXPERIMENT with different models before committing yourself to a project of this size!
Set the Stage!

This is a rough, almost violent animation… so what better place for it to take place than in a high school! … I attached the “MMD Inside of School stage” to a dummy bone and slid the entire stage so as to place my shooting area outside those lockers. Some MMDers don’t move the stage… and so have to drag the camera and all of the models too far from center-stage… I like to move the stage.
It turned-out that the bit of stage I selected was about exactly the right width for this animation. There is a lot of running-around with these motions. and they just-fit between the left wall and that right-side doorway… perfect!
Watch those Motherbone positions!
Now I was watching the animation to be sure that everyone was in his proper place.
… and I found that there were a few spots where the symmetry seemed wrong… I wanted the dancers in geometrically-balanced positions around Michael.

I carefully scrolled through the animation, backwards and forwards watching for places where the symmetry needed to be adjusted… moving and registering the Motherbone, as needed.
Of course, if you add “moves” to the Motherbone over here, you need to undo that move for the next scene… a tricky business of copy/delete/paste to restore the original Motherbone positions.
Start all of the action in Frame 60…
After I had been playing with all of this, I got another email from Silent Headset who had determined that, to get the animation to be timed to the WAV file, I needed to start all of the animations at frame 60… NOT frame zero!
… and Dancer #5??
That guy was bugging me from the start… his role is to stand there, on the far left, until his solo dance part “happens”… I decided to unDisplay him from frame zero until it was his turn to dance, after which point, I unDisplayed him, again. It happens so smoothly that you hardly wonder about where he came from!
Lip-sync?
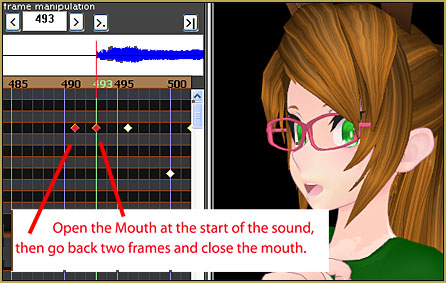
I had not been happy with the lip-sync and I was hoping that the 60-frame move would help. So, I moved each dancer’s motions out to frame 60… and, sure, enough, the dance moves seemed to line-up better with the music, but I still had issues with the Lip-Sync; it seemed to be out of time. After some study, I decided to do a Range-Select/Copy/Delete/Paste on ALL of Michael’s Facials, as one big group, so as to move them all back a few frames and set the first mouth-motion diamond to where Michael speaks his first word. Better… but still not perfect. I decided to just GO with it!
Camerawork…
The original camera motion .vmd file got the job done… but was boring… with many simple moves that stayed locked in place until the scene changed. Me?… I like to keep the camera moving! So I kept that in mind as I tried to feature Michael over his background dancers.
Crop/Transition Panel

 I chose to use my Crop/Transition Panel as a way to add interest to a couple of the scenes. I attached it to a dummy bone and slid it into position… checking the Display checkbox as necessary. I used it to crop that nice intro scene… and another moment, later on in the animation.
You adjust the width of the crop by sliding the Panel’s dummy bone along the Z axis to bring it closer-to or farther-from the camera. At one point I wanted to zoom-in on Len while he was in that crop… and so had to compensate that Z-axis position of the Panel as I moved the camera. It CAN be done!
Looking good… am I done?
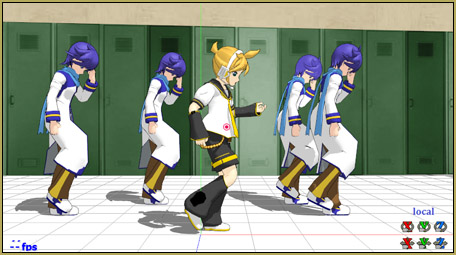
My new Smooth Criminal video was looking good… but it still needed more!
Effects!
 The shadows were out of control… I could see stark changes as Len moved from front-stage to the back… and his shirt was burned-out to white most of the time. I tried my favorite SSAO-lite effect, but everything looked murky… so I chose SeriousShader to enhance the shadows… I kept those ground shadows; I like ’em. I turned-off Transparent Ground Shadows in the View menu.
The shirts were looking good, but I never did get the shadows on the face that I wanted… NEXT TIME, maybe!
I wanted to do a fade-from-black opening and a fade-to-black close, so I loaded the Blackout effect. I decided to add some  excitement to those machine-gun burst moments by using Blackout to flash the scene on and off during the bursts! I liked the effect… and added it into the machine-gun burst at the end of the animation, too!
Background image…
 I lifted an interesting animated GIF from a site, online, sometime back… and for this use, I created a huge JPG of it… it fit my mind’s-eye view of what I wanted here: nightclub style. I found that if you don’t turn off the Transparent Shadows, the background image will be seen in the dancer’s shadows!
DiscoLight effect…
 I still wanted more! … so I added the DiscoLight effect to the opening sequence. It works fine, except that with Self-Shadow selected in the View menu, DiscoLight will not “shine” on your models! … but I wanted shadows… so I let it not-shine on my models and I, instead, changed the color of the ambient lighting every few frames throughout that sequence! … copy/pasting strings of diamonds to fill the requisite number of frames. It works!
SvDOF effect…

STILL wanting more, I enhaced some scenes with the SvDOF effect which lets you blur the backgrounds in a scene… allowing the main model to be in the spotlight, so to speak.
So, am I done, yet?
No! I kept seeing “little things” that were bugging me… like Michael’s WuuOOOH! were not accounted for in the lip-sync… they appear to come from off-stage… and, after I fixed a couple of them, I decided to just let the rest of ’em be.
… how about, now??
Nope!… not yet… I went through the animation trying to work on the lip-sync and work on keeping Len’s hands from sinking into his shirt and face… I have more than twenty-hours into this project… and I find that I could continue to nit-pic this thing for ANOTHER twenty!
… so I decided “Enough is enough!” … and did a final Render to AVI.
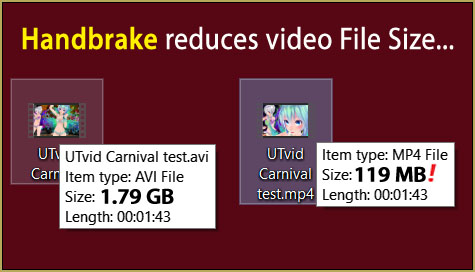
I had been using an HD screen-size of 1280×720… and my final rendered video file was 3.1GB!… to large for me to consider uploading to YouTube. I changed screen-size to 854×480… and got a video file size of 1.7 Gigs… it IS over 5-minutes long! … so I ran it through Prism Video File Converter to change the soundtrack to a low-res MP3 format, and got the final video file down to 85mb… just right.
The finished Smooth Criminal video!
What a project… a “Love-Hate” relationship!
Fun… but grueling… satisfying and annoying…
I recommend it!
Have fun with MikuMikuDance!
– SEE BELOW for MORE MMD TUTORIALS…
— — —
– _ — –


