

What is the ALMorphMaker plugin? How can I put AutoLuminous morphs on a model? How can I add model morphs such as LightUp, LightBS and LightBlink like Tda has?

![]()
Many modelers such as Tda have built-in AutoLuminous morphs in their models, but how did they add them?
ALMorphMaker Adds AutoLuminous Morphs similar to Raycast’s Emissive LightBlink Materials!
AutoLuminous was developed and released by Sovoro in 2014 and is the final effect of the Luminous series, which features KeyLuminous and ObjectLuminous. Unlike the previous Luminous effects, AutoLuminous allows you to add a glow effect to any subset of a model, but also to pre-program assets to react to AutoLuminous without your audience having to edit the model themselves like in previous versions. The morphs that come with ALMorphMaker are a good alternative to Raycast’s emissive lightblink materials, as they pretty much do the same thing.
To add AutoLuminous morphs into your own models you will need MMD, MME, PMXe, AutoLuminous4 and ALMorphMaker. You can download all these programs and plugins at the bottom of the tutorial. You can use any version of PMDe or PMXe, however I recommend PMXe because it works with all types of MMD models.
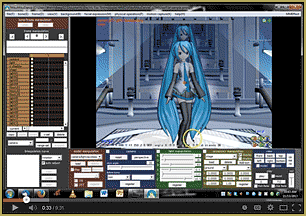
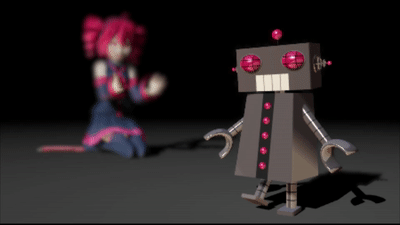
Once you have all these materials downloaded, open up PMXe and open the model you want to add the morphs to. For this tutorial, I am going to use my Eared Robot model.

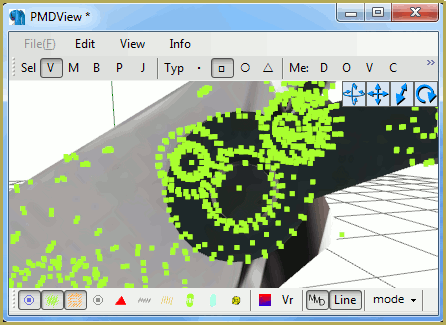
I want to make all the pink parts of the model glow with AutoLuminous, so I am going to the Material tab [1] and select the ‘Eye’ subset. Sovoro’s AutoLuminous readme instructs that you should change the specular colour setting [2] of the glowing subset to 0,0,0, which is pure black. Next, the readme states that you should change the ‘Reflection’ setting [3] to 110 or more to activate the effect. I’m going to use 121, as that’s the setting I use for all my assets.

After you’ve set the specular colour and the reflection intensity, save the model and test that AutoLuminous works with the model in MMD.

Success, it works! When we know that AutoLuminous will work with the model, we can move onto adding the morphs.
If you open up the AutoLuminous file and go to Options > AutoLuminousSetter.zip > AutoLuminousSetter, you’ll find a .dll file called ALMorphMaker.dll. This is the AutoLuminous plugin we need to create glowing morphs on our model. Click once on the .dll and copy it. Then, open up your PMXe folder, go to _plugin and then User, and paste the .dll file in there. Just to clarify, you do NOT need to extract the entire file to get this plugin to work, you only need the single file ALMorphMaker.dll.

You can tell whether you’ve installed the ALMorphMaker plugin properly by reloading PMXe, navigating to Edit (E), Plug-in (P) and User. If you see this file here, then you’ve installed it properly!

There are two methods to adding AutoLuminous morphs.
Method 1: the easy way of using ALMorphMaker
Go back to your model in PMXe and click on AutoLuminous用のダミーモーフ追加 in Edit (E), Plug-in (P) and User, as shown above. This box will appear.

All these tick boxes represent a morph that you can add to your model. The writing in the red box translates to ‘Cancel’ and the writing in the blue box translates to ‘Select All’. As you can see, there are 9 morphs available, which I will break down below:
–LightUp– Makes AutoLuminous brighter.
–LightOff– Turns AutoLuminous off.
–LightBlink– Makes Autoluminous blink a sine wave.
–LightBS– Makes AutoLuminous blink a square wave.
–LightUpE– Increases AutoLuminous brightness by x400.
–LightDuty– Changes the ratio of the blink, similar to how the interpolation curve works with motions. Use with LightBlink/LightBS.
–LightMin– Dictates how decreased the glow is when using LightBlink/LightBS.
–LClockUp– Speeds up blinking cycle by x6.
–LClockDown– Slows down blinking cycle by 1/6.
Select all of the morphs you want to add to the model and click ‘OK’. Then, go to the Morph tab in PMXe to make sure that they have been added.

Yes, there they are in the left hand side display box [1]! If your model is going to have an English translation, you’ll need to manually add in the English morphs names. You can do that by clicking on the ‘En’ tab next to Mrph Name [2] and writing in the morph names as they are in the ‘Jp’ tab. You can also choose which section of the expressions box these morphs appear in by clicking on the far-right drop down menu called ‘Panel’.
Then, go to the Display tab and click on this section in the left hand side display tab. This translates to ‘Expression’, or ‘Morph’ in this context. If you see all the AutoLuminous morphs you added earlier, then congrats! You did everything properly.

Method 2: the hard(ish) way of using ALMorphMaker
Go to the morph tab in PMXe and right click in the display box on the left. Go to New (N) and click Material (M).

Click on your newly-made morph and in the Jp Mrph Name tab write the name of the morph you want to add. Two very important things to remember here:
- The name HAS to go in the Jp Mrph Name tab, otherwise it will not work
- The name of the morph has to be spelt exactly right, otherwise the plugin will not detect it

Repeat this process for every morph you want to add. As with the previous method, if your model is going to have an English translation, you’ll need to add in the English morphs names too.
When you’ve added all the AutoLuminous morphs, we need to make sure these morphs will display in the Display Panel in MMD. This will help animators keep track of all the morphs. Go to the Display tab [1], click on the Expressions option in the left hand side display box [2] and click on the drop down menu over at Morph [3]. Then, click on a morph and select ‘+Add’ on the right hand side, and repeat until you have added all of the morphs.

You’ll know when you’ve added all the morphs when they all appear in the second display box in the middle of the interface.

Make sure to save your model regularly to avoid data loss. Now, load your model and AutoLuminous into MMD and test out the morphs.

And voilà! The morphs appear in the model’s expression tab, and they appear as registered morphs in the MMD Display Area!
Downloads:
Download MMD, MME and PMXe– https://learnmmd.com/downloads/
AutoLuminous and ALMorphMaker– https://onedrive.live.com/?id=EF581C37A4524EDA%21108&cid=EF581C37A4524EDA You have to login on that page… it’s free. When you do login, that full page will be there. You can click the tiny “Download” at the top to get the entire lot of effects or you can download just the one you want.
Eared Robot by chestnutscoop– https://www.deviantart.com/chestnutscoop/art/MMD-Eared-Robot-v1-2-Download-857587638
Kasane Teto by Arue- https://bowlroll.net/user/35827
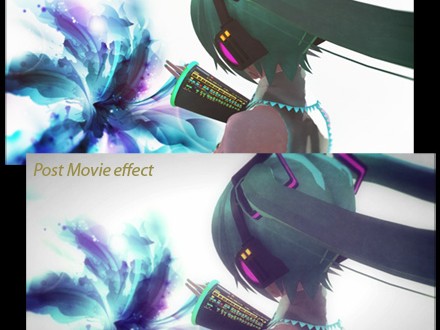
Effects in the header image- NCHLShader2 by nil, ExcellentShadow by Sovoro, ikBokeh by ikeno and HgSSAO by HariganeP
Have fun with MikuMikuDance!
– SEE BELOW for MORE MMD TUTORIALS…
— — —
– _ — –
![]()