![]() How do I use Beamman’s GSW Gauge? How can I add hit-points/damage-points gauge to my MMD video? Where can I download Beamman’s GSW Gauge? How do I adjust the HP numbers in the GSW Gauge?
How do I use Beamman’s GSW Gauge? How can I add hit-points/damage-points gauge to my MMD video? Where can I download Beamman’s GSW Gauge? How do I adjust the HP numbers in the GSW Gauge?
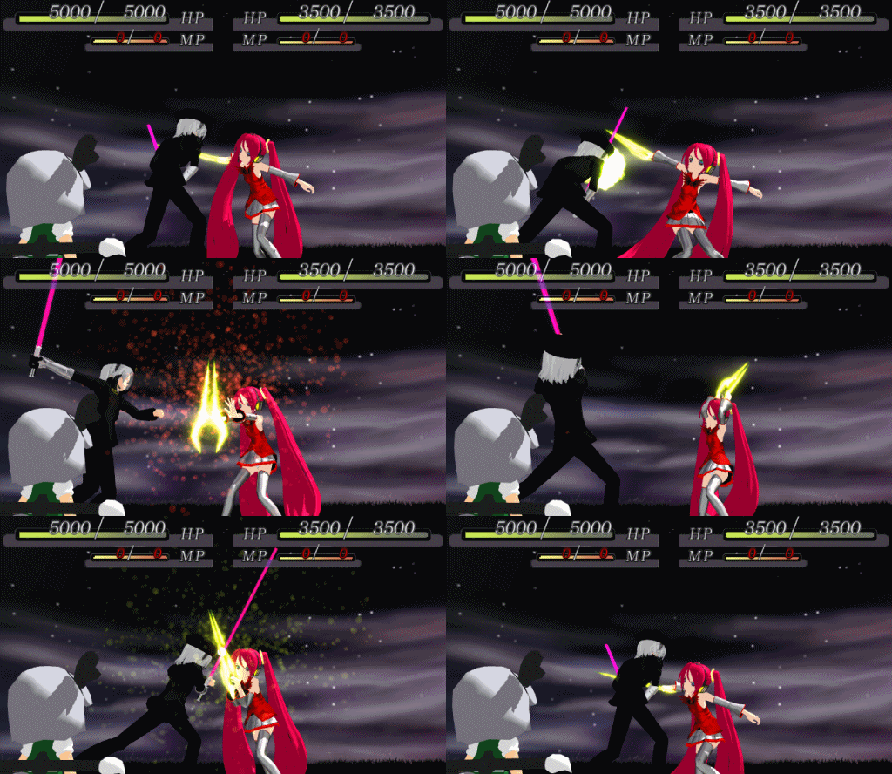
“So which ones are the enemy?!”
“Those with the health bar above their head!”
S.H. : Are you ready?
Hiiro : Bring it on!
Youmu: Everyone! We’re starting today’s post!
……………
………Hello?…..
Please, can you two stop fighting?……
There’s no helping it….Youmu will do today’s article then….
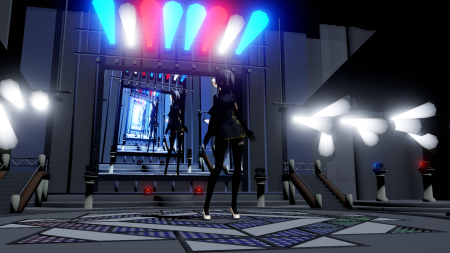
Hello everyone~! Youmu here! Today’s article will be about those little HP bars you saw above. Wait, you don’t see them?

Surely now you’ve seen them! It’s called the GSW_Gauge by Beamman. It’s an HP/MP gauge you see in many strategy-based RPG, with reference to both the Super Robot Wars series and it’s doujin remake, the Fantasy Maiden Wars by the Doujin Circle Sanbondo.

Here’s the link to Beamman’s page! Just scroll down until you find the GSW_Gauge effect and click on then download button!
Eeehh? The link for the game? Find it yourself ;p
So what can you do with this particular effect? Well, it’s a health gauge. So if you want to make an RPG styled video, this effect is an easy way to create a health display for your scene!
So…How do we use the effect?
It’s really simple! Youmu will tell you how!
First of all, extract the downloaded .zip file to your MME folder. There are three .pmx files and a few other files there.

The three .pmx files are the damage display, and both left and right gauges
Now just load the desired model to your MMD screen. Either Drag and Drop or the traditional Load Model button, your choice!
When first loaded, they’ll start out in the middle like any other models. Just drag the gauge to the desired position. Since they operate like the Nameplate effect, you only need to adjust it once and the gauge will stay in that exact place on screen no matter how you move the camera… how thoughtful of them! You can also control the gauge’s size by moving it along the Z axis.
Now how do we control the numbers displayed?
(Thanks to Arizona for pointing this out!)
Heheheh…It’s really, really easy!
Look at the Frame Manipulation Panel on the left! There’s a group of bones there! They’re hard to spot on the actual screen since they’re all at the same position!

That’s all you need to know! Click on the desired bone and drag it along the X axis to adjust the displayed numbers! You can also use the sliders to manipulate the current HP and MP, but not their maximum value!
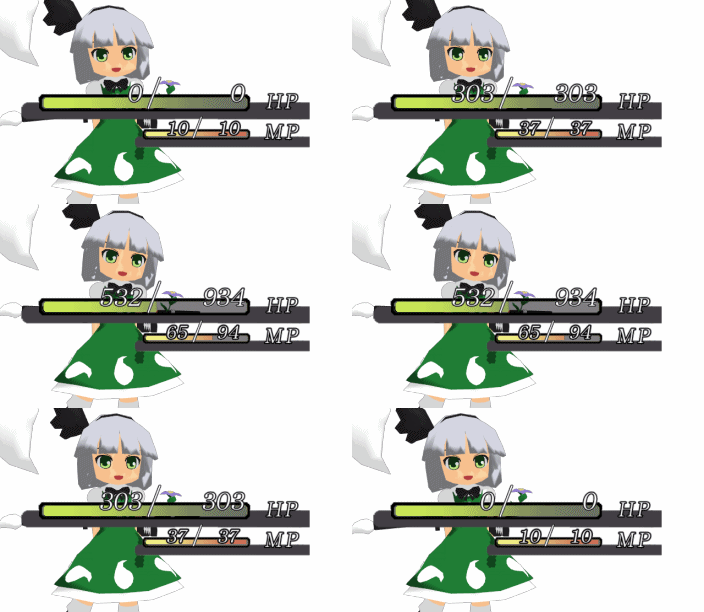
The same goes for the damage display, but this time the bone only controls the damage numbers, and the slider controls the appearance/disappearance of the effect on the screen.
We’ve already uploaded a video demonstrating the effect in use, check it out!
Well, everyone? Isn’t this effect fun?
Mr. Reggie said in one of his article that “MMD is a computer game, without the actual game!” But now you can give your video more “game atmosphere” with this effect!
Now Youmu will need to check back on those two….

Aristella: Have you two learned your lesson yet?
Hiiro : Ouch….Ahm showwiee…….
Looks like they’ll be hospitalized for a few days….
Alright, looks like Youmu also have to do the closing then…
Thank you so much for reading our article for today, everyone. Youmu hopes that we all learned something today. If you have any questions, don’t worry, give us a shout in the comment or send an e-mail. We’ll help you to the best of our abilities!
This is Youmu, signing off for, Silent Headset~!

Credits:
Models:
MameYoumu by Nya
RPG Stage by saler1
Effects:
Auto luminous, Diffusion7, Particle Bomb, GSW Gauge
– SEE BELOW for MORE MMD TUTORIALS…
— — —
– _ — –





I want to try making my own version of the Gauge but I don’t understand the script nor open the pmx (I know its an effect model. I am curious whether there there is a method to editing this specific effect…)
For this specific effect, you don’t need editing the script (unless you want to radically alter the calculation algorithm, which I don’t expect to be the case). What you need is to edit textures in the Tex subfolder. There are Base_l/Base_r files (for the left and right side of the screen respectively) that define the basic effect look, and GaugeMask_l/GaugeMask_r that represent dynamic bars. Their shape must match the shape of holes in Base files, and their color must be a gradient between leftmost and rightmost colors of the bar. So you must open them in an editor that allows for PNG files with transparency (which rules out Windows Paint, but perhaps anything more advanced than that must be okay) and has a gradient filling tool.
does not working… -.-
Read the comment below…
its work! Thank you so much
I can’t use it… when i open file its a white small square how to fix it?
The archive has rather tricky structure, you must reorganize files before you can use the effect. Inside the “GSW_Gauge_v1_0_32_64” folder, there’s a “Tex” subfolder and three subfolders with Japanese names. Two of the latter contain pairs of .pmx/.fx files and one has another copy of the whole effect with different fonts. What you have to do is take those .pmx/.fx files and move them from their subfolders into the root of GSW_Gauge_v1_0_32_64 itself. Then you can also rename these files with English names making sure that each pair of .pmx/.fx had the same first name.
Which folder is the root? They’re already in the main folder. If I move them into the other folder that isn’t the tex folder it doesn’t work. If i move them into the tex folder, it still doesn’t work. I’ve done every combination in the last 3 hours. Can you explain that a little more detailed?
OK, wipe the mess you’ve made so it won’t confuse you. Download a fresh copy and unpack it as is. Do not move anything, just rename each file in the *main* folder that has a Japanese name into having only English characters. Make sure that .x and .pmx files that are named the same in Japanese have the same first names after renaming as well. Try to load them now, they should work.
Unless you’re running MMD in Japanese mode, you will probably fee bones’ and morphs’ names as bunch of “nulls”. To make your work more convenient, you will have to translate those pmx’ innards as well, using PMXE: https://learnmmd.com/http:/learnmmd.com/translate-pmx-models/
After you learn how to use files in the *main* folder, you can check those in the Japanese-named *sub*folder. Those are essentially the same effect with different looks. You’ll have to translate them too *and* rename all Japanese folder names as well if you want to use them.