


 Crypton Future Media, Inc.")
![]()
Raycast MMD is a popular MME that seems to be all the rage these days in MMD  videos on YouTube. But there’s very little information for the average user on how to use the system to get the kind of awesome results that the better MMDers seem to be able to get from this MME.
In this article, we will show you exactly how it can be done by using an actual example and showing you the techniques behind the scene that are needed to create those kind of results.
Using Raycast MMD like a pro!
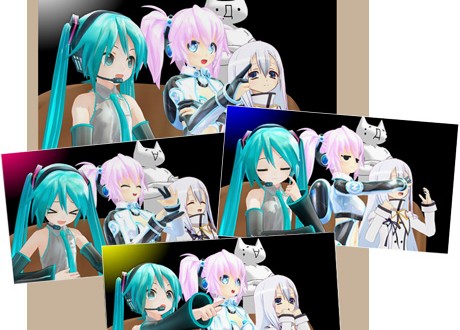
First of all, go watch our sample video; at least a part of it to see what can be done. Then we will show you all the necessary steps.
If you do not know how to use Raycast MMD, read this article first as we won’t be teaching you the basics in this article: How to use Raycast MMD MME Shader Effect
If you want to follow along and recreate the scene used in the video, the links to the models used are included in the credit section.
- Important: We will be using Raycast MMD ver 1.5.0 in this article.
- Note: All images in this article can be seen at their original render sizes by clicking on the image. The original renders will show details that might not be evident in the smaller images.
WHAT EXACTLY IS RAYCAST MMD ANYWAY?
There is a lot of misunderstanding about what Raycast MMD really is, and it is important to know exactly what it is to get the most out of it. For a start, some of Raycast MMD’s more powerful features are “OFF” by default. In this article, we will explain some of these features in more detail.
Raycast MMD isn’t just another MME shader. It should be regarded as an entire lighting system that brings MMD’s lighting system up to par with contemporary computer rendering methods. MMD and its lighting engine is over a decade old; a lot of things have changed in the technology field since then including the capabilities of video graphic cards. Raycast MMD takes full advantage of many of these advances.
Also, and most importantly, Raycast MMD is an environmental lighting system. It takes account of (or simulates) lighting from multiple sources, not just from a single light source which is the default behavior of MMD’s own lighting system.
So exactly how good is Raycast MMD? The short answer is that it makes renders using MMD competitive with some of the render engines in the best computer games currently out there today.
WHAT KIND OF EQUIPMENT DO I NEED FOR RAYCAST MMD?
You will need a better than average computer to take full advantage of Raycast MMD; but it should run on most 64 bit systems with a decent graphics card or high performance graphics chip.
For example, the system I am currently using for MMD is an ASUS gaming laptop. It has both a Nvidia graphics card and an Intel graphics chip. I have set up my system to force MMD to use the Nvidia graphics card by default to ensure that I have maximum graphics processing power. It took my system just under 10 minutes to render the video above.
RAYCAST MMD – THEORY BEFORE PRACTICE
Raycast MMD like I said above is an environmental lighting system. Exactly what this means is that it takes into account all sources of light falling on a surface, much like how light behaves in the real world. It also, ignores artificial constructs such as toon maps, by default. This also applies to most SPA and SPH files. To make things really shiny in Raycast MMD requires a different approach but it can make metals look really shiny and glass look like glass. It also has the ability to make materials give off light much like Autoluminous.
Basically though, Raycast MMD works best in an environment. This gives it plenty of surfaces to bounce lights off to create an illusion of a real world scene. So we start by setting up the world. In our video example we are using a sky dome of our choosing rather than the default Raycast MMD sky boxes. Nothing wrong with those, in fact the ones included with the Raycast MMD download are dynamic and offers some really nice features like moving clouds.
SETTING UP THE WORLD SCENE
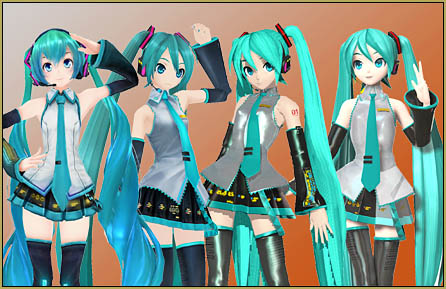
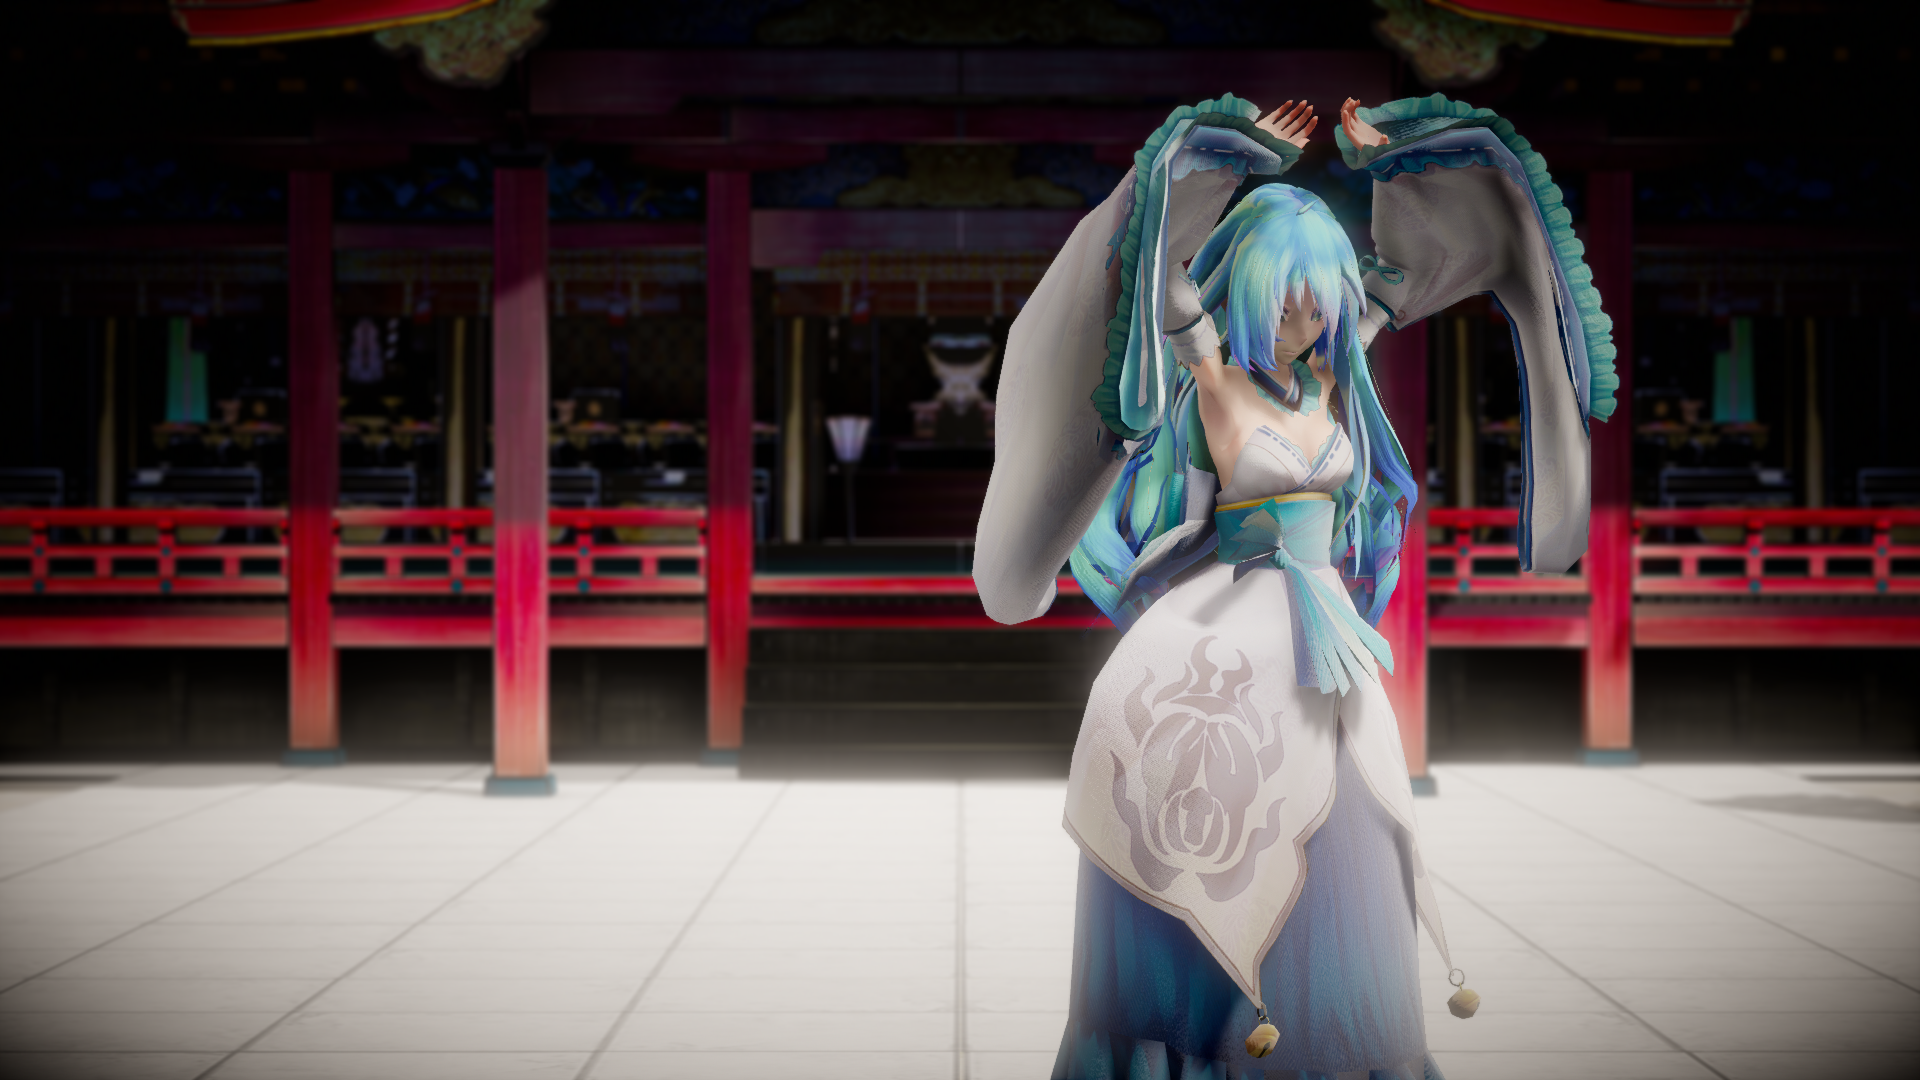
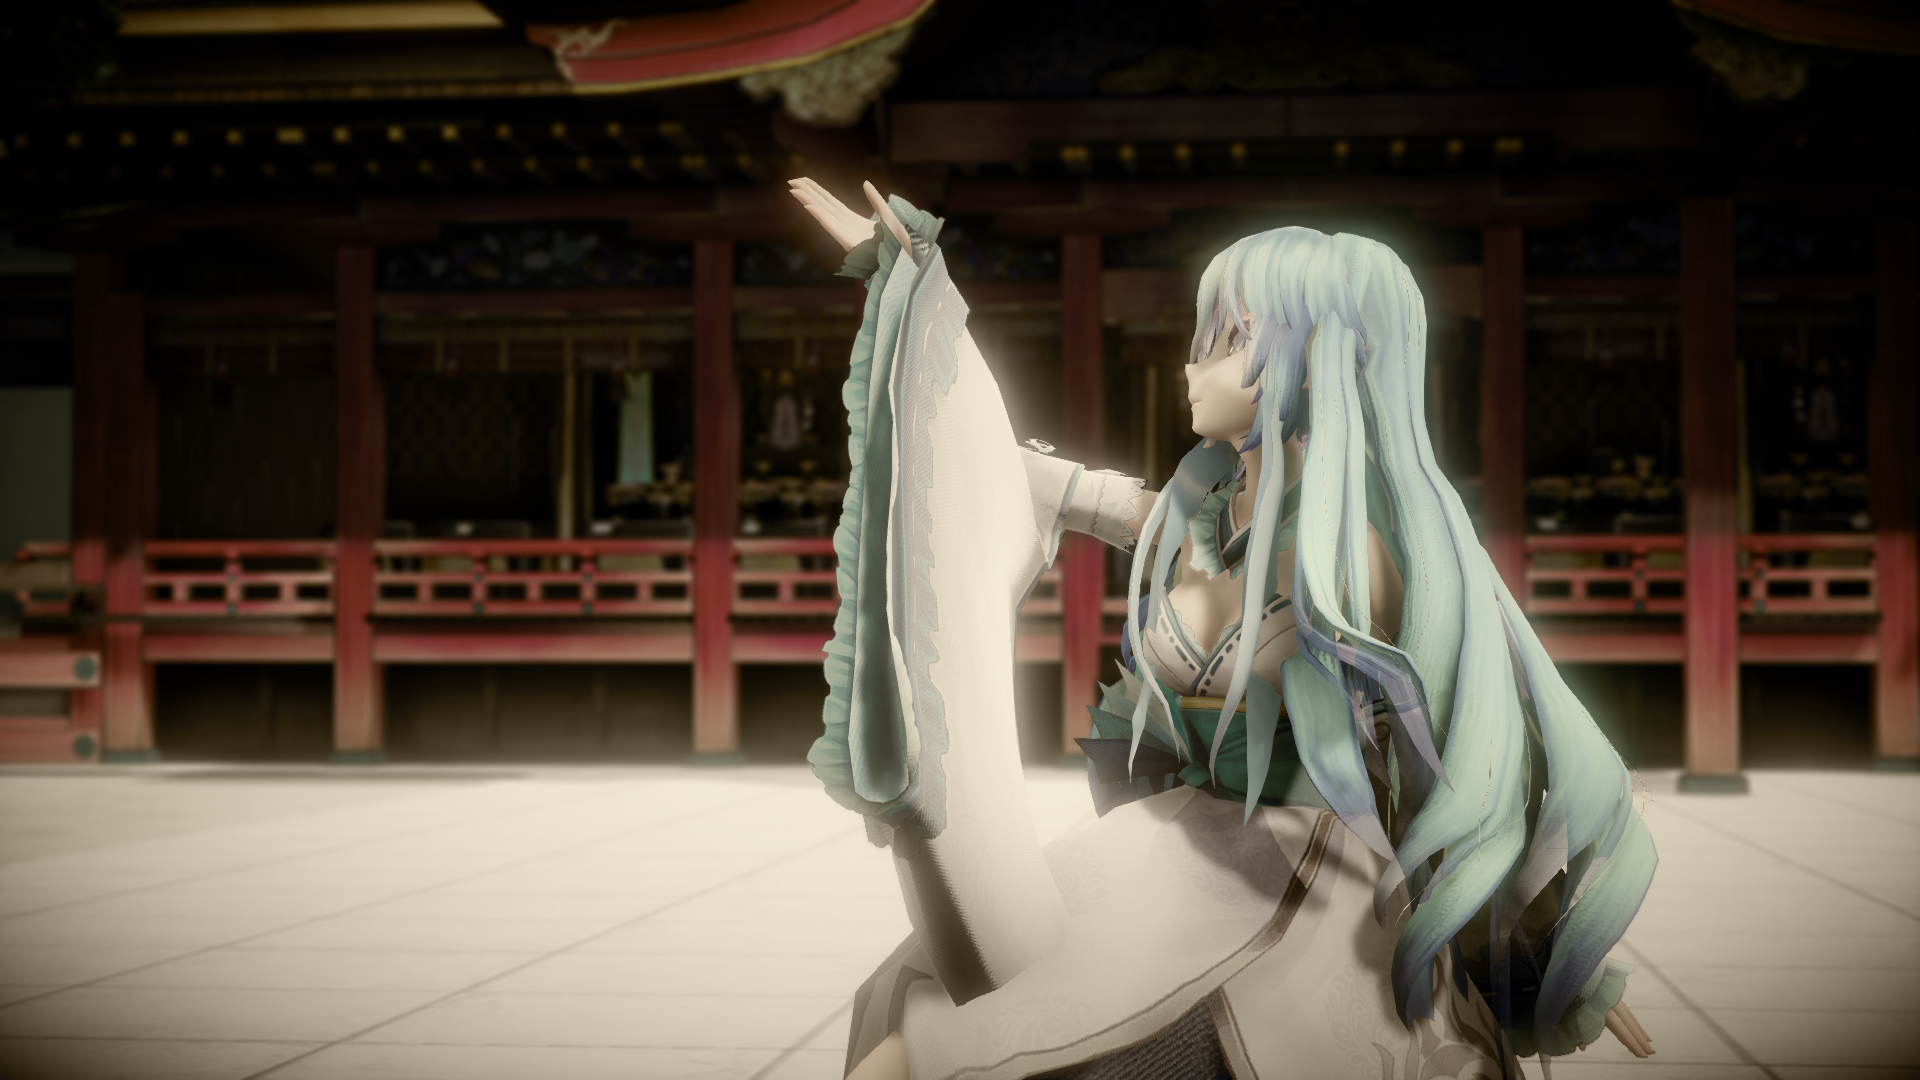
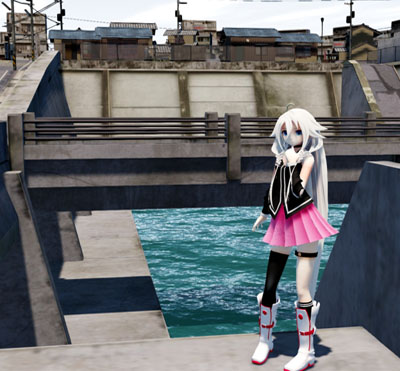
Specific to our video only, we added our own choice of skydome, a stage and a model of Miku. It looks exactly like this before Raycast MMD was added:

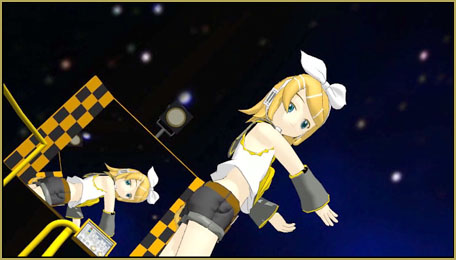
This is what the same scene looks like with Raycast MMD added and configured:

If you click on the images above, you should be able to see both images at their original rendered sizes. Compare them, the differences are on the one hand subtle and on the other hand quite different. See if you can spot the differences.
Which scene looks more like a real world scene?
MAKING THE SKY DOME LOOK LIKE SKY
There’s a lot of light bouncing around the atmosphere. If you look out at a real sky, it’s actually quite bright. Raycast MMD comes with several sky boxes; if you want to use your own sky dome, first load that and then add the Sky Hemisphere sky box.
The Sky Hemisphere is important as it allows us to control the behavior of light under your sky. Also, if you have not already done so, add ray.x and the Raycast MMD controller to MMD. Our camera motion uses essentially the default light set up, which works fine for our scene.
Under the EnvLightMap tab in the MME UI, add Sky with lighting.fx to the Raycast MMD skybox. Add the main.fx to your sky dome. To make your sky dome bright like a real sky, under the MaterialMap tab add Materials>Emissive>Fixed Color x1>material_albedo_x1.fx. It should brighten up your sky dome perceptively and in a natural manner.
Next go to the facial controls for the Sky Hemisphere model. Play with these facials to see what they do. Once you figured them out, use them to set the behavior of ambient light and shadows under your sky.
Note that these controls work in conjunction with the controls under the Raycast MMD controller. Don’t worry about fine controls at this point. We will need to revisit all these controls again when we set up Miku’s shading.
MAKING THE TEMPLE LOOK MORE REALISTIC
This temple model is absolutely stunning but, and this has been noted by its modeler as well, the vegetation could be dodgy under certain circumstances and Raycast MMD treats the vegetation material like the flat surfaces that they really are. So we will try not to show them in too much detail.
The interior of the main temple building is going to be very dark and you won’t be able to see any of the fine details. There are solutions to this, but the simplest method is to cheat. Simply add the same material that we added to the sky dome to it. Since the material is emissive, it will allow the interior to be somewhat visible, but not in an unnatural fashion.
The only other thing needed for the temple is to add some shine to the main paved area. We added Materials>Subsurface>material_marble.fx to these areas. The main reason for this isn’t just to make the paved areas look like marble/stone, but also to reflect some light back up at Miku.

DOLLING UP MIKU
Raycast MMD works really well with Tda models; that’s why there are so many MMD videos that features this type of model. Raycast MMD even has materials specially set up to cater to this type of model.
First thing to do is to run your model through the PMXe and label the materials in English so that you can easily identify what material is what. Then it becomes a simple matter of applying the correct materials to the model.
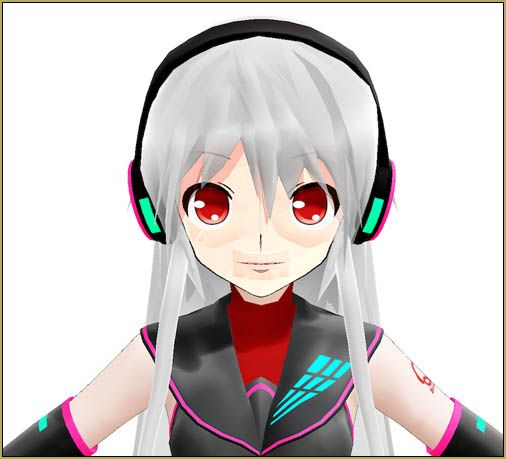
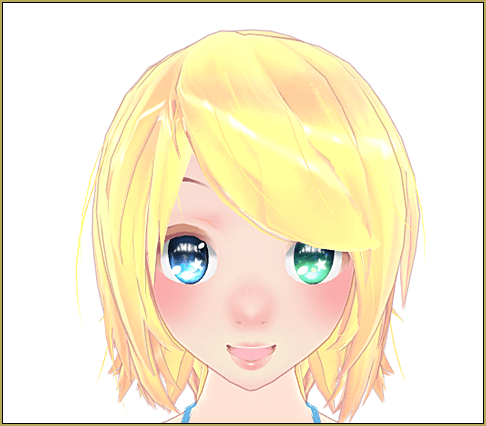
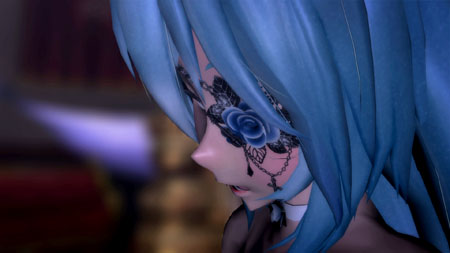
Here’s my approach. I like to make my models look doll like, and I especially want to give special emphasis to those lovely anime style eyes. You might want to take a different approach, which is fine, but here in this article, I will just show you how I achieve the effect that I want. First though, let’s have a closer look at the model.

Miku’s skin tones just used the ones in the Materials>Skin>TDA folder; likewise her clothing uses Materials>Cloth>material_cloth.fx.
To create the glass eye effect the following was done (and bear in mind that on Tda models, the whites of the eyes is actually a concave area that recedes into the model’s head). The materials applied are as follows:
- Eye whites: Materials>Subsurface>material_jade_white.fx
- Pupils: Materials>ClearCoat>material_albedo.fx
- Highlight: Materials>Emissive>Fixed Color x1>material_white_x1.fx
- Highlight2: material_2.0.fx (default material)

Raycast MMD makes it very easy to add your own custom materials. In fact, it even comes with template files for making your own materials fx files. These are all in the Materials>Editor folder. We used a custom material fx file for Miku’s hair and it is really easy to do this.
The procedure is to create a new folder for your custom materials. Then copy over one of the Editor template files and edit its references as well as to add the normal map. We got our normal map for the hair from a package from Bowlroll made for the NCHL2 shader set.
The only things we needed to edit for our custom fx file was simply to add a reference to the normal map that we wanted the material to use and to set the FROM value to “1”.
Specifically:
#define NORMAL_MAP_FROM 1
#define NORMAL_MAP_TYPE 0
#define NORMAL_MAP_UV_FLIP 0
#define NORMAL_MAP_FILE "mat5.png"
mat5.png is the name of the displacement map file which is kept in the same folder as the fx file which references it. The fx file needs to be able to resolve the path to the file so it is easiest to keep both in the same folder.
There are other references to other types of bump maps. These all use default names and if the file doesn’t exist, the fx just simply ignores it. If you’re not a programmer, like me, just use the template file closest to the type of material that you want to replicate.
The other thing we did with Miku’s hair was to change the main shader file from main.fx to main_ex_with_sphmap.fx. This takes advantage of the sph/spa file assigned to Miku’s hair and makes the hair more shiny. This is essentially the same technique used to make metal objects really shiny.
ADJUSTING THE LIGHTS
This is the key to success in using Raycast MMD. Unfortunately, if I tried to write down everything I did, this would be a very long and tedious article. So instead, I will just make note of the general principles as they will be fairly uniform across applications.
- Set up the light direction using MMD’s own light controls. This also determines where the sun or moon’s position is for Raycast MMD.
- Using the Raycast MMD’s sky box controls, set up the behavior of ambient lighting. With the dynamic sky boxes ( Time of Day / Time of Night ) , there are other special effect controls as well.
- Using the Raycast main controller (ray_controller.pmx), set up the strength of the principle light source and the behaviors of the shadows.
Most of these things will be apparent by eye, so use those, your own intuition and look out the window if necessary for reference. Use a light touch. The controls are linked in a sense so changing one thing may require changes elsewhere. Honestly, I just do it by eye but that said, I have a good basic understanding of how lighting behavior works in computer simulations so that helps.
UNDERSTANDING BLOOM
Key to working with Raycast MMD is understanding what Bloom is; these are controlled by the facials in the third set of facial controls (normally used for the brows).
Main lighting and shadow controls are in the first set of facial controls (normally used for the eyes).
Fine tuning is in the fourth set of facial controls (normally used for miscellaneous facials).
But back to bloom. Bloom doesn’t generally exist in the real world. It is a computer rendering construct but very effective. What it represents is, in very simplistic terms, imaging artifacts in a camera. If you want some idea of what bloom looks like, the best analogy is to go to a darken church interior and look at the light coming through the windows. That’s the closest you will come to bloom in the real world, however, with cameras it is fairly common. So common in fact that we hardly notice that it isn’t actually real for the most part as there are millions of images around featuring the effect and of course it is prevalent in computer games.
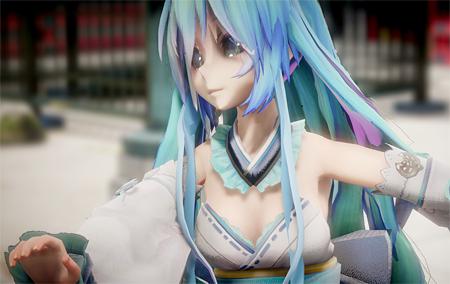
Raycast MMD features bloom and it is extremely effective. It is what gives the subtle, and I emphasize subtle, glow around Miku and this adds poignancy to her appearance in the video imagery.
WHY AREN’T THESE CONTROLS WORKING?
You will notice that the second group of facials (normally those used to control mouth morphs) have no effect. These are the depth of field controls and by default Raycast MMD’s depth of field features are turned off. In the video and the images shown here I used PowerDOF instead as it is easier to control and essentially does the same thing. If you want to turn on the depth of field controls in Raycast MMD (as well as other hidden features) you will have to edit the configuration file.
In the main Raycast MMD folder there is a file named: ray.conf
Make a backup of this file before messing with it, but it can be edited with Notepad or any other plain text editor. Don’t use a word processor to edit this file!
The file includes notes as to what values to use to enable or change the behavior of effects. Here I will just cover a few of them.
- Support for toon shaders is off by default. There is a good reason for this, but if you do want to use toon shaders, you can turn it on here.
- Bokeh Depth of Field. Turn this on and the ray_controller depth of field features will work.
- Lens glare and flare can be turn on here.
- Tonemapping; if you want your MMD render to look more like something from a computer game, mess with these values.
- Anti-aliasing. By default, Raycast MMD overrides the MMD anti-aliasing method using the FXAA system instead. Keep this value; it is the latest and the greatest.
- By default, Raycast MMD turns off the outlines of models it renders. If for some reason you want the outlines, just change the values in the field provided.
Example:
To set Bokeh DOF “ON”, change this line to read: #define BOKEH_QUALITY 1
// Bokeh Depth Of Field
// MeasureMode can supports the following options:
// When MeasureMode at (0.00 ~ 0.24) : Test circle
// When MeasureMode at (0.25 ~ 0.49) : Test circle + Bone from ray.x
// When MeasureMode at (0.50 ~ 0.98) : FocalDistance Only
// When MeasureMode at (0.99 ~ 1.00) : FocalDistance + Bone from ray.x
// 0 : None
// 1 : Enable
#define BOKEH_QUALITY 1
FINISHING TOUCHES TO OUR VIDEO
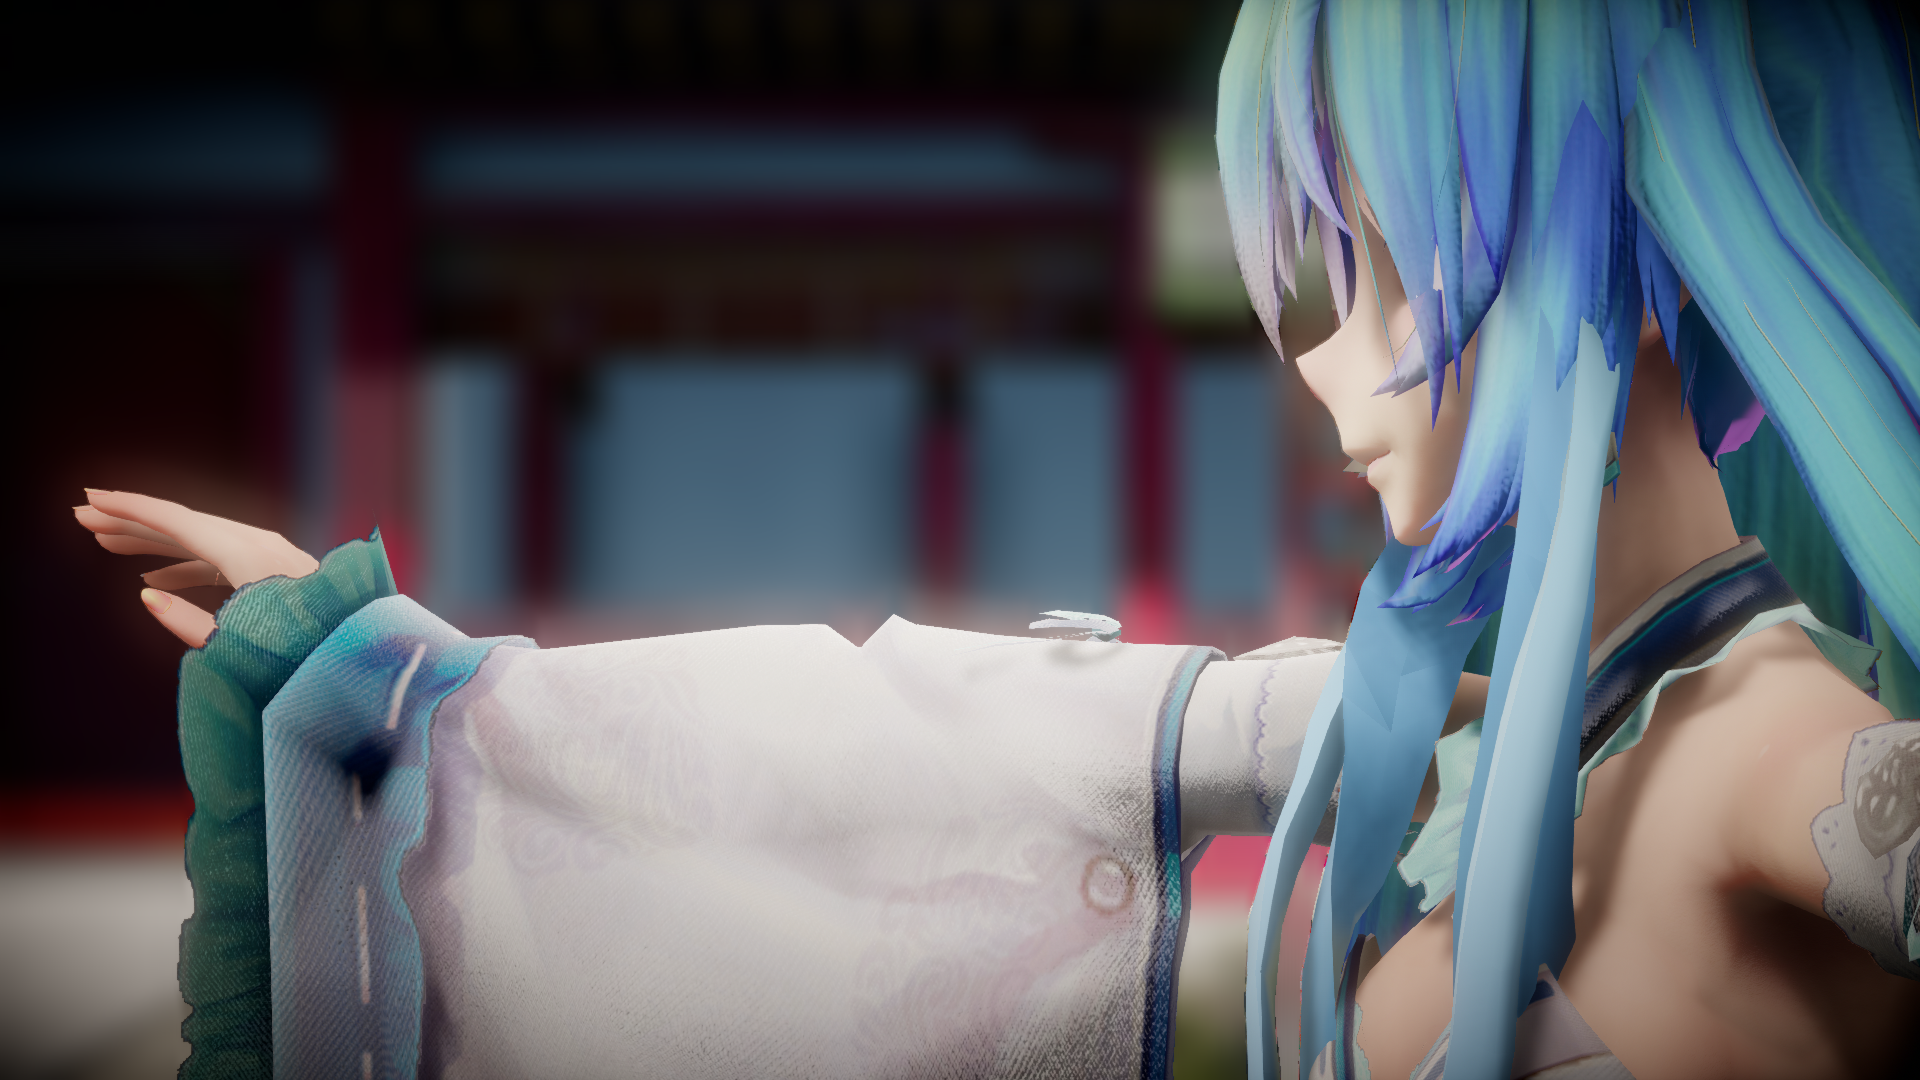
If you take a look at the images here again, the temple in a lot of the video is actually blurred. This is deliberate as the temple model has a lot of details which can be distracting and we wanted attention focused on Miku. This is done with PowerDOF but there is a trick to it.
Before we get to that, however, note that Raycast MMD has its own DOF controls (disabled by default as noted above). I chose not to use that option as PowerDOF makes things a lot simpler.
To set up PowerDOF, simply I set its Si value to 0.125. This reduces it’s strength considerably; if I did not the background would be very blurred and it is not a good look. Using the effect at reduced strength is more “realistic”. Also, I attached the effect to Miku’s neck bone. This ensures that Miku is in focus at all times.

Giving a vintage feel to the video imagery was done in two ways. First of all, we took advantage of Raycast MMD’s vignette feature. This is the fuzzy black border around all the images. The old picture effect uses the o_psSepia.fx. Simply this is used at full strength and then faded out completely simply by tweaking it’s Tr value.
Example:
- Set it up at full strength (Tr=1.0) at frame 1
- Set it disappear completely (Tr=0.0) at frame 100
All you have to do is to set the start and end Tr values; MMD will automatically work out the intermediate values for you.
Tip: Once the effect is faded out completely, disable it by turning off its display attribute (uncheck the display check box). This will tell MMD to ignore the effect thereafter and save on system resources. Do this the frame after the effect fades to “0”. You can always enable it again later by checking the display check box as was done at the end of this example video.
NOW IT AIN’T THAT HARD IS IT?
In essence, Raycast MMD makes doing videos like these very, very easy. In fact, all of this could have been done with Raycast MMD alone, but I chose to mix in other effects as I was just plain lazy.
Anyway, thanks for reading. Hopefully, you learned some of the tricks on how to use Raycast MMD more effectively here. If you have questions, just post a comment below.
CREDITS AND LINKS
- Raycast MMD: https://github.com/ray-cast/ray-mmd
- Miku Kimono: MMDVocaloidThailand
- Temple: 天満宮風ステージ: seiga.nicovideo.jp/seiga/im5204091
- Skydome: incskies_E001_mmd8
- PowerDOF (tutorial and d/l link)
- o_psSepia.fx (incl. with the o_Tonemap effect)
- Collection of 56 displacement/normal maps: ノーマルマップ56種類(MMD規格)(bowlroll.net/file/113622)
Miku Hatsune (C) Crypton Future Media, Inc.
Other credits are on the video page.
– SEE BELOW for MORE MMD TUTORIALS…
— — —
– _ — –
![]()


i need help my normall map have a bad Quality
What?! I got a strange thing and who knows that, besides making some changes is impossible. And this only within the basics. The stage looks good, the skydome and the model are completely in black.
I was looking for one of the mentioned folders but couldn’t find anything. Also, I would like you to explain to me how it is possible to put more than one effect to a model.
Ray-MMD 1.5.0 – 11.1.2018.
Ray-MMD 1.5.2 – 13.3.2018.
Maybe I should put this question here. Is Raycast exactly the same technology as Ray tracing?
I’ve got no idea… but if you google for mmd ray “tracing” with those quote marks, you will find many informative links… I just did that and saw a discussion of Raycast, Blender, and Ray Tracing… Looks like Raycast for MMD “uses” Ray Tracing? … ?
It doesn’t It’s use some rendering techniques similar to real time engine.
Github includes the source of the coder’s mme shader
I have problem with RAYCAST MMD, Edge lines are still visible
Check the ray.CONF file and make sure that show edge lines is disabled. If that’s not it, see if changing the global light direction makes the problem go away. By default, RayMMD disables edge lines so if you are seeing them, something else is going on. ALso, what type of computer are you using and especially important, what type of graphics card does it have? Is it powerful enough to play 3D action games like World or Warcraft or Skyrim?
hey , i really want to use the ray cast but i have a bad computer , i think i’m gonna buy a new one but without a nvidia ( i5 , 8go ram ) but does it work without a nvidia ( because computer with a nividia are so expensive ) thanks in advance ! :)
You will want to buy a Windows 10 PC with a mouse and a dedicated graphics card. Many “cheap” PC have “integrated graphics” and many of those are too weak to run the high-end features like Raycast/Ray-MMD. You can ADD a graphics card to a cheaper PC… buy a card with at least a 1Gb cache. You might try buying a used “gamers” machine from a local computer-repair shop. Be sure to tell them that you want to play modern DirectX games on it.
oh okay but the problem is that i want a laptop sorry i don’t say it :)
Same basic rules apply… get a Windows 10 laptop capable of playing modern online interactive games… you should be OK. … Still will need a mouse to run MMD.
ok perfect ! thank u so much ! :)
Is there a way to add background video while using raycast? I load the background video but the background still show the skydome, not the video.
I believe the Skydome will always block the background image (or background video).
Do you know any way for me to still use raycast and use background video? I saw video on youtube, the person use different effects (raycast is one of them) but still using background video. https://youtu.be/prt6hSqsyOY
AVI Background video behind your Raycast effect… it worked for me.
I had already set-up the Raycast effect on my model as an art project, and I had that Helicopter Pad skybox behind the model. I added that video background and could not see it because that skybox totally covered it. … All I did was UNCHECK the DISP box (and register) in the Model Manipulation Panel for that Skybox model. NOW we can see that video in the background. CLICK the link to see the test video.
It worked!!! =D Thx for the solution, it really helps ^^
I can never figure how to use the Time of NIght sky some, I manged to get the ray cast to work in every way but showing the dome, it just turned pale! Any pointers as I’m having a heck of a time finding any tutorials for this specific issue.
The Time of Night sky dome can be quite a challenge; but it can be used to make some really awesome night scene renders. Plus you can actually make it really dark to the point where it is literally pitch black; which can be useful for scenes with, for example, street lighting.
Probably needs a tutorial of it’s own to explain as it requires quite a bit of adjustment to set up. But in the mean time, the link here leads to an example of what can be done with this particular sky dome: https://learnmmd.com/wp-content/uploads/2019/04/Asika-Kiso-Night00.png
Everytime I try to put the skin or any effect except the main effect on the model. The model becomes see through
You’re probably trying to put them on the wrong render target ( https://learnmmd.com/http:/learnmmd.com/understanding-mme-render-targets/ ). The only effect that should go in the Main render target are the set of main effects. Material definitions, like skin, should go in the Materials render target.
Hello, my question is more, hardware related.
Since I’m having trouble with my nvidia GT730 on Windows 10, you think the amd radeon rx550 can handle OK mmd raycast effects?
Well, I don’t have rx550, so can’t say for sure how it will perform specifically at Raycast. It’s hard to imagine, though, that it will act *worse* than your current card (as for myself, I’m considering GTX 1050, but they are more expensive on average, so it’s your call). At the end of the day, it all boils down to how badly you feel uncomfortable now, and how much you can afford to pay for improvement.
http://gpuboss.com/gpus/Radeon-RX-550-vs-GeForce-GT-730
http://gpuboss.com/gpus/Radeon-RX-550-vs-GeForce-GTX-1050
I actually figured out how to open the subset extract panel, and was quite excited to finally be able to achieve the level of quality I see with some of my MMD peers. I have instead somehow made the skybox translucent over the whole thing… I think.
Here is what I know:
– Hiding the Skybox makes everything else opaque. Hiding ray.x removes everything else from the scene
– The skybox is Grand Canyon, lit with the correct shader. Using a different skybox produces the same result
– This does not happen with main.fx, but anything in a material is affected
– The angle of the skybox moves with the camera
What is happening?
Hey Senshi. It’s probably the wrong shader or hide/show status in one of the bazillion render targets. But first check model draw order: skybox should be before any other visible models.
I’m using devtest branch of Raycast (which might be different from Master, the other branch, you can specify which you want on the Github download page.) In it, skybox.pmx is hidden in fogmap and lightmap render targets. In main, it has “sky with box.fx” and in EnvLightMap it has “Sky with Lighting.fx” but you have alternate choices for these. In material it has “material_skybox.fx” and this shouldn’t change. In SSAOMap and PSSM1-4 it has the same .fx files as everything else, and these shouldn’t change either. Note that there are multiple copies of relevant effects for envlight, main; you need to be sure to use ones from the proper directory, the same directory from which you loaded the skybox .pmx.
I was only working with the materials. It appears I put the material set on the “main” tab instead, with the effects on the materials tab being listed as material_02 for everything. Selecting everything, changing them to main, then re-adding the material files in the “material” tab fixed it. It already looks beautiful and I haven’t even added lighting yet.
Update: I uploaded the video and I’m super happy with the final result.
Here’s the link to that video… Nice!
Hi y’all!! I love how Ray was explained here, and this is a great resource for people just staring on this harrowing journey of using this effect.
Thank you! … Yes, Raycast is practically a hobby in itself!
Hi..I have A problem With this Effect,It Makes The Entire Program Lag And I dont Know How To Solve That Problem.Im a pro At It. But Still it Lags..Is There A Way To Solve It?
Your computer probably isn’t strong enough.
This is a fantastic explanation! Thanks!
Is there perhaps a link to the normalmap package?
Link… yes… it’s the last line in the Credits at the end of the article.